

accaciatura 136, 226
accent
active staffline 17, 85, 235
adding parts, systems and pages 123, 127
Apply To
System Manager 130 apply to new score 131 Aria Player 50
articulations palette 138 Associate Image Files 240 Audio CD recording 223 Audio MIDI Setup 84
deleting end of staff 62, 93, 151
reset number per line 123 beaming flagged notes 116, 234 beams
bracket
bracketing 120, 183
centering music for printing 105
change
splitting into voices 56 Chord symbol preferences 181 chord symbols
Clefs and Signatures palette 148
color
overriding automatic color 159
conductor score from parts 36, 40, 112 contrapuntal voices (see also "voicelines") 20, 159
ENF region to clipboard 98 courtesy accidentals 137 crescendos and decrescendos
Ctrl+A (Select all) 56, 154, 232
barlines at the end of staff 62
note(s) from cluster 56, 91, 154 notes and symbols 115 numbered endings 62, 93, 151 selected group of objects 116 when all else fails (Tip) 116
descelerando 67 display, page view 85 document layout 105
draw tool
drums
working with 186 duplicate parts (TAB) 190 dynamics 253
Edit
endings
add new page 87, 233
clone document 239 Cut, Copy and Paste 230 editing files 30
image association 236 orientation of score 107 paging 166
reformat 102 region to copy 96 scoring 77, 98
using scrollers 166 visibility of parts 129 warning preferences 227
ENF - MIDI
expanded systems 80 exporting ENF files 98 expressions 139, 147 Extended Notation Format 16 extracting parts and voices 126
fermata
file formats 77, 98, 228
Finale
exporting files to 77, 98, 229
flagged notes
fonts
setting default style 225 format score 102, 233 formatting
grace notes 136, 226
guitar
classical notation 182 Guitar Chord Library 177 guitar fret symbols
convert from notation 186 copying from notation 190 recognition 37
hairpin
hymnal and choral scores 56, 60
instruments
changing during playback 58, 204 selecting for playback 57 transposed 73
key signature 148, 252 at end of line 149 change 149
line spacing
Long view (horizontal display) 85
default font preferences 225 font size and style 176 recognizing 36
show/don’t show 225, 236
when found under last staff 37
map, Quick Keys 171, 172
measure number display 225, 236
merging
parts or systems 77 metronome marks 146 MIDI
closing MIDI views 199 Cut/Copy and Paste 211 display controls 216
importing files 166 inserting note events 213 Instrument settings 206
program change 58, 204, 254
new tracks 219 select by time frame 208 selecting view 198
viewing in an ENF document 240
MIDI Files
MIDI instruments assigning 125
changing 58 MIDI Menu Items 241 MIDI Setup
modes
mordent
Multi-measure rest properties 70
navigating around ENF 85 navigating ENF screens 164 Navigator 154, 254
normalize graphical controllers 76
associated with lyric block 173
overlap or offset 38, 163, 226
optimized systems 80, 120, 129, 232
page
page layout
Page Setup 20, 107
Center on Page 105 optimize page size 110 simple centering 96
page type
part linking 77, 80, 120, 154
Part names
extracting 24, 126
making visible/invisible 129 merging separated systems 77 naming in System Manager 125 re-linking / optimized 80
pickup and close-out measures 22 pickup measures 25, 70, 71 pitch shift (see Nudge) 131
Playback
changing instruments on-the-fly 52
inserting instrument change 204 instrument change - ENF View 58 jumps 63
Lock to time signature 22, 70, 226
Preferences
Print Preview 96, 105, 229
centering pages 105 optimizing page size 110 optimizing size 97
Properties
Quick-Select 19, 89, 90
recognition
hymnal fonts 37 joining offset voices 38 lyrics and text 36 optimized scores 38
reformat score 102, 124, 225, 233
Re-link parts 77, 80
before inserting staff 78 Repeat previous measure mark 60 repeated endings 62
repeated verses and sections 60
associated with lyric block 173
score
reformatting 102 score from scratch 100 Score Properties 93, 120
Score-Part 112, 123, 251
Sibelius
exporting to 77, 98
signatures
slurs
soft accent
playback 141 solo violin tutorial 27 spacing 121
applying to other staffs and systems
splitting chords into voices 154
staccato
spacing 120, 121 spacing using tabs 103 visibility 122
Staff Properties 27, 78, 122
stem direction
changing 90, 153 Step Time Recording 220 Super System 79, 129
symphonic music
add / remove 123 apply changes to 130 changing widths
System Manager 124, 254
change fingering 188 duplicate notation staff 190 editing 187
unifying staff & line distances 20
Task Window 15, 227, 239
tempo
properties 67, 147
setting default 146, 233
tenuto
Text
nudging 131, 177 Text and tools palette 152 ties 137, 253
time signature 148, 252
Tool palettes 133, 134
trill
125, | ||
turn | ||
extracting 24, 127 | ||
user interface preferences 227
visibility
XML
Zoom
![]()
![]()
SmartScore requires personalization and verification of ownership the first time it is opened. You will be able to install SmartScore 5 times on up to 5 computers you own and use exclusively. Contact Musitek Technical Support if additional installs are necessary. For details, please read the SmartScore licensing agreement.
You will need to be connected to the Internet during the installation. If you do not have Internet access you will be given a confirmation number which will require entering a response from Musitek (Verification ID). To complete manual verification, contact technical support at tech@musi- tek.com (805-646-5841).
NOTE: Turn firewall & virus protection OFF during installation. Copying the installed program to other media will to cripple the program.
After purchasing SmartScore for downloading, you will be taken to a “Thank you” page which will give you your new ID and serial number. Be sure to print this page out and store it for future reference. You will then be directed to a link for downloading. (If you are upgrading from a previous Musitek product, you will first be required to enter your previous ID and serial number).
In the “Download Product” page, you will be able to choose to download the complete installer (SmartScore X2, Aria Player and Garritan sounds) or just the SmartScore X2 product you purchased. The full download installer is over 600MB and may be slow or possibly even time out if you have a slow Internet connection.
If you choose to download only the SmartScore X2 installer, you will be given a link where you can purchase the full DVD for $5 plus shipping.
Insert the SmartScore X2 DVD into your computer’s DVD drive.
(Windows) Inserting DVD should launch Auto-run. If not, Push Start > Run and Browse to find your DVD drive. Double-click Install_SmartScoreX2.msi.
(Macintosh) Insert the DVD and open the Macintosh folder. Double-click on the file Install_SmartScoreX2.
After successful installation, launch your copy of SmartScore X. Follow personalization and verification steps. You will need to enter your unique Customer ID and Serial Number which is printed on the DVD box or was given to you when you downloaded the software.
Installation requires online registration and verification. File saving and printing will be disabled after 30 days if registration is not completed. If you are unable to register online, please contact technical support at 805-646- 5841 or by e-mail at tech@musitek.com.
This manual is a reference. It is not intended for bedtime reading. The best method for learning or solving an issue is to go directly to the Index on page 1, find your topic or issue then find the corresponding page number. We strongly suggest new users walk through the Tutorial, Chapter 2), page 15 before diving in. A Quick Refer- ence Guide is included within the program and can be accessed from the Help menu.
NOTE: We’ve produced a number of helpful support videos. You can find them at:
Not all features described apply to every SmartScore edition. Symbols in the left mar- gin identify editions that do not apply.
SmartScore Pro Edition
The Pro edition has no restrictions. All features and descriptions in this manual apply to SmartScore Pro Edition.
![]()
Not found in MIDI Edition
Indicates the feature or description does not apply to MIDI Edition.
![]()
Not found in MIDI or Guitar Editions
Does not apply to either MIDI or Guitar Edition.
![]()
Not found in MIDI or Piano Editions
Indicates the feature or description does not apply to either MIDI or Piano Edition.
![]()
Not found in Piano or Guitar Editions
Indicates the feature or description does not apply to either Piano or Guitar Edition.
![]()
![]()
SmartScore includes several pre-scanned TIFF files. For the purpose of this tutorial. we will start with sample file, Fandango.tif.
![]()
If the SmartScore Task Window is open (Ctrl + “W” will open it at any time), push the “Recognize Scans” button. The Navigator and the Toolbar also have a Recognition button.
NOTE: The Task Window opens automatically only at program start. It can be launched at any time with Ctrl + “W” or by selecting Recognition from Windows menus (on Windows) or from the File menu (on Macintosh).
The Begin Recognition window opens. This is the window you will use to select previ- ously-scanned music for recognition.
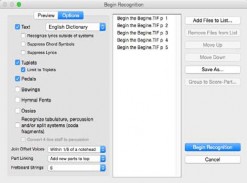
FIGURE 2 - 1: Begin Recognition window
![]()
Press Add Files to List. In the Open dialog box, double-click on the sample file, Fandango.tif, inside the SmartScore folder. This will add the pre-scanned file to the list.
Press Begin Recognition. This is where the magic happens.)
Once recognition is complete, you will see list giving the total number of systems found as well as the largest and smallest number of parts found in any given system. This is espe- cially important information if you are working with large scores or scores with expanding and collapsing systems. Click “Open SmartScore File” to proceed normally.
NOTE: If the information in the System Report differs significantly from your original score, there may be problems with your scanned image, such as broken systems or missing parts due to poor originals or incorrectly scanned pages.
In the Unify window, click OK to accept the default (Unify key signatures based on the topmost staff line in each system). Accepting the defaults after recognition is usually fine.
The name Fandango.enf will appear in the Save As file name window. SmartScore’s file extension is ENF (Extended Notation Format). The .enf extension will automatically be added to all file names after recognition. Click on Save.
After recognition of the Fandago file, the screen will fill with a number of colorful and interesting windows. Don’t be afraid. It’s all good.
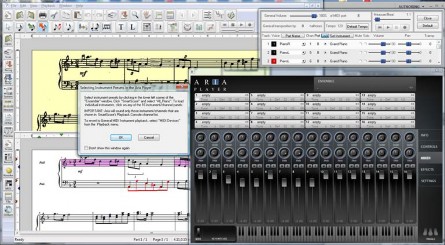
FIGURE 2 - 1: Opening screen after recognizing a file
The information window is important, but may be a bit incomprehensible at first. For now, just push OK. (Do not click “Don’t show this again” unless the message is clear to you.) In order to play back the music, you will need to load some instruments into Aria player.
Left-click in the lower left hand corner of the “Ensemble” window in the Aria player, choose “SmartScore” and select “All_Piano”.

Move your cursor to the “Playback Console” and in the transport controls, push the Play button.

To stop playback, hit the Spacebar. The Spacebar starts and stops playback.
With your cursor, click and drag an edge of the Playback Console and drag it to the right side of the screen. Do the same with the Aria player. For more informa- tion about the Aria player, see (Section 4.1, "Working with the Aria Player and Garritan sounds" on page 50). Now, lets discover SmartScore’s notation editor...
The original scanned image is displayed in the upper pane and the newly recognized SmartScore version appears below it in white. file appears below it. Use the scroller bars, mouse wheel, or arrow keys on your keyboard to scroll up and down the page.
Only one staff line is active at a time. The active staff displays black while inactive staff lines display in grey. Move your cursor within the boundary of a staff until it highlights black. Caps Lock will “lock in” an active staff until it is hit again. If you want all staves to
display in black, go to the View menu and un check Show Active Staff. If you do this, remember to move your cursor within a staff line first before doing any editing within a staff line.
To see all staff lines in black, check “Show Active Staff” in the View menu.
![]() Since editing is done a staff-to-staff basis, turn this back on if you are unsure which staff line you are editing.
Since editing is done a staff-to-staff basis, turn this back on if you are unsure which staff line you are editing.
Once you have recognized Fandango.tif, it’s time to edit the few mistakes...
The beamed grace note in the first measure was recognized as a quarter note.
Hit “X” key on your keyboard and with your mouse, left click on the quarter note to delete it.
Click and hold on the quarter note button in the Note and Rests palette. In a sec- ond or two, all possible note values will appear.


FIGURE 2 - 1: Expanding Tool Palettes (Notes) and selecting Beam direction
Select the 16th note (two flags).
In the Notes and Rest palette, click on the beam direction button. Hold down for a second or two and select “right beam”.
![]() e. Now click on the “Grace note” button to the right of the beam button.
e. Now click on the “Grace note” button to the right of the beam button.
NOTE: Use the “S” key on your keyboard to toggle whether the inserted note will be
“stem up” or “stem down”.
Move your cursor to where first “grace note” should appear and click to insert.
Move your cursor to where the second grace note should appear and click. You should now see two grace notes joined together with a double beam
Notice Measure 3 is highlighted pink. This means there is a rhythmic problem. The beam notes in the treble clef should all be 8th notes, not 16ths. We will use Quick-select to fix it without having to go back to the tool palette.
Position you cursor over the middle note of the 8th note beam group in the next measure (Measure 2) until it highlights yellow. With Ctrl button down, click on it. Notice the cursor immediately becomes a middle-beamed 8th note.
This action is called Quick-select. With Ctrl down, clicking on any object will inherit its attributes. You may find Quick-select to be the fastest and easiest method for selecting most musical symbols while editing.
Position you cursor over the first 16th beamed note in Measure 3 until it high- lights yellow and click on it. The note will change to an 8th beam.
Notice the measure’s pink color disappears. This means there is no longer a tim- ing error in the measure.
Push the Space bar to begin playing the piece. To pause, hit Space.
![]()
NOTE: If the target note turns light blue, a new note will be inserted. Only objects that highlight yellow will become changed. If a mistake is made, push the Undo but- ton or Ctrl + “Z” (Cmd + “Z” for one-button Macs).
In Measure 23, notice a grace note was mis-recognized, again as a quarter note.
Hit the “X” key and click to delete the first, incorrect quarter note.
Zoom out (right-click) and return your cursor to the beginning of Measure 1. Hit the “O” key (or push the “Selector” icon in the ENF toolbar) and right-drag to highlight both grace notes. Select Edit > Copy or push Ctrl + C/Cmd + C.
Position your cursor in Measure 24. Push Ctrl + V / Cmd + V and click to paste the grace notes where they should be.
![]()
The pitch of the first grace note should be e, not d. Zoom in with zoom too. While holding the SHIFT button down, drag the head of the first grace note up a step to e.
![]()
Push the “Transpose” button in the Toolbar (or select Edit > Transpose).
In the Transpose window, click the scroller upwards to change the target key sig- nature from 1 flat (Dm) to 1 sharp (Em).
Push OK to effect the key transposition.
This piece comes from an older edition with somewhat irregular sized staff lines. Notice the bass staff is slightly larger than the treble staff. SmartScore measures and displays staff and systems distances exactly as the original.
Locate the blue “staff height” tab left of the bass staff in Measure 15. Move the blue tab upward to slightly decrease staff height so it matches the staff width of the treble clef. Once you are satisfied with staff and line spacing, hit the “Caps Lock” key to “lock in” the active system.
![]()
Push the “Unify” button in the Navigator. Select “Unify System, Staff and Line Spacing” (Based on active system). Push OK.
In unifying system spacing, it’s possible that the last system may have rolled over to a new page. Here, we will center the score and readjust page margins...
![]()
Push the “Setup” button in the Navigator or select File > Page Setup. Notice default Document Layout is From Recognition.
Change Document Layout to Center on Page. The print preview pane in the background will change to reflect actual page size. Push Apply.
If necessary, reposition the green header/footer tabs located inside the left margin ruler.
Turning on voice color will display contrapuntal voices as different colors. This allows you to view secondary voices (both notes and rests) in red and tertiary voices in green. Any notes belonging to a 4th voice will appear in blue.
In Page Setup view, push “Main View” button at top of screen.
In the Toolbar, push the “Voice Visibility” button.
![]()
Notice in Measure 2 how notes and rests appear as either black or red. They rep- resent two of the four possible contrapuntal voices. Voices can be assigned differ- ent MIDI instruments if desired.
Push the Console button to open the Playback Console or use the keyboard shortcut, Ctrl + 9 / Command + 9.
![]()

FIGURE 2 - 2: Playback Console with Voice Visibility on
The left and right-hand piano parts have been automatically recognized as piano and assigned the General MIDI patch of Grand Piano.
In the Instrument column of Track 2 / Voice 2 (red track), change the instrument to Timpani. Press the spacebar or Play button. You will hear that the secondary voice of the left hand will be different from the others.
Move volume slider left or right to increase or decrease volume on one or more parts. Close Playback Console.
![]()
The sample file, Chorale.tif, is a well-known Lutheran hymn with four voices: Soprano, Alto, Tenor and Bass written in two staff lines.
Push the Recog button on the Navigator. Press the Add Files to List button in the
Begin Recognition window. Select Chorale.tif from the SmartScore folder
Press the Begin Recognition button. Once Recognition is complete, press “Open SmartScore File’ and save the file.
Hit the spacebar to hear the playback.
Hold the “Ctrl” button down and in the upper staff, click on the green note in Measure 3. Now hit the “X” key then click to delete it. Hit the “C” key and drop the selected note into the lower staff line at f3.
Pickup and closeout measures are commonly found in hymns and other vocal scores. Notes may be correctly recognized within these incomplete (pink) measures but playback will hesitate because SmartScore normally locks playback to the time signature. There are two ways to force such measures to play unconstrained notation (free rhythm):
![]()
Push the Properties tool (Esc key). Click on the barline at the beginning of the first measure. In the Barline Properties window, change the Playback pull-down menu from Current time signature to As written. Repeat for Measure 5. This will affect only individual measures. It will not affect playback of any other mea- sures in the piece.
To have the entire score ignore the default time signature, go to Playback menu and select “Play as written”.
Make sure you see both black and red notes. If not, push the “Voice Visibility” button found in the lower toolbar.
In the upper staff, the Soprano voice is black (Voice 1) and the Alto voice is red (Voice 2). In the lower staff, the Baritone voice is black and Bass is red. Up to four voices are possi- ble within each staff.
Hold down the Ctrl key and hit the “9” key (Cmnd + 9 for Mac). This opens the ![]() Playback Console. Or push the “Console” button in the Toolbar.
Playback Console. Or push the “Console” button in the Toolbar.
Change MIDI Instrument assignments of the two voices in the top part, PianoR
(Track 1). Change Voice 1 (black) to Choir Aahs and Voice 2 (red) to Voice Oohs.
To hear separate voices, push the Play button, manipulate the volume sliders and the solo or mute buttons. Press Close to close the Playback Console.
![]()
![]()
Push the Recog button in the Navigator. In the Begin Recognition window press Add Files to List. Double-click the file Gluck.tif inside the SmartScore folder.
Press Begin Recognition button to start the recognition process. Accept the post-recognition defaults. Select Open SmartScore File in the System Report window and Save the ENF file.
To listen to Gluck, simply press the spacebar. Hit the spacebar again to stop.
A natural sign is missing from a half-note in Measure 18. Quick-select (Ctrl+click) on the natural sign in the right-hand piano part. Move the cursor into the flute part and click on the half-note to insert the natural.
In Measure 20, the words “rit.” (ritard or ritenudo) and “poco rit.” were recognized and applied to gradually slow playback down for that measure. The word “poco” (a little bit) was also recognized, but not necessarily applied. To change playback characteristics of nearly any musical symbol, use the Properties tool.
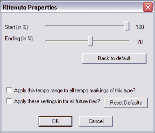
With Properties tool active (Esc key), click on the word “rit.”.
![]()
FIGURE 2 - 3: Ritenudo Properties window
Change the tempo value of the Ending of the measure by moving the slider to something like 70 or 80% of the current value.
Push OK. The measure will slow a bit more.
Repeat in the bass clef, this time by clicking on the marking, “poco rit.”.
NOTE: With Properties tool active, try clicking on the “tr” and “f” signs in Measure 19 to get a sense of how this tool can work.
You may want to hear back only Measures 19 through 20 to test the playback settings which you changed using the Properties tool.
To playback a small range of measures,
![]()
Push the Select tool in the Toolbar or hit the “O” key on your keyboard.
Hold down the right mouse button (alt + click for Mac) and drag inside a selected range of measures. Measures will highlight blue and are staged for play- back using Spacebar or the Play button.
Press the Spacebar again to replay the selected range from the beginning.
Click anywhere outside of the range of measures to deselect the range.
To play back a larger range of measures or to continuously loop playback, choose Playback > Set Play Range from the main menu. The Set Play range window will float and remain open until closed.
![]()
Push the “Structure” button in the Navigator palette to the left of the screen. Score Structure is an environment that will display all open ENF files in a hierarchy and allow you to manipulate the arrangement and visibility of parts and voices. You can even move parts from one open ENF file to
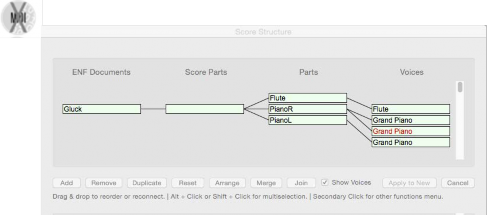
another simply by dragging the selected part to the other file.
FIGURE 2 - 4: Extracting a part in Score Structure window
Click to highlight PianoR and PianoL parts then push the “Remove” button at the bottom of the window.
To create a new document containing only the flute part, select “Apply to New”.
A new ENF file will open displaying only the flute part.
Your original 3-part score will remain open and unchanged.

Select Recognition.
Press the Add Files to List button in the Begin Recognition window. Select Songbook.tif and press Open. In the Options area, make sure the box to the left of Text is checked.
Press the Begin Recognition button. Once Recognition is complete, accept “Open ENF” and save the ENF file, Songbook.enf.
In the Aria player, click on the lower left-hand corner of the Ensemble window and select SmartScore > OneVoice_Piano. This will add a vocal sound to the topmost staff line.
In the Playback menu, select “Play as Written”. Now, all measures will play exactly what is written and the time signature will be ignored.
Go to View menu and in the “Show” submenu, uncheck “Error measures”. This will turn off the pink color which highlight measures having incorrect beats.
NOTE: Individual measures can be assigned to “Play as written” by clicking the barline preceding the measure with the Properties tool and checking “Play as written.”
The first word in the second system lost the “W” because it was broken up.
![]()
In the lower toolbar, locate the “L” button (for Lyrics) and push it.
Click on the first eighth note in the vocal line. The lyric cursor will jump to the beginning of the first lyric syllable. Type the letter “W”.
At the end of the same line, find the blue lyric syllable, “noats”. Click the quarter note above it and hit the delete key. Now type “fl” and click outside of the staff.
Move to the next line down and correct the words “otr” and “tmst” in the top lyric line using the same method as you did before.
Hit the down-arrow key to move to the next line down. Now correct the words “noat” and “yon”. Use the left and right-arrow key to move along the lyric line.
In the next measure, the word “bough” in the top line was associated with the wrong note. It should be attached to the half note. Use the arrow keys to position your cursor at the beginning of the word. Click and drag right to highlight the word “bough” and with the Ctrl key down, hit the “X” key to cut it to clipboard.

Click on the half note to the left and when the cursor drops down, hold the Ctrl button down and hit the “V” key. The word “bough” will be pasted into position.
Click out of the staff line. Press the “L” button in the toolbar to exit Lyric mode. Restore error measures by going to View > Show and checking “Error mea- sures”. Restore normal playback by going to the Playback menu and click on “Play as written” to turn it off. Most settings in SmartScore remain on until turned off.
NOTE: You may want to experiment with changing the Andante tempo marking. Hit the
SmartScore includes some very useful and powerful features for solo guitar music includ- ing recognition and editing of tablatures.
Push the Recognition button. In the Begin Recognition window, push Add FIles to List. Double click on the file, GUITAR.TIF in the SmartScore folder to add the file to the list of recognized pages.
NOTE: Solo guitar and violin music often contain fingering numbers. You may want to prevent SmartScore from interpreting fingerings as tuplets. To ignore tuplets, uncheck Tuplets in the Recognition Options area. Press Begin Recognition.
The original tempo is marked “Poco allegro”. SmartScore recognized the word, “Allegro” which has a default tempo of 150 bpm. It’s too fast.
![]()
Push the Properties tool and click on the mark, Allegro in Measure. Move the slider to change the speed to something slower.
NOTE: With “Apply this tempo to all similar marks” checked, all existing marks of Allegro will become updated to the new tempo after you push OK.
Solo classical guitar and solo violin scores are unique in the world of published music. In most music, usually no more than two voicelines are present; each being distinguished by notes having opposite stem directions.
Save the file with the default name given.
Notice measures have notes in three colors, including green. The green notes rep- resent the third or tertiary voice. Push spacebar to Play. Hit spacebar again to Stop.
The part name (Nylon Guitar) overlaps the first measure. To turn off part names, go to
View > Show > Part Names submenu. Check “Don’t Show”.
Open the Playback Console (Ctrl + 9 / Cmnd + 9). Click into Instrument selec- tion for Voice 2. In the Instrument pull-down menu, change Nylon String Guitar to Tango Accordion.
Change Voice 3 to Acoustic Bass or some other instrument.
Select Properties tool from the Toolbar.
Click on the yellow triangle to the left of any staff line.
In the Staff Properties window, click in the “Apply Staff Type” checkbox. Select “6-string guitar TAB” from the pull down menu.
SmartScore also recognizes TAB-formatted scores. For more details, refer to Section 3.5.1, "Recognition Options" "Recognize Tablature, Percussion and Split Systems (Codas)".
Most SmartScore keyboard shortcuts are identical on both Windows and Macintosh com- puters. For Macs with a single mouse button, the right-click function is performed version by holding down the “alt” (Option) key and clicking the mouse.
![]()
![]()
To scan right away, locate the SCAN button in the toolbar or Navigator and push it.
![]()
![]()
Start Scan (Toolbar) Start Scan (Navigator)
If your scanner responds well to the SCAN command, you can jump to Section 3.5, "Rec- ognition Sequence" on page 35. To learn more about scanning options in SmartScore, turn to Section 3.2, "Scanning in Macintosh®" on page 30.
SmartScore uses “3rd-party drivers” for scanner control. These drivers are installed from the CDs packaged with your scanner. Windows drivers are usually WIA or TWAIN. If you encounter problems when attempting to scan, locate your scanner manufacturers’ website, download and install the most recent scanner driver before calling Musitek Tech- nical Support.
NOTE: Some users may have to select “Custom” from their scanner installers.
a. Go to File > Scan Music > Select Scanner. Click on the driver name that corre- sponds to your scanner.

FIGURE 3 - 1: File > Scan Music > Select Scanner
Using to SmartScore X2 29
All scanners are not created equal. Most will work well with SmartScore; some better than others. For an updated list of recommended scanners, visit: https://www.musitek.com/bundle.html
We’ve produced some helpful videos on scanning in SmartScore along with other topics. Visit our video page at:
To read more about scanning, scanning issues and work-arounds, go online to:
or see “Scanning Issues” at www.musitek.com/faqs.html
Macs running Apple OS 10.6 (Snow Leopard) or later have scanner drivers imbedded in the operating system. This limits third-party scanning to those devices selected by Apple.
If your scanner does not respond to the “Scan” command, scanning will have to be done outside of SmartScore.
If your scanner does not respond properly in SmartScore’s scanning interface or if you cannot prevent your scanner from creating dithered/half-toned images, you will be a able to create usable images with the scanning software that came with your scanner. Returning to SmartScore, you will be able to Recognize these saved images.
Check that your scanner is on and connected to your computer.
Go to File > Scan Music > Choose Interface > Your Scanner’s. When you push the Scan button, your scanner’s software may open up. If not, launch the scanning software application that came with your scanner.:
Place your music in the scanner as squarely as possible
NOTE: Some scanners, especially lower-cost all-in-one devices have limited settings. If you are unable to locate specific settings described below, choose Text or Docu- ments. Normally, you will not select “Photos”, “Illustrations” or “Color”.
Look for Scan type or Output option. Set scanning to Grey (Greyscale).
Set Brightness to -20 to -35% for average printed music.
Set Resolution to 300-400 dpi for average printed music.
Scan between 300-400 dpi (for average-sized printed music). Scan at higher resolu- tions for music printed in smaller-than-average print size. Do not exceed 600 dpi.
In the preview pane, crop around but not into the area containing the music.
Scan and save multiple-page scores as a PDF file.
Scan and save single pages as uncompressed TIFF files. Give a unique filename for each page... e.g. Page1.tif, Page2.tif, etc.
TIP:Optimum resolution is achieved when the distance between staff lines is about 20 pixels. In SmartScore’s Image Editor, zoom into the image. Referring to the
![]() mouse position readout in the status bar, measure the distance between two lines in a stave (measure white space only).
mouse position readout in the status bar, measure the distance between two lines in a stave (measure white space only).
There are several methods that may be used to scan in oversized orchestral scores. Refer online to:
“My orchestral score is bigger and wider than my scanner.” found in the Support > FAQ section at www.musitek.com
![]()
Go to File > Scan Music > Choose Interface = SmartScore’s. This will ensure that SmartScore’s scanning environment is activated.
Push the Scan button found in the Navigator and in the Toolbar or choose File > Scan Music > Acquire.
When you start scanning, a low-resolution pre-scan will appear in the Preview window. If your scanner does not respond properly inside SmartScore’s scanning interface, select File
If your music extends to the edge of the preview window, uncheck “Cropping” and push “Prescan” to scan again. This will allow for maximum scanning coverage. If cropping is checked, a bounding box will limit the scanning region. If you scan with cropping on, make sure about a 1/4” of clear white space is left on all sides of the music inside the pre- view image.
If the preview appears slightly crooked, push the “Deskew” button to correct. If the pre- view is very crooked or if some music is cut off, reposition the music in the scanner and scan again.
This feature takes the guesswork out of choosing the correct resolution (dpi) setting for each scan. When selected, the image is analyzed and sized in order to obtain an optimum image resolution, thus achieving the highest possible recognition accuracy. Use this when- ever possible.
NOTE: Selecting Next Page immediately activates your scanner. Before selecting it, position your next page onto the scanner and wait until the scanner bar resets. If you push too soon, you may get an error message that “Scanner is not ready.”
Push Next Page and continue to preview, deskew and scan until you have fin- ished scanning your entire song, project, section or movement. Select Finish when done.
NOTE: If the piece you are processing exceeds 10-15 pages, divide it into smaller, dis- crete sections, e.g. Intro, Part1, Part2, etc.
It is recommended that you use Auto-Resolution whenever possible.
NOTE: When scanning music with staves having different widths (e.g. containing both standard notation and TAB staves or smaller “cue” staff above a piano accompa- niment) or if you continuously receive error messages suggesting alternative res- olutions, turn Auto-resolution OFF and re-scan at 300 dpi.
If you choose to set resolution manually, turn Auto-Resolution off. For most printed music, the recommended resolution is between 300 and 400 dpi. If the original music is printed in smaller type, you can increase resolution to 400 or 500 dpi. For miniature scores, try 600 dpi. SmartScore works best with an optimum resolution. Scanning at too high or too low a resolution will actually reduce recognition accuracy. It is not recom- mended to scan music below 250 dpi or higher than 600 dpi.
If your scanner fails to respond properly to the Scan command in the SmartScore interface or your scanned image is unacceptable (partially scanned, distorted, etc.) your alternative is to scan using the software provided with your scanner. See Section 3.2.1, "Scanning Outside of SmartScore" on page 30 for details.
To recognize PDF images of printed music,
![]()
Push the Open File button and select “Image” type. Or push one of the Recogni- tion buttons in the Toolbar or Navigator. The Recognize function is also found under the File menu.
After the image is converted from PDF to .TIF, it will open in SmartScore’s Image Editor where you can set grayscale threshold levels as well as delete non- notation pages such as the title page and front matter. While this step is recom- mended, it can be skipped each time or bypassed permanently.
![]()
A file-selection window Begin Recognition will open. This is where you list your pre-scanned files for recognition by selecting them, rearranging them, removing or reordering them.

FIGURE 3 - 2: Recognition - Selected Files / Options / Preview
In the Begin Recognition window, push Add Files to List.
Browse to where your images are stored. Click on an image file to select. If more than one page was scanned in the SmartScore scanning interface, the file will appear as a multi-page list.
NOTE: You may click on and drag image icon(s) to the selected files list of the Begin Recognition window. Some older Windows operating systems may not support drag-and-drop.
Preview pages prior to recognition to check that pages were scanned completely and that no page is severely skewed. Any of these issues will affect recognition results. Select the Preview tab and click on each page to view your pre-scanned pages.
Refer to “Recognition Options” on page 36 for details on how recognition options operate.
Notice that one file may contain many pages. If you happened to have scanned a page out of sequence or if you notice pages out of order (e.g. “Page10” is listed before “Page2”). To reorder the list of pages to be recognized, click on any page and hit Move Up or Move Down. It will be repositioned. Hitting Remove Files from List will cause that page to be taken off the list and will not be recognized.
If one page of a scanned group is incorrectly scanned or is missing altogether from a multi-page image file (Page group), you may reselect individual pages to form a new page group.
Select (or drag) the original multi-page file inside the selected files list of the
Begin Recognition window.
Highlight a page to remove and push Remove Files from List.
To add a replacement or additional page to the original page group, select or drag the page(s) to the selected files list.
Reorder pages as necessary.
NOTE: If pages were reordered, added to or deleted from the original image file, you will be able to re-save the newly listed pages.
To Save a modified list of grouped pages as a new image file,
Select all pages so they are highlighted and push Save As.
Select the existing name to over-write or type in a new name.
When scanning pages is done, choose Save As and Begin Recognition to initiate recogni- tion. Or you can choose Open Pages in Image Editor to view scanned pages and make alterations to the scanned image (e.g. cropping, deskewing, line drawing, cutting and past- ing). Pushing Cancel before recognition is complete will exit the process and return you to the main window.
NOTE: Turn to “Image Editor” on page 45 to learn about editing scanned images (Open Pages in Image Editor).
To save your scanned image file and begin recognition sequence,
Push the Save As and Begin Recognition button.
Browse to a location for saving your SmartScore ENF files. You may wish to add a unique directory at this time.
Give the image file a name. If you are using Windows, the extension “.TIF” will be added automatically.
Push OK to begin the recognition process.
The image file you have just saved contains all pages you scanned. The default file type is “Compressed TIFF” (CCITT Type 4), a multi-page, single-file highly-compressed TIFF file format. It will be approximately 10 times smaller than an uncompressed TIFF image file.
NOTE: If you are going to open the scanned image in Adobe Photoshop®, you may want to save in the larger, uncompressed TIFF format; Photoshop does not currently support CCITT Type 4 files.
TIP:When you Save a file to a specific location, SmartScore will continue to save to that directory until you change it. The same is true when you Open a file.
![]() Remember that SmartScore may look in one directory when opening a file and
Remember that SmartScore may look in one directory when opening a file and
then go to a different one when saving a file. Once changed, the new file path
becomes the default.
The following section describes options you can choose for recognition. When satisfied with your choices, push Begin Recognition.

FIGURE 3 - 3: Recognition - Options
NOTE: If Recognition fails, refer to “Troubleshooting Scanning and Recognition” on page 42.
Check this box if you wish to recognize lyrics and text in the music.
TIP:If you are scanning in single-line parts for the purpose of joining them into a con- ductor’s score, it is recommended not to recognize text. Otherwise, text from every score-part will be overlaid on the pages of the conductor’s score.
![]()
Recognize Lyrics Outside of Systems
Check this box if you are recognizing a score which has one or more lines of lyr- ics written under the last staff line of each system or if it is a single-line score with lyrics underneath the staff. Otherwise, leave unchecked.
Suppress Chord Symbols
When checked, chord symbols and guitar fret diagrams will be ignored. Even if recognized, chord symbols and guitar fret diagrams can still be turned off later. Check only if you are sure you never want chord symbols to appear in your score.
Suppress Lyrics
Check this box if you are recognizing a score which has one or more lines of lyr- ics written under the last staff line of each system or if it is a single-line score with lyrics underneath the staff. Otherwise, leave unchecked.
Keep this box checked, unless you experience many false positive recognition of tuplets.
If pedal markings are written into the music, check this box.
If up/down bowing marks are written into the music, check this box.
Select to recognize TAB (guitar) notation or percussion staves having other than 5 lines per staff.
NOTE: If your music includes a part with 4 lines, it will be recognized as 4-string TAB by default. If the 4-line staff is in fact a percussion part, check “Convert 4-line parts to percussion.”
If the original score contains a coda system break, it’s important to indicate that prior to recognition. SmartScore will recognize split systems if Recognize tablature, per- cussion and split systems is checked.
Two notes belonging to opposite voices are often offset even though they’re meant to sound at the same time. By default, noteheads of different (colored) voices having no more than 1/8th of a notehead’s space between them will share the same “time event” and will sound simultaneously after recognition and appear in different colors.
If your music has offset noteheads which are meant to sound simultaneously but gen- erally exceed 1/8-width of a notehead, choose a greater distance. The amount of white space between note heads determines this distance.
If your music has dense polyphonic texture, like that found in solo guitar music or tightly-spaced orchestral passages, it may be necessary to “tighten up” the allowable distance between offset voices. In these cases, choose a distance of less than 1/4 of a notehead.
Setting “Join Offset Voices” to “Exactly aligned” will join only those voices with note- heads that are exactly vertically aligned.
When a score is “optimized”, parts (i.e. stafflines) will appear only when they are meant to be played. Otherwise, the parts remain invisible. Optimized systems can be referred to as either “collapsed” or “expanded”. Usually, parts are added to the top of a system, e.g. after a piano introduction, the vocal line will appear above the piano part. This “top-down” arrangement is the default. However, some scores may have parts are added to systems in a “bottom-up” fashion, e.g. existing staves are bumped upwards. If your score is struc- tured in this way, change default to “Add Parts to Bottom”. Orchestral scores, being grouped by instruments, may have no pattern. For more information on part linking and maintaining playback continuity, see "Part Linking (Ctrl+L)", Section 7.7.7, on page 154
The default fretboard for recognition is the six-string guitar. If your music has ukulele fret- boards (4 strings) or some other configuration, change the selection to the correct number of strings.
Scanned pages will be saved as a .TIF file prior to recognition. When recognition is com- plete, a System Report will list the number of parts found in the largest and smallest sys- tems. If any of these do not agree with the original music, investigate the cause before spending a lot of time editing the score... it could be difficult to restructure your score later on.
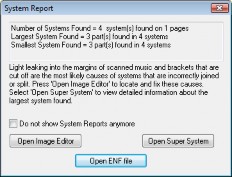
FIGURE 3 - 4: Post-recognition System Report
Normally, you will select Open SmartScore file. You can accept or change the name and the destination directory. Press Save to save and open the file.
If you selected Open Super System, you will be able to view a list of the largest sys- tem. You can locate and edit any system that contains an incorrect number of parts. See for more details.
If you selected Open Image Editor, the scanned image will open in the Image Editor where you can correct certain flaws in the scanned image. See Section 3.9, "Image Editor" on page 45 for more details.
A checkbox allows you to skip viewing the System Report in the future. To reset this option, go to Edit > Program Preferences > User Interface > Recognition.
Another window will prompt you to Unify Key and Time signatures. Refer to for more details.
![]()
SmartScore allows you to process and combine scanned pages of solo parts, duets, trios or quartets and play them back simultaneously. They may also be recombined into a conductor’s score.
To
TIP:If you are scanning in Score-parts for the purpose of joining solo parts into a con- ductor’s score, it is recommended not to recognize text.
![]() scan and combine Score-parts into one ENF file,
scan and combine Score-parts into one ENF file,
Scan in all pages for each part. For easiest identification, give a unique name or number for pages belonging to one part, e.g. Flute_Pg1, Flute_Pg2 and Guitar_Pg1, Guitar_Pg2, etc.
In the Begin Recognition window, arrange files in order of parts then pages: e.g. Part1/Page1, Part1/Page2, etc.
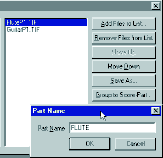
FIGURE 3 - 5: Grouping pages to Score-Parts
Highlight the first set of pages that make up the first Score-Part.
Push Group to Score-Part. In the Part Name window, give the selected pages belonging to a score-part a unique name.
When all pages are properly grouped to score-parts, push the Begin Recognition
button.
SmartScore will internally organize score-parts following recognition. The ENF window will display pages for the first part followed by pages of the next part. Parts will play back simultaneously.
If recognition accuracy is not as good as what you expected, examine the image up close by zooming into the image pane of your ENF view. You may also view your scanned pages in SmartScore’s Image Editor (FIle > Open > Image file type).
Determine the following by examining your image file close up:
send the .TIF file to tech@musitek.com. We will confirm whether or not it is half- toned. If you were scanning from inside SmartScore’s scanning interface, scan instead using your scanner’s software observing the guidelines found here: “Scanning Outside of SmartScore” on page 30. For more information on half-toning, refer online to “Dithering” in the FAQ section at www.musitek.com under the Support tab.
If objects such as note stems and staff lines are broken or thin or if objects appear weak and lack clarity, re-scan with -30% to -40% decreased brightness to fill in gaps.
If edges of objects are “stair-stepped” or ragged, it may mean, re-scan with the Auto- Resolution setting checked (On) or increase scanning resolution manually. Optimum distance between horizontal stafflines is 20 pixels. You may use the cursor and readout in the Status Bar (pixel coordinates) to measure exact width of a typical staff line.
If the source document is poorly printed or is faded and weak, try locating a better print copy of the music.
![]()
Following recognition, guitar chord fret symbols may sometimes overlay chord names recognized as text: Raw or “dumb” text chord names will not transpose. To remove “dumb” text fields, use Nudge mode (Shift) and drag the control han- dles of each text field upwards. Use the Select tool and “group delete” all selected text fields.
Recognition accuracy is directly related to the quality of the source document as well as the quality of the scanned image. Very cheap scanners may always produce poor or half- toned images. Remember the saying: “Garbage in / Garbage out”. If after examining the image and consulting the Troubleshooting chart, you are still unable to achieve good rec- ognition results, we invite you to send us your TIFF file(s) for detailed analysis by our technicians.
Problem | Probable Cause | Fix |
Scanner does not operate. | Scanner drivers not installed. (Win only) | Install WIA or TWAIN software from scanner manufacturer’s site. |
Scanner not selected. (Win only) Scanner driver is incompatible with computer operating system. (Mac) | Ensure proper scanner driver is selected (File > Scan Music > Choose Scanner). | |
Scan outside of Smart- Score. See “Scanning Outside of Smart- Score” on page 30. | ||
Scanner not connected or not turned on. | Check cabling and power. Use scan test program if available. | |
“This page should be scanned at xxx dpi. Re- scan or Accept. | Staff widths not con- sistent. Music contains cue, TAB or percussion staves. | Re-scan in Smart- Score’s scanning inter- face with Auto Resolution = off. |
Scanner model used does not support infi- nitely variable DPI (only scans in large increments). | Re-scan with Auto Resolution = off. Man- ually set resolution acceptable to scanner (300 to 600 dpi). | |
Printed area containing music is too wide or too long to scan on a standard sized scanner. | Actual image size of the music is what counts, not the size of the paper or page. | Refer to “Scanning Issues” section of www.musitek.com/ faqs.html for work- around. |
Reduce original size using photocopier. |
Problem | Probable Cause | Fix |
“Recognition failed for this page.” | Scanner set to screen resolution of 72 dpi. | Scan again accepting Auto-resolution set- tings for best results. |
Resolution of scanner set too low. | Manually set resolu- tion to 300-600 dpi. Scan again. | |
Page was scanned with too light a setting. | Re-scan with -30% to -35% brightness. | |
Scanner was forced to create a black & white image with “dither- ing”. | Re-scan in Your Scan- ner’s interface: Greyscale / 350 dpi. | |
Music not fully scanned or is severely skewed. | Re-scan making sure all the music is selected. Scan music straight or use “Deskew” function. | |
Image too large for selected resolution. | Re-scan ensuring Auto Resolution = On. | |
Accept setting. If rec- ognition is poor, re- scan with Auto-Reso- lution off. Reset to 350 dpi. | ||
Scanner hangs or crashes. | Driver conflict. | Ensure latest scanner drivers are installed. |
Scan outside of Smart- Score using software that came with your scanner. |
Problem | Probable Cause | Fix |
Poor recognition results. | One or more scanning issues creating less- than-optimum image quality. | |
Missing barlines due to light obscuring right margin or to right mar- gin having been cut off during scanning. | Open image file in Image Editor. Use Select Tool to delete obscured regions and the Line Draw tool to restore barlines on right side of systems. | |
Image too small for selected resolution. | Scan again accepting Auto-resolution set- tings for best results. | |
Note stems “razor thin” due to laser print output. | Open .tif image in Image Editor and apply darker thresholding. | |
Handwritten or non- standard notation. Poor print. | Scan well-printed, standard-sized sheet music. | |
Poorly printed music. | Decrease brightness level. Find better origi- nal. | |
Image not straight (skewed). | Open file in Image Editor (File > Open > Image). Use Deskew tool to straighten each page. | |
Stafflines and note stems of canned file are broken or too thin. | Re-scan page(s) with decreased brightness setting. |
Following the final scan of music pages, you can choose to “Open Image Editor”. This choice will stop the recognition process and open the scanned pages in the Image Editor. At any time, you can open and edit an existing image file with the “Open” command.
The Image Editor allows you to manually draw in missing system brackets and/or barlines prior to recognition. You can erase or add details as well as being able to delete large areas of unwanted material from the image.
![]()
Loading a prescanned image file
To open an image file you have previously scanned,
![]()
Press the Open button on the Navigator or choose Open (Ctrl + O) (Cmnd + O
for Mac) from the File menu.
Change Files of Type pull-down menu to Image Files.
Browse and highlight an image file from the listed saved files. Press Open.
Image Information
Select View > Image Information to display characteristics about the current scanned image including resolution, file type and page size.
Zoom
![]()
To Zoom in and out click the Zoom Tool in the Toolbar (Ctrl + Q). Click inside the image will increase the scale of your view (Zoom In), while right-click (alt / option + click for Mac) will decrease the scale of your view (Zoom Out).
Page
![]()
To view pages of an image file, use the paging buttons in the Toolbar or select
Image Toolbar
![]()
Crop
Select
Delete Page
Line
Color
RotateR
Deskew
Invert
Freehand
Thickness
RotateL
Threshold
FIGURE 3 - 6: Image Editor Toolbar
Used for selecting a region for cropping, deleting, cutting or copying.
To crop an image file (trimming unwanted portions of your image from outside a marked frame),
Press the Select button in the Image Toolbar.
With your mouse, drag a box around the area you wish to keep. If you want to extend the cropping region outside of the display, keep dragging; the page will scroll as you drag up or down.
To adjust the marked bounded area, move your cursor over a boundary line, click and drag the boundary to a new position.
Select Crop from the Edit menu OR press the Crop button in the Image Toolbar. The resulting image will be reduced to the area inside the bounded frame. Remember to Save when done.
Page through each scanned image and check for relative straightness of each image page. If a page appears tilted or skewed, recognition accuracy will be compromised. The Deskew tool rotates the image slightly to correct skewed pages and will optimize recogni- tion accuracy.
Press the Deskew button in the Image Toolbar or select Deskew from the Edit
menu.
Position the cursor over a staff line. Starting from the left side, click and drag the mouse along the length of the staff line. A red “skew angle” line will display as you drag the mouse. When you are certain the red “skew angle” line parallels the staff line, let go. The page will automatically straighten. Repeat for each page. Remember to Save when done.
NOTE: If the page becomes incorrectly rotated, undo with Ctrl + z / Cmnd + z for Mac
(or select Edit > Undo).
If the image you open in SmartScore is white-on-black (instead of the normal black-on- white), then you should reverse the image output in your scanning software. SmartScore defaults to 0=white polarity.
If your scanned image appears white on black, choose Edit > Invert or choose the Invert
button from the Toolbar.
If there is more than one scanned page in the image file, the Delete Page function is active. Use it to remove poorly scanned or duplicated pages. To re-scan and restore deleted pages, see Section 3.4.2, "Removing, replacing and re-saving scanned pages" on page 35.
To draw free hand lines in your image file, select Brush from the Edit menu OR press the Brush button in the Image Toolbar. Choose a line width then click and drag to paint.
Some printed scores have weak or missing stafflines and/or brackets that can create prob- lems during recognition and may result in missing or incorrectly bracketed systems. Sometimes, by accident, brackets and/or barlines are cut off during scanning. If this is the case, you can manually draw in staff line and brackets or enhance their thicknesses.
To restore cut-off or missing system brackets,
Select Edit > Line or choose Line Draw in the Image Toolbar.
Push the Pen Color push button in the Image Toolbar, if necessary, to choose Black Color.
In the Width pull-down selector, choose a fairly wide thickness (10-20 pixels).
Click and drag the mouse to draw a line along the missing or broken bracket along the left margin of the music.
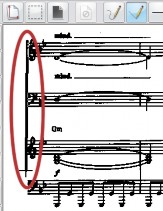
FIGURE 3 - 7: Using Line Draw tool to restore missing bracket
When finished modifying the image. Select File > Save As and give it a name. You may then Recognize the file with corrections.
![]()
To change the width of brush or line tool, select a new size from the Width menu in the Image Toolbar. Select from 1 to 50 pixels.
Black / White Color toggle (Eraser)
Push the “Eraser” button to activate white color. Push again to deactivate it for black color. Or choose Pen Color > Black or White from the Edit menu.
To rotate an image file (for landscape formatted scores or upside down scans), go to the
Rotate the image Left (90 degree rotation).
Rotate the image Right (90 degree rotation).
Select Edit > Rotate > Any to rotate at angles other than 90 degrees.
If note stems and/or staff lines are “razor thin”, recognition will be improved by darkening the image. Use this feature to manually convert grey images to black & white using a vari- able threshold (75% lighter to 75% darker). Many PDF music files and sheets output from laser printers have thin lines (1 pixel wide.) Move the threshold slider far to the right in cases of “razor thin” lines.
![]()
After modifying the image, you can save and begin recognition of it by pushing the “Begin recognition” button in the Toolbar.
To cut an area from the scanned image, hit Delete button. Or use the Select tool and drag a box. Cut with Ctrl + “X”.
To copy an area without removing it from the image, use the Select tool and drag a box with the mouse. Select Edit > Copy (Ctrl + C (Win) / Cmnd + C (Mac)).
To Paste the cut or copied region into an image file, select Edit > Paste (Ctrl + V / Cmnd
![]()
![]()
SmartScore X2 is configured to automatically open both the Playback Console and the Aria Player when a new file is opened or recognized.
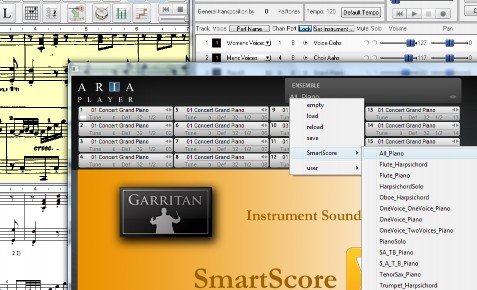
FIGURE 4 - 1: Aria player with SmartScore Playback Console
To load preset instruments for playback,
In the Aria player, select one of several instrument presets by clicking into the lower left corner of the “Ensemble” window.
Click on “SmartScore” and select “All_Piano”. All channels will play a Grand Piano sound. Other combinations can be selected from “SmartScore” preset list.
To load individual instruments,
Click on any of the 16 instrument/channel slots in the Aria player.
Select an instrument from one of seven instrument groups under “SmartScore”.
IMPORTANT: The Aria player will play only those channels that are displayed in the channel list of SmartScore's Playback Console.
Using to SmartScore X2 50
Use the transport controls in the Playback Console or Mini Console to control playback. The spacebar can be used to start and stop playback, but not when the focus is on the Aria player. To activate spacebar for playback, click outside of the Aria player window.
Volume, Pan, Mute, Solo and Transpose pitch controls are all active in Playback Console.
If a part is not playing back or is playing the wrong sound, make sure you have the right instrument correctly assigned to each instrument/channel slot. Remember that only those channels listed in SmartScore’s Playback Console will sound in the Aria player.
NOTE: Instrument names in the Playback Console are not active when using the Aria Player. Only those instruments loaded in the Aria player are activated.
Both the Aria and Playback Console windows are “floating” and can be easily moved out of the way when editing the ENF notation file. When either window is closed, current instrument settings are saved. In order to reassign instruments, playback windows will need to be reopened.
![]() To reopen Playback Console, push the “Console” button in the lower toolbar.
To reopen Playback Console, push the “Console” button in the lower toolbar. ![]() To reopen Aria player, push the VST or AU button in the lower toolbar.
To reopen Aria player, push the VST or AU button in the lower toolbar.
To exit Aria player and revert to General MIDI Instrument playback, select General
The Aria player is loaded with useful features including effects and the ability to add more Garritan sounds. The Aria user manual can be found under the HELP menu > SmartScore manual (PDF) > Aria Player for SmartScore X2.
![]()
We recommended using Aria for playback whenever you save to an audio file or burn playback audio to DVD.
Press the spacebar to start playback. Press spacebar again to pause. Press again to resume play. Press the comma key (“,”) to rewind to start point.
![]()
NOTE: Instrument change is only functional when General MIDI is selected under the
Playback > MIDI Device menu. Aria player does not support instrument change.
The Mini-Console transport controls Play, Rewind and Stop.The “spring-loaded” slider will accelerate or decelerate playback depending on how far the slider is dragged. The slider will snap back to the default tempo once it is released.
![]()
FIGURE 4 - 1: Mini-Console
![]()
The quickest way to play back a snippet of the score is to use the “Select” tool and drag the mouse over a region of the page while holding down the right mouse button (Alt + click for Mac). Measures selected for playback will high- light light blue. Hit Space bar to play.
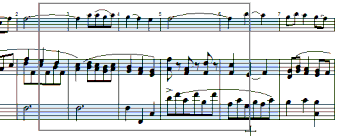
FIGURE 4 - 2: Selecting measures for limited playback
For playing larger sections and for looping, go to Playback menu > Set Play Range.
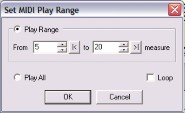
FIGURE 4 - 3: Set Playback Range
In the From field, choose a starting measure. Then select an end point in the To
pull-down box.
To repeat playback over the range, check the Loop box.
The Playback Console is opened from a button in the Toolbar, by holding down Ctrl + 9
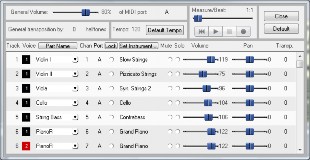
(Win) / Cmnd + 9 (Mac) or by selecting Playback console. from the Playback menu.T
![]()
FIGURE 4 - 4: Playback Console
Instrument assignments in the Playback Console are ignored whenever the Aria player is activated. Instruments assigned in the Aria player will respond only in channels that correspond to those in the Playback Console.
The playback transport controls works exactly as the Mini-Console. The General Vol- ume slider controls overall volume. Tempo controls default tempo (if no metronome value was assigned in ENF). Measure/Beat slider resets playback position to desired measure and beat.
Each horizontal MIDI track is linked to a contrapuntal voiceline found in a staff. Tracks are grouped with light or dark grey shading representing one part / staff line. Each track has its controls arrayed in columns:
Column 1 (Track): Indicates the MIDI track assigned to the staff. MIDI Tracks are assigned automatically and cannot be changed.
Column 2 (Voice): Lists the contrapuntal voice number (1 thru 4) given to each voice- line. Voice numbers appear inside colored boxes representing one of 4 possible voices (black, red, green and blue).
Column 3 (Part Name): Each track (part) is linked to a Part Name. Part names are cre- ated in the System Manager.
Column 4 (Channel): SmartScore automatically assigns a unique MIDI channel to each track whenever possible. Since MIDI allows for only 16 channels, channel num- bers may become repeated. Channel numbers can be edited manually by clicking inside the Channel number field.
Column 5 (Port) displays the current port (device) to which the MIDI track is being sent. If more than one MIDI device is available, the port assignment can be edited by clicking inside the Port field.
Column 6 (Lock): You may choose to lock the MIDI Channel of one or more parts to keep them from being changed dynamically.
Column 7 (MIDI Instrument): Every track is assigned a MIDI Instrument. The default instrument is “Grand Piano”. Some recognized scores, depending on their structure, may have other instruments assigned.
Column 8/9 (Mute / Solo): buttons control whether a track should be muted while all other tracks play or soloed, muting all other tracks.
Column 10 (Volume): This slider controls the default volume of each track.
Column 11 (Pan): This slider controls the Left/Right balance for each track.
Column 12 (Transpose): Each track can have its playback transposed up or down. Note that transposed instruments will already reflect a transposed playback value to com- pensate for correct pitch.
For detailed information on Dynamic and Articulations palettes, see "Articulations pal- ette", Section 7.6.2, on page 138 or "Dynamics Palette", Section 7.6.3, on page 144.

![]()

![]()

While in the Insert mode, select a triplet (“T” key) from the “Notes” palette or select Legato from the “Articulations” palette.
Creating a triplet
Creating a slur
FIGURE 4 - 5: Creating a Tuplet or Slur (legato)
Click and drag down to insert the tuplet or legato above the notes to be selected.
Click and drag up to insert the tuplet or legato below the notes to be selected.
To delete a tuplet or articulation
Once selected, push the Delete key.
NOTE: To resize or move a tuplet bracket, use Nudge mode and drag the control point located on either end of the tuplet.
Control of contrapuntal voices is key to proper playback of your score.
![]()
To view contrapuntal voices as colors, push the Voice Visibility button in the Toolbar. Each ENF Part (each staffline of the score) can contain a maximum of 4 voices (represented by 4 colors, black, red, green and blue). For scores to play back correctly, it is important that voices appear correct and be properly manipulated. See "Working with Contrapuntal Voices", Section 7.9, on
page 159 for additional details about editing voices.
Music ministers and choir directors will find this tool extremely handy: Most hymnals and many choral scores group voices into 2-note chord clusters (SA/TB) instead of opposite note stems for each voice. SmartScore treats chord clusters as a single contrapuntal voice. Using the voice-splitting tool, you can split two-note clusters into separate voices (black and red) where each voice will have a unique instrument sound and each voiceline can be extracted to a separate document (See "Extracting Voices", Section 7.4.4, on page 127 for more details on extracting voices).
To split all two-note clusters into two independent voices,
a. Hit the “O” key or Select button to activate the Select tool.
![]() b. Select Ctrl+A (Select all) to highlight all symbols in the document.
b. Select Ctrl+A (Select all) to highlight all symbols in the document.

c. Press the “H” key. This will separate two-note clusters into 2 voices.

FIGURE 4 - 6: Splitting two-note chords into 2 voices
![]()
TIP:Only two note clusters will split. If you wish to split clusters containing three or more notes, delete the least desirable note(s) from the cluster (“Z” key and “X” key) until you are left with two notes in each cluster.
Assigning unique MIDI instruments adds richness and allows the user to distinguish con- trapuntal voices during playback. There are two areas where you can change MIDI instru- ment assignments for voices: inside the Playback Console and inside the System Manager.
To change an instrument assignment of a voice in the Playback Console,
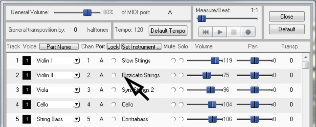
Push the Playback Console button in the Toolbar to open it. The console may be opened with quick-keys (Ctrl+9 / Cmnd+9) or from the menu by selecting Play- back > Console.
![]()
FIGURE 4 - 7: Changing MIDI instrument of a voice in Playback Console
In any of the Voice column, click to select a new MIDI instrument.
To change an instrument assignment of a voice in the System Manager,
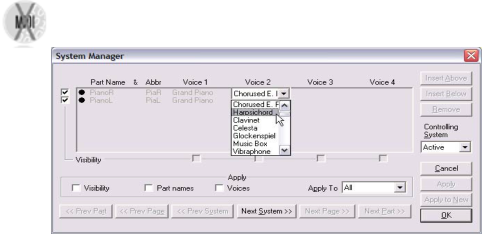
Open the System Manager (Ctrl+M) or select System Manager from Edit menu. All staves are displayed in horizontal rows as “Parts”. Voices are arranged in columns above each part (1 thru 4).
FIGURE 4 - 8: Changing MIDI instrument of a voice in System Manager
![]()
You can change instrument sounds anywhere in the score by applying a Program Change to a selected voices within any given measure.
To apply a Program Change in the ENF notation view,
Push the “Instrument Change” button in the ENF Toolbar.
Position the note-arrow on the first note where the change should occur.
Select a new instrument sound for that voice. If more than one voice is present in the measure, you will need to select the voice to which you want to apply the change.
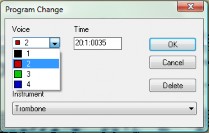
FIGURE 4 - 9: Correcting offset voices not “glued” after recognition.
In printed music, noteheads belonging to different voices may appear side-by-side even though they are meant to sound simultaneously. During recognition, horizontal distances between offset noteheads are measured and a decision is made whether or not to join (or glue) notes to the same vertical event. It is possible that offset notes will not become glued due to excessive distance between the noteheads. It is also possible that notes will become incorrectly glued if they are too close. The default distance for joining noteheads to the same vertical event is 1/8th of a note head. This distances can be adjusted prior to recogni- tion. See "Recognition Options", Section 3.5.1, on page 36 for details on resetting the dis- tance for joining notes.
Following recognition, check that Voice Visibility is on (See "Voice Visibility", Section 4.5.1, on page 56). If two notes with opposing stems both appear black and are meant to play simultaneously, they can be aligned as follows:
To vertically align offset voices,
![]()
Use the Select tool (“O” key) and highlight notes or rests that are horizontally offset (likely, they will both be black).
Press the “Y” key to group the selected, offset notes into a single vertical event. Selected voices may move a bit and one should turn red.
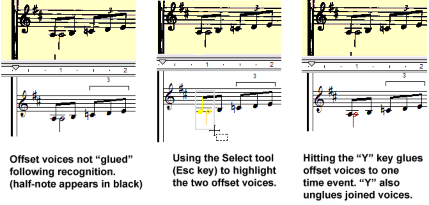
FIGURE 4 - 10: Correcting offset voices not “glued” after recognition.
Similarly, if you see notes that belong in a single voice each displaying a different color (most likely black and red) and nearly touching, they are joined to the same vertical event and can easily be “unglued”...
To “Unglue” offset notes which are not intended to play simultaneously,
With the Select tool (“O” key), carefully select the incorrectly glued notes (NOTE: they will each have different colors). Be sure to select only the notes which are incorrectly joined.
Hit the “Y” key. Joined notes separate and change color. Select again and hit the “Y” key once more to rejoin.
See “Join Offset Voices” in "Recognition Options", Section 3.5.1, on page 36 to reset default distances prior to recognition. See also "Working with Contrapuntal Voices", Section 7.9, on page 159 for more information on editing voices and their affect on score playback.
![]()
To insert a repeat barline, repeat measure or any other repeat symbol,
Toggle the “C” key to enter Insert mode. Select any repeat symbol from “Bar- lines & Repeats” palette and click to place it.
To change any current barline to a repeat barline,
Select a repeat barline from the “Barlines” palette. Click on any existing barline to change it to the selected barline.
To insert a “Repeat Previous Measure” mark,
a. Select the Repeat Previous Measure mark from palette. ![]() b. In Insert mode, click into an empty measure.
b. In Insert mode, click into an empty measure.
All notation present in the previous measure will automatically repeat itself during play- back.
To change how many times a section should be repeated,
![]()
With the Properties tool selected, click on the Left Repeat barline that begins the section. The Barline Properties window will open.
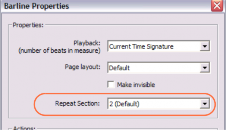
FIGURE 4 - 11: Selecting the number of verses to be repeated
Select the number of desired repeats in the Repeat Section pull-down menu. Choices are from 1 to 8 repeats.
SmartScore can cope well with repeats, jumps and endings both simple and complex. For proper playback to occur, repeats and endings must be unambiguous and logical.
With SmartScore’s alt repeat tool you are able to set the sequence of numbered endings as well as how many times they should repeat.
To create a numbered ending or edit an existing numbered barline,
![]()
Select Start Alt Rep button from the “Barlines and Repeats” palette then click on the appropriate barline to assign its sequence properties.
The Repeats window will open. Choose “1” to assign the next repeat sequence as the first ending.
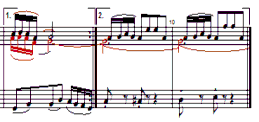
The Close Ending tool will appear on the cursor. Click on the last barline that terminates the first ending. The cursor then switches again to the Start Ending tool.
Click on barline that begins the second ending (it may be the same barline that closes the first ending). Choose “2” as the sequence number of the second end-
![]() ing.
ing.
FIGURE 4 - 12: Multiple Endings
Finally, click the barline that “closes out” the last ending.
To change a numbered ending barline to a “normal” barline,
Ctrl + click on a nearby barline (or pick it off the Barlines palette). Click directly to the left of the numbered ending. This inserts the selected barline.
Delete the numbered ending (hit the “X” key and click to delete).
NOTE: Repeat barlines are critical for correct playback. Remember, the number given to each ending represents the order each ending will play within a repeated sec- tion. You can have multiple “1st & 2nd endings” provided each set of endings is placed inside repeat barlines. Without repeat bars, SmartScore will interpret it as “Repeat last section this number of times.”. Jumps are different... they are not sequential. For more information about non-sequential jumping, see "Repeated verses", Section 4.6.1, on page 60.
To delete and replace a numbered ending or barline at the end of a system,
Insert the desired barline type to the left of the numbered ending that you wish to remove.
Delete the original ending (hit “X” key and click). The measure will shift slightly to the left.
Jump symbols may include segno, da capo,coda, to coda, fine and other markings indicat- ing where playback should stop and jump back, jump forward or be repeated and finally stop. To avoid discontinuity or endless looping (what we call the “bowl of spaghetti” prob- lem), it’s important that jumps be used logically.
A Coda sign generally marks the concluding passage of a piece. A To Coda sign is used to mark where a jump to the Coda begins; usually from inside a repeated passage.
To insert a “jump to Coda” sign and mark the beginning of a Coda,
![]()
Select the To Coda sign from the palette. Find the measure where playback begins its “jump” (usually at the end of a repeated section or numbered ending). Click on the barline to insert the To Coda sign. It will appear above the bar.
Select the Coda sign from the “Barlines and Repeats” palette. In Insert mode, click on the barline where the coda is to begin, (usually near the end of the piece).
NOTE: The Coda will not be played back until it is activated by the To Coda or d.s. al Coda sign.
![]() Segno means “sign”. It marks the beginning of a final repeat or ending. Segnos are usually positioned early on in the piece.
Segno means “sign”. It marks the beginning of a final repeat or ending. Segnos are usually positioned early on in the piece.
To mark a final repeat with a segno,
Select Segno from the “Barlines and Repeats” palette.
Insert the Segno by clicking the barline that begins the last repeated ending or section.
To stop a final repeat or ending, return to the Segno and continue on to the Coda,
select d.s. al Coda (meaning “from the sign to the Coda”).
To have a final repeat or ending return to the beginning of the piece and terminate at the
Segno sign,
Select d.c. al Segno (meaning “from the beginning up to the sign”) and insert it by clicking on the barline in the last ending or repeat where playback is to return. The repeated section will return to the beginning of the score and play through to the Segno.
NOTE: To Coda, Segno, d.s. al Coda, D.S., D.C. and d.s. al Fine signs are all ignored until an ending or repeat is played once.
To have playback return to the beginning of the piece and play through to the end,
Select the D.C. button from the “Barlines and Repeats” palette.
(dal Segno) means “from the sign” or “return to the sign”.
To have a final repeat or ending return to the Segno and play through to the end,
Select the D.S. button from the “Barlines and Repeats” palette.
Click on the desired barline to insert the D.S. sign.
To have the last repeat stop, return to the Segno and continue on to the end of the piece,
Insert a Fine sign by clicking on the barline that marks the final end point.
Select d.s. al Fine (meaning “from the sign to the end”) from the “Barlines and Repeats” palette.
Insert either the d.s. al Coda or d.s. al Fine mark by clicking the barline where the last repeat is to begin.
To have the final repeat or ending return to the beginning and play through to the Fine,
Place the Fine sign at the appropriate barline. Select and insert d.c. al Fine in a mea- sure following the Fine sign.
Repeat signs, ending markings (including Codas and Segnos) are found in the “Barlines and Repeats” palette. Using repeat signs properly will alter playback accordingly.
Playback values of dynamic and articulation markings can be altered by use of the “Prop- erties” tool. Changes can be applied individually to the marking itself or globally to all similar markings in the score. Finally, default values can be reset for that particular mark for all future SmartScore files. Certain changes to barline properties will also affect play- back. See 4.9.11 on page 70 and 4.6.1 on page 60 for barline properties details.
To activate the Properties window of an object:
![]()
Hit the “Esc” key or select the Properties icon from the Toolbar and click on one of the objects below to open and modify its playback and display properties:
Clicking on any note head will open the Note Properties window.
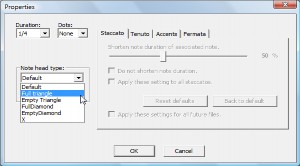
FIGURE 4 - 13: Note Properties
Note duration: Change basic note value.
Dots: Add or change dots of prolongation.
Staccato: Change default duration when staccato is applied.
Tenuto: Change default duration when tenuto is applied.
Accents: Change default velocity when accent is applied.
Notehead types: Noteheads can be altered to several alternative shapes configurations including triangle, empty triangle, diamond, empty diamond and “x”.
Selecting this option will update playback properties of the same mark throughout the score.
Selecting this option will permanently reset the default value for the selected property to its new values for all future ENF files.
This will reset values to application launch defaults.
This will return values to new installation defaults.
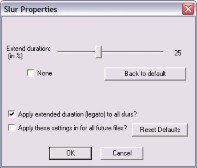
FIGURE 4 - 14: Dynamic Marking Properties
Tempo values can be changed by clicking any tempo marking with the Properties tool. Changes can be applied to all tempo marks in the document or to all future instances of the selected tempo mark.
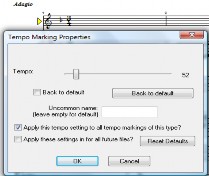
FIGURE 4 - 15: Tempo Marking Properties
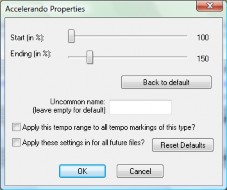
Starting and ending tempos (as a percent of default tempo)
Use an uncommon name (e.g. “gradually slower”)
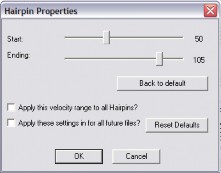
FIGURE 4 - 16: Hairpin Properties
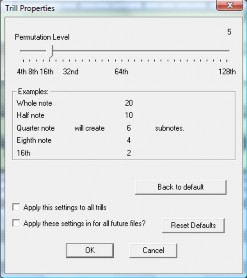
FIGURE 4 - 17: Trill Properties
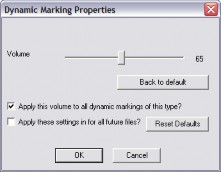
FIGURE 4 - 18: Dynamic Marking Properties
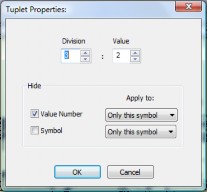
FIGURE 4 - 19: Tuplet Properties
NOTE: Default settings for how tuplets appear can be changed in Text Symbols and
Score symbols tabs found in Program Preferences or Document Preferences.

FIGURE 4 - 20: Multi-measure Rest Properties
Pickup, measures normally begin a piece or section with a truncated measure having less beats than the time signature calls for. It is often associated with a “closeout” measure at the end of the section. Split-measures are divided between the final measure of one system and continue through the first measure of the following system.
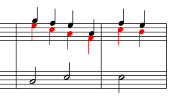

Pickup Measure (Typical) Split Measure (Typical)
FIGURE 4 - 21: Pickup and split measures
To play individual measures exactly as written,
Select Properties Tool and click on the barline that precedes the measure in question.
![]()
In the Playback combo box, choose “As written”.
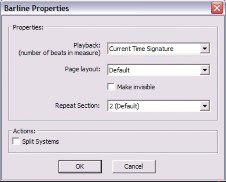
FIGURE 4 - 22: Barline Properties
Sometimes a score will contain so many split or incomplete measures that you will simply want to play it entirely without hesitation. In this case, you will want to apply “Play as written” to the Playback tab in Document Preferences.
To play all measures in the document exactly as written,
Go to Edit > Document Preferences. In the Time Signature (Lock to Time Signature) pull-down menu, select “Play as written”. All measures are now unlocked.
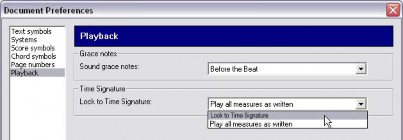
FIGURE 4 - 23: Document Preferences > Playback > Play as Written
In Barline Properties, you can also create system breaks (Codas) and page breaks.
NOTE: If the original score contains a coda system break, it’s important to indicate that prior to recognition. SmartScore will recognize split systems if Recognize tabla- ture, percussion and split systems is checked in the Begin Recognition dialog. For more information, see "Recognition Options", Section 3.5.1, on page 36.
To create a Coda (Split system)
FIGURE 4 - 24: Creating Codas (Split Systems)
Feel like singing out loud? Hey, you only live once...
To view moving lyrics with familiar bouncing ball,
Press the Karaoke button in the Navigator palette.
![]()
The Options menu allow for changes in the Karaoke display. These options are also available in Edit > Program Preferences.
Open the Playback Console (Ctrl + 9 / Cmnd + 9 for Mac) to adjust tempo and change instrument assignments for parts and voices.
a. To open Instrument Templates, select Edit > Instrument Templates or hit Ctrl
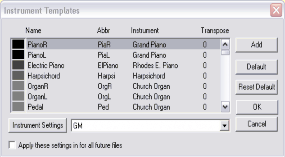
FIGURE 4 - 25: Instrument Templates
To change or add a new instrument template,
field of any template and type to change the given name of an instrument.
To change an abbreviation, click then type inside the Abbr field.
Click and select a different MIDI instrument from the Instrument list to change default MIDI instrument assignment.
Transpose displays the default playback transposition for selected instruments. The MIDI representation will reflect the transposed shift in pitch.
Various sets of MIDI instruments can be selected in Instrument Settings pull- down menu. Instrument sets acquire their names by clicking on the Instrument Settings button and selecting a set.
To save settings for future ENF files, check “Save for Future”.
Transposed instruments do not actually play the pitches notated in the score. To play them back in tune with the other non-transposed instruments, they must have their playback adjusted up or down by certain intervals. This “playback transposition” is already preset in Instrument Templates for most transposed instruments. The number in this column repre- sents the amount of pitch change (+/-) in half-step increments.
Adding an automatic drum track will add more pizazz to the mix.
![]()
Push the Drum Pattern button in the Toolbar to select an appropriate pattern for your piece. For more information on adding or creating drum tracks, go to "Auto- matic Drum Patterns", Section 9.5.
This feature applies standard swing rhythm to straight 8th and 16th notes notated in beamed groups. SmartScore will modify playback and the underlying MIDI representation as follows:

To apply swing to playback,
In the Playback menu, click on Swing.
With the Velocity graphical controller you can vary note velocities of each note cluster quickly and smoothly. With the Tempo controller, you can “draw in” tempo variations smoothly over time. Controllers can be accessed either in the ENF Toolbar or below the Piano Roll window in MIDI view.
![]()
FIGURE 4 - 26: Text and Controllers
![]()
In ENF score view, push the “Velocity controller” button to activate. Click and drag your mouse along the vertical bars which represent each note’s velocity. The higher the bar, the more the velocity.

FIGURE 4 - 27: ENF Velocity Controller
![]()
Push the “Tempo controller” button to active. The horizontal line in the topmost staff represents default tempo. To vary tempo, click and drag your mouse up or down. The last tempo point will be fixed until changed.

FIGURE 4 - 28: ENF Tempo Controller
![]()
NOTE: For ritards, accelerandos and descelerandos, use the Properties tool instead of the Tempo Controller. You will have much more predicable results. See 4.9.5 on page 67 for information on these properties.
After making changes to Tempo or Velocity controllers, you may find you have created greater-than-desired changes to playback. If so, you may globally reduce the effects of either controller by applying normalizing.
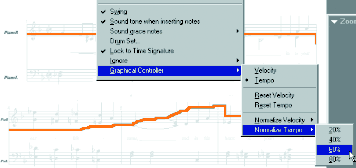
Normalize Tempo Controller (Before)
![]()

Tempo Controller after normalizing by 80%
FIGURE 4 - 29: Normalizing Tempo
To reduce effects of either Tempo or Velocity graphical controllers
Choose Playback > Graphical Controller
Select either Normalize Tempo or Normalize Velocity.
Choose amount of reduction desired: 20% / 40% / 60% or 80%. Controller dis- play and playback will change accordingly.
Choosing Reset removes all controller changes and resets the default settings. Tempo markings inserted into ENF will still take effect. The end result is an aver- aging of all tempo values.
![]()
Working with Finale® and other scorewriters or programs. SmartScore full version works seamlessly with MakeMusic’s® Finale® program. If you already own a version of Finale or Print Music with SmartScore Lite, SmartScore can be made to launch automatically when “Music Scanning” is launched in Finale...
To launch Finale and import the current SmartScore file,
![]()
To save SmartScore files in one of several different file formats...
In the File > Save As (File type/Format) pull-down menu, choose one of the following formats to save the ENF score to:
![]()
MusicXML (.XML) MusicXML has quickly become the most widely used file format for the exchange of music notation files between scorewriters. Most well- known notation scorewriting programs now support importing and exporting MusicXML files including Sibelius®, Finale®, Notion®, Personal Composer® and others.
Playback may loose continuity for several reasons, e.g. system braces/brackets were cut off during scanning or in the case of optimized scores, where the number of parts varies between systems.
To merge two systems into one larger system,
Position your cursor over the topmost broken system or staff line. Hit Ctrl+L / Cmnd+L (Mac). The Re-link Parts window will open up.

FIGURE 4 - 30: Relink Parts / Merging Systems
The active system highlights in grey. Using the checkboxes, reassign each high- lighted staff to its correct part name and position in what will become the final, reformed system. Apply to = System.
Press the Next System button and reassign each highlighted staff line to its cor- rect part name as you did above. Return to the first staff of the final, reformed system by selecting Previous System.
Now, check the Merge with checkbox. When the Next System button is pushed, the two systems will join into a single system. Continue using Next System again until all separated parts are correctly joined. Review Part Name check- boxes for correctness.
Restoring a missed or “invisible” staff line
Occasionally, a staff line inside a system may have been missed during recognition due to flaws in the original score. Or in the case of an optimized score, you may want to restore a “hidden” (optimized) staff.
First, you want to check that parts in the shorted system are properly linked. Posi- tion the cursor inside the system and hit Ctrl + L to open Re-link Parts.
![]()
Put a check next to the appropriate visible parts. Leave the missing part unchecked. Make sure the order of the parts you check correspond to the actual staffline and the missing part remains unchecked. Hit OK.
Select the Properties tool (Esc key).
NOTE: Yellow arrows along each system bracket indicate all possible parts, visible or invisible. They correspond to the “Super System” in System Manager.
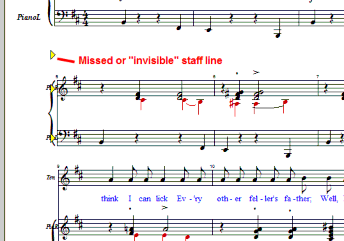

With your cursor in the affected system, click on a “floating” yellow arrow that corresponds to the missing staff line you wish to restore.
In the “Staff Properties” window check “Visibility”. Make sure “Show Staff” is also selected.
In the “Apply To:” pull-down menu, select “Current Staffline or System”.
TIP:Hit the “U” key and select Unify Key Signatures (based on First System). Hit OK and the key signatures of the score will become unified. Now you need only to fill in the missing notes. Remember you can always use Copy and Paste to clone measures of notes at a time whenever possible.
Occasionally, scores will contain collapsed or expanded systems (sometimes referred to as “optimized systems”). Unless you re-link parts, these systems will not playback with the correct instrumentation.
The Re-link Parts function allows you to reassign each visible staff with its correct part (as defined by Part Name in System Manager). By re-linking parts of optimized scores, parts will play back correctly as they disappear and reappear throughout the score.
NOTE: Parts listed in Re-link Parts window are derived from the Part Name column of the System Manager (see "System Manager", Section 7.4, on page 124 for more information). Checked boxes identify which parts are assigned to the active sys- tem. Before re-linking, make sure all possible parts have been created.
To re-link parts in a system,
From the FILE menu, select “Part Linking”. Or, hit Ctrl+L (Win) / Cmnd+L
(Mac). This will open the Re-link Parts window:.

Check the part names that are associated with each staff in the active system. Be sure to remove checks from parts that are not associated with the active system. Larger systems may require scrolling down the list. The program will not allow you to select more or less parts than actually appear in the active system.
To view adjacent systems, press Next or Prev System.
In the Apply To box, press Apply to apply to active system. System+ will apply to the active system plus all subsequent systems.
Page #1 of Orchestral Score
Page #2 of Orchestral Score
In this example, the first page consists of one system having 15 parts (15 staves per system). With the cursor positioned over the system and Re-link Parts opened, 15 parts will be checked.
The second page contains 3 systems each with 6 staves. Many parts that appeared on the first page have dropped out. With the cursor positioned over one of the systems, 15 Part Names will be listed but only 6 will be checked in the Re-link Parts window. In this case, it was necessary to remove all check marks and then check the top six parts to reestablish proper part linking.
See FIGURE 4 - 31:. Notice that the re- linked parts were applied to all subse- quent systems (System+) from the top- most active system.
FIGURE 4 - 32:
Re-linking an orchestral score
Go to the Playback menu again and select VST or AU Setup. Push Add and browse to the plug in folder created when your sound library was installed. If the plug-in folder cannot be located, reinstall the library and be sure to install the audio plug-in.
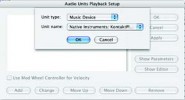
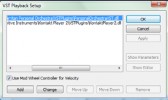
FIGURE 4 - 33: VST (Win) and AU (Mac) Setup
Go to Playback menu and select MIDI Devices. Click on “VST Plugins” (Win) or “Audio Units” (Mac) from inside the Output window. Click OK.
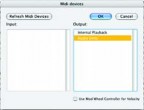
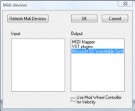
FIGURE 4 - 34: Playback > MIDI Devices
To return to your computer’s wavetable sound set, open Playback > MIDI Devices and reselect the desired driver.
![]()
Once the desired plug-in is selected, push OK. In the main ENF view, push the VST (or AU) button in the Toolbar to open the plug-in player.
![]()
It may be necessary to identify the MIDI device attached to your system in order for SmartScore to play General MIDI instruments. In the Playback menus, select MIDI Devices and choose General MIDI or MIDI Mapper. Most computers today provide built-in MIDI synthesis. This allows you to select and play General MIDI (GM) sounds without installing an outboard synthesizer or soundcard.
To set the MIDI input and output devices,
Select MIDI Devices from the Playback menu. The MIDI Devices window will open.
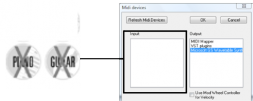
FIGURE 4 - 35: Playback > MIDI Devices
![]()
Click on the MIDI Output device you wish to use for MIDI playback. The MIDI device window will display all installed MIDI device drivers.
If you intend to record in SmartScore, select the desired MIDI recording device/ interface in Input window.
NOTE: If the desired device is not listed in the MIDI Devices window make sure your MIDI device driver has been properly installed.
Press OK to set the selected MIDI devices as your MIDI sources.
NOTE: You may need to close any open MIDI programs. Some MIDI programs prevent playback by blocking the MIDI Out port.
To access Audio MIDI Setup in Mac OS X, locate “Utilities” folder inside the “Applica- tions” folder. Double-click on Audio MIDI Setup.
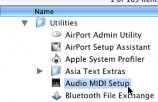
FIGURE 4 - 36: Applications > Utilities > Audio MIDI Setup (Mac)
If you have external MIDI devices installed such as an external synthesizer module and MIDI interface, they should appear as icons in the window. Using your mouse, drag the “Out” arrow of the source device to the “In” arrow of the receiving device and vice-versa. Internal connections should then be established. Close Audio MIDI Setup.f
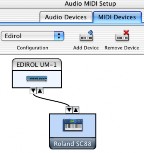
FIGURE 4 - 37: Connecting MIDI Devices in Audio MIDI Setup
With SmartScore ENF file open on your Mac, go to Playback menu, click and select Play- back at the bottom of the list. Choose CoreMIDI Playback to activate devices connected in Audio MIDI Setup. To activate built-in soft-synthesizer (Macintosh QuickTime Musical Instruments), choose QT Internal Playback.
![]()
![]()
This section describes basic SmartScore editing features. For information on advanced editing techniques such as part extraction, optimizing scores, managing systems, applying or changing instrument templates, reformatting, respacing, page reformatting, print setup and part linking, turn to Chapter "Detailed ENF Editing", Section 7), on page 115. Many editing and playback default settings are accessible in either Document Preferences or Program Preferences under the Edit menu. See "Preferences", Section 11.1, on page 225 for details.
Only one staff can be edited at a time. Positioning your mouse over a staff will cause it to highlight black. Objects associated with the highlighted staff (including text and lyrics) can then be edited. You can choose to display just the active staff or to all staves in black.
To display all staff lines in solid black,
Go to the View menu and uncheck Show Active Staff.
To lock the active staff and allow the mouse to move anywhere,
Hit the Caps Lock key. To unlock the active staff, press again.
Several ENF page view layouts are available after scanning.
To select a different page view layout,
Click on any one of four page view buttons in lower Status Bar.
![]()
FIGURE 5 - 1: Page View Buttons
View ENF pages horizontally
View pages vertically
View pages in book format (facing pages)
View score in horizontal scroll format (long view)
NOTE: Whenever the ENF and TIFF view panes loose synchronization, e.g. in Long View mode or after score reformatting, the Image display pane will close and the “Scan View” window will appear instead. Closing the Scan View window will re-initialize normal Image / ENF view panes.
The TIF/ENF split screen format can be changed to display only the ENF view with a floating “scan view window” corresponding to the same region in the scanned image where your cursor is placed.
To view full-screen ENF pane with a floating scan window:
Go to the Window menu and select Scan View window.
By dragging the Split Pane control up or down, you can quickly view more of the TIF pane or more of the ENF pane.

FIGURE 5 - 2: Window pane shade control bar (View > Split Screen > Vertical)
The slider to the right of the Toolbar controls both the TIFF / ENF window shade bar.
An opaque ENF-over-TIFF view is available on Macs. The ENF-TIF slider adjusts the opacity of the ENF overlay from 0 to 100%.
To edit using ENF variable-opacity overlay,
Go to View > Split Screen > Overlay.
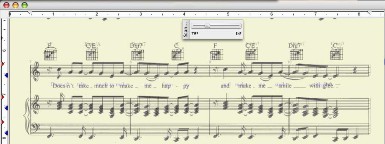
FIGURE 5 - 3: ENF / TIFF overlay view (Mac only)
To change zoom level in any view window,
Select one of 3 zoom levels in View > Scan View window.
To Zoom in and out,
![]()
Left click will increase the scale of your view (Zoom In), while right-click (Option + click for Mac) will decrease the scale of your view (Zoom Out). Ctrl
+ scroll wheel works for zooming in and out as well.
•
To page forward or backward in an ENF document,
The Next / Previous page control buttons are located to the far right of the ENF ![]() Toolbar.
Toolbar.
To add a new page with empty systems,
![]() • Push the Add New Page button in the Status Bar.
• Push the Add New Page button in the Status Bar.
The status bar at the bottom of the SmartScore window contains information about the current page being viewed. Clicking inside any of these fields will open a control window: Page Number (Go To), Page Size (Page Setup) or Zoom Level (Zoom).
For editing, we recommend a “left-hand-on-keyboard” technique as shown below. The left index finger is over the “C” key, the left middle finger is over the “X” key, the left ring finder is over the “Z” key and the small finger is over the “CTRL” key.
NOTE: You will find editing fast and easy once you begin working with this “Quick Keys” method:
FIGURE 5 - 4: Left-Hand Position for ENF Editing
To change the pitch of any note,
Position the mouse over a staff line. Hold the Shift key down with your small left finger then click and hold on the control point in the center of the notehead. Drag the note head up or down to shift its vertical position in the staff.
To change the pitch of several notes at once,
![]()
Press “O” key to activate the Select tool in Toolbar.
Click and drag a box around any series of notes.
Hold down the “Shift” key and drag the notes up or down.
![]()
FIGURE 5 - 5: Measure with rhythmic error (1 beat is missing)
For neatness sake, many scores intentionally truncate second and third voicelines. Nor- mally, truncated voices will not cause playback problems provided notes on the same beat are vertically aligned.

FIGURE 5 - 6: Voice #2 (stem down) is truncated causing measure to highlight
Pickup measures and measures split between systems play back without pauses by select- ing Properties Tool (Esc key), clicking the beginning barline of the pickup, closeout or split measure and choosing “Play as written”.
NOTE: The red color used to highlight flag error measures can be turned off by uncheck- ing “Show Error Measures” under the View menu.
![]()
Musical symbols can be selected from one of several floating tool palettes posi- tioned on the left side of the screen. Symbols with multiple values are grouped inside a single “master’ button identified with a small arrow. By holding down any button containing an arrow, the entire set of selectable symbols will expand to the right.

![]()
FIGURE 5 - 7: Expandable Palette Buttons (Notes and Rests)
Quick-select (Ctrl + Click):
You can select any symbol on a page without having to find it in a palette. Hold the Ctrl
key down and click on any object The cursor will inherit that object’s properties.
![]()
Insert mode (Insert button on the Toolbar.) is activated by hitting the “C” key on your computer keyboard. It also activates with Quick-select (Ctrl+click on an existing symbol) or when a symbol is picked from the Tool Palette. The selected symbol will insert into a staff line or will change an existing symbol when its clicked on.
To change the value an existing note, rest or other symbol:
Select a note or rest within the same symbol class but with a different value.
Position your cursor over the symbol to be changed until it highlights yellow.
Then click to change the new symbol.
NOTE: When a note highlights light blue, clicking will insert a new note in another voice at the same vertical event. See "Working with Contrapuntal Voices", Section 7.9, on page 159 for more about vertical events.
In Insert mode, the default stem direction of a note switches when the cursor crosses the middle line of a staff.
To insert a note with the opposite stem direction as shown by your cursor, with a right- click (option + click for Mac).
To reverse the stem direction of one or more selected notes,
Select one or more notes with the Select Tool (“O” key). Hit the “S” key to change stem direction of the selected notes.
To change the stem direction of an existing note,
a. In Insert mode, right-click (option + click for Mac) on any note once it high- lights yellow.
There 4 methods for deleting objects. They are:
![]()
![]()
![]()
“Control Delete”: Quick-select (Ctrl+click) any symbol. Hit the “X” key. Click on any object of the same class to delete it. NOTE: In this mode, note clusters will be deleted.
![]()
“Clustered Note Delete”: Hit the “X” key (or push the “Delete” button in the Toolbar). Now hit the “Z” (cluster) key. In this mode, single noteheads of clusters will delete.
To undo any single action,
Click the Undo or Redo button to reverse the last editing action. Or hold the Ctrl
down and hit the “Z” key (Cmnd + Z for Mac).
To Undo or Redo one or more previous actions
To select one or more actions to be reversed, click the small arrow to the right of the Undo or Redo buttons. Drag to select multiple actions. Push “Undo Actions” or “Redo Actions”.
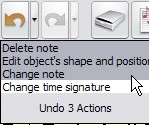
To insert additional note heads to existing note stem:
![]()
![]()
In Insert mode, additional noteheads can be added to an existing note stem sim- ply by clicking above or below an existing note provided the selected note value (displayed by the cursor) is the same as the existing note stem. Position the cur- sor on the correct line or space and when the note highlights yellow, click to insert.
To add a notehead to any existing note stem (regardless of what is shown on your cursor), hit the “Z” key (“Cluster tool”). When the existing note highlights yel- low, click to insert new notehead.
To delete a notehead from existing cluster:
![]()
Select Cluster tool from the Notes palette (“Z” key). Then hit the “X” key Click- ing on any notehead in a cluster will remove a single notehead. The Delete clus- ter tool also works to delete single-headed notes.
NOTE: Always use the Cluster tool to remove single note heads. The single greyed note and arrow will delete entire note cluster.
To edit beamed notes:
![]()
Hit the “C” key (or click on the Insert button for Insert mode) and select a flagged note from the “Notes” palette. Then choose a beam direction from the “Beams” palette or the “A” key on your computer keyboard. If a similar beam note is nearby, Ctrl + click on it to select it.


Notes palette (expanded) Beams palette (expanded)
FIGURE 5 - 9: Editing Beamed Notes
To form a beamed group, insert the selected beamed note by clicking into a staff (not adjacent to another beam group). Repeated clicks will form successive 2-note beam groups when “left” or “right” beam direction is selected. One continuous beam group will be created when the “middle-beam” is selected. Auto-Beam can be used, but it may also cause re-coupling of other beams in the measure. See "Score Properties", Section 7.3, on page 120 for more details.
Inserting a “right” or “middle” beam to the left of an existing beam group will cause that note to attach itself to the beam on its right. Likewise “left” and “middle” beams will attach to the right of an existing beam. Clicking inside an existing beam group with the “middle” beam selected will insert a beam note inside the beamed group.
Clicking on an yellow-highlighted beamed note will change its note value and/or beam direction as indicated by the cursor.
To delete a beamed note, Quick-Select it, hit the “X” key and clicking again to remove it. Deleting an end beam will cause the beam to join to any adjacent beamed groups.
To create a single beam group from adjacent flagged or beamed notes:
Use the Select tool (“O” key) and highlight any number of adjacent flagged notes. Hit the “B” key to join the notes into a single beamed group. The “B” key will also join two or more adjacent beam groups that are selected.
While in the Insert mode, hit the “I” key (or select any barline from the “Bar- lines & Repeats” palette).
Click anywhere in the active staffline to Insert a barline.
Deleting a barline at the end or beginning of a system will cause that measure to roll up or down to an adjacent system. Follow this step to delete or change a barline type that ends or begins a system...
To change a barline at the end of a system to another barline type,
a. Insert the desired barline type to the left of the barline that you wish to remove.
Delete the barline (“X” key then click). The measure will shift slightly to the left but not roll to an adjacent system.
![]()
The Properties tool is found in the Toolbar. Certain playback and display proper- ties of most symbols can be edited by clicking with the Properties tool. Changes can be applied to all similar symbols in the score as well as all identical symbols created in future files.
![]()
![]()
With the Properties tool selected, click on the barline preceding the measure of interest. For details on controls, see "Barline Properties (Pickup measures and Codas)", Section 4.9.11, on page 70.
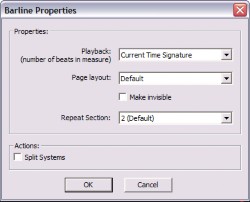
FIGURE 5 - 10: Barline Properties
With Properties tool selected, click on any note head. Here you can change note values, dots and even the appearance of the notehead.

FIGURE 5 - 11: Note Properties
Refer to "Playback Properties", Section 4.9 for details on Note Properties and other play- back properties including:

Other transposition methods such as transpose-by-clef, transpose within a selected range and transpose-notes-only are all possible. To transpose the key of a score, first check that the “source” key signature is correct before applying any transposition function...
![]()
The “source” key signature will appear in the main window with its signature name listed in both major and relative minor keys.
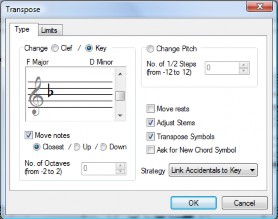
FIGURE 5 - 12: Key Transposition
Choose to transpose either by Key or by Clef or by Pitch.
Use the scroller to select a new key signature if by Key or a new clef sign if by
Clef.
With Closest selected, SmartScore will transpose to the target key, up or down, with the least number of intervals. Choose Up or Down if you wish to make your own choice. Push OK.
For information on additional transposition methods turn to "Transposition", Section 7.2, on page 117.
![]()
If your score was scanned, ENF pages will probably not be centered. Page Setup provides various tools for controlling print layout. The simplest way to center music on each page is to select the Fit to Page layout option.
To center ENF frames prior to printing...
![]()
Open Page Setup. In the Document Page Setup pull-down menu, choose Center on Page. Click Apply.
NOTE: Various document layouts can be applied in Page Setup. For exam- ple, you may want to have alternating left/right margins for bound scores.
To explore other printing layout options, see "Changing default margins", Section 6.3.2, on page 106.
To print your score,
Select File > Print or push the Print button in the Toolbar.
Select File > Save As PDF.
To select an alternative PDF creator application for Windows,
Open Edit > Program Preferences and click on ENF-PDF.
Install an alternative PDF creation program and select it in the pull-down menu in the upper part of the window.
Modern “intelligent” scanners can (and will) do some unexpected things... in order to attain required resolutions (dpi), some scanners will actually re-scale the size of the image. An 8.5” x 11” page may end up becoming 9” x 13”. Since SmartScore matches the size of music scanned exactly, the resulting ENF file may print off the page. If this is the case, you can “optimize” the size of the SmartScore frame to fit precisely inside the margins of your default page size and orientation.
To re-scale (optimize) your ENF pages,
Center the score on the page. (See "Page Centering", Section 6.3.1, on page 105)
Go to File>Format Score. Check Scale score. Push Find Optimal. OK.
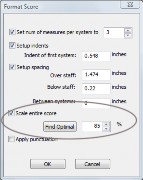
FIGURE 5 - 13: Format Score window
![]()
TIP:The Reset Workspace button (or F1 key) will reset all windows and palettes to their default “startup” positions. It’s useful if your workspace gets messy.
You can save the current ENF file at any time by pushing the Save button in the ![]() Toolbar or by hitting Ctrl + S (Cmnd + S for Mac).
Toolbar or by hitting Ctrl + S (Cmnd + S for Mac).
To save SmartScore files in one of several different file formats.
In the File > Save As (File type/Format) pull-down menu, choose one of the following formats to save the ENF score to:
![]()
MusicXML (.XML) MusicXML has quickly become the most widely used file format for the exchange of music notation files between scorewriters. Most well- known notation scorewriting programs now support importing and exporting MusicXML files including Sibelius®, Finale®, Notion®, Personal Composer® and others.
Press Save. The proper extension will automatically be added.
To copy a full page:
Open 3rd-party application, position cursor and Ctrl + V/Cmnd+ V (Paste).
Press the “O” key to activate the Select tool.
Right click (option + click for Mac) and drag to select a region in an ENF page that you wish to copy to the clipboard.
Select Edit > Copy (Ctrl +C / Cmnd+C) to copy selected (highlighted) region to the clipboard as a bitmap image.
Open application that supports bitmap graphics and select Paste.
![]()
TIP:Use this feature to take “snapshots” of musical snippets and Paste into word pro- cessors or other non-music programs.
![]()
SmartScore full version works seamlessly with MakeMusic’s® Finale® program. If you already own a version of Finale or Print Music with SmartScore Lite, SmartScore can be made to launch automatically when “Music Scanning” is launched in Finale...
To replace SmartScore Lite with SmartScore full in Finale:
In SmartScore, open Edit > Program Preferences. In the User Interface tab, place a check in the “Integrate with Finale” option. Push OK to apply.
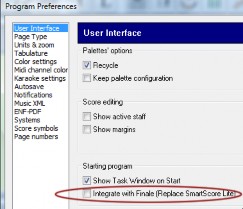
FIGURE 5 - 14: Program Preferences > User Interface
Always edit your music in SmartScore before bringing it into Finale. You will loose a lot less in the translation. You may find it more convenient to work entirely in SmartScore (e.g. transposition, playback and printing) or you may decide at some point to bring the SmartScore file into Finale.
•

To launch Finale and import the current SmartScore file,
Push the “Save as XML and open in Finale” button in the lower Toolbar. The cur- rent ENF file will be saved as an XML file. Finale is then launched (provided it is
installed) and the SmartScore file will import as a MusicXML file.
TIP:Before exporting any SmartScore file to another program, make sure it is edited first. Small mistakes become compounded if the file is not cleaned up. This is especially true for key and time signatures and measures with rhythmic prob- lems.
SmartScore isn’t only about scanning. It is also a full-featured scorewriter as well. When creating a new score from scratch, certain defaults will turn on such as auto-beaming and auto-spacing.
To create an empty ENF score using one of several basic templates,
![]()
Push the Score button on the Navigator or select New > New ENF under the File
menu (Ctrl + N (Win) / Cmnd + N (Mac)).
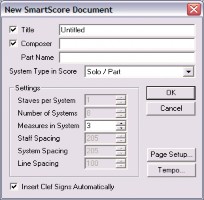
FIGURE 5 - 15: New score window
Type in a Title for the new score.
Add the Composer’s name for the first page score header.
Press the Page Setup button to change the basic page layout of your score. See "Custom document layouts", Section 6.3.5, on page 107 for details.
Uncheck Insert Clef Signs automatically to create an ENF document without clefs.
SmartScore has 15 preset 2-page templates including solo instrument, piano, duet, com- mon vocal and orchestral scores and a custom setup.
Select a desired template from System Type in Score window.
To add a new page,
a. Push the “Add New Page” button on the right of the status bar.
![]() b. Or, push the Properties Tool, right-click into any staff line and select “Add
b. Or, push the Properties Tool, right-click into any staff line and select “Add
c.
d.
![]()
Empty Page” from the Score Properties window.
To delete an empty page,
To delete a page, all systems on the page must first be removed. Right-click (alt for Mac) into each system of the page you wish to delete. Select “System > Remove” in the Score Properties window. Repeat as necessary.

![]()
![]()
![]()
![]()
The MIDI Edition will allow you to edit the score and even reformat page layout, etc. However, since MIDI Edition does not print, it doesn’t make a lot of sense to spend time changing score layout because this edition will only create MIDI files and/or burn to CD.
Measures, staff lines, systems and even pages can be resized, compressed or expanded while maintaining proper note spacing. Parts can be extracted from the score and/or recombined to form conductor’s scores. Page layout and margins can then be selected, modified and previewed prior to printing.
Several interesting and useful reformatting possibilities can be applied when barlines are repositioned in Nudge mode:
Measures can be compressed or expanded in Nudge mode. This may cause measures to scroll from system to system. Also, the number of measures per line may be set to a fixed number. These actions will cause the score to reformat.
For more details, see "Repositioning measures using barlines", Section 7.5.6, on page 132. For setting fixed number of measures per system, see “Set Number of Mea- sures” in Section 7.3.2, "Staff Properties" on page 122.
System widths can be changed one-by-one or globally.
To globally change system widths,
See "Changing default margins", Section 6.3.2, on page 106.
Single system widths can be changed in the ENF main view by dragging either end point tab in the upper ruler margin.
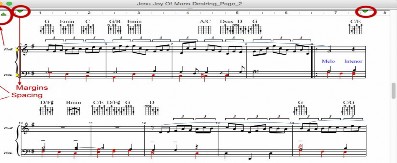
FIGURE 6 - 16: Using tabs to change staff distances and system widths
The lower tab towards the left margin adjusts the position of instrument Part Names.
To visually increase/decrease staff and system distances...
Position the cursor over a staff to make it active. The bottom-most red tab controls the distance between the active system and the system below it. Each staff will have a red
tab aligned with its topmost line. These tabs change distances between staff lines. The “T” tab on top changes the margin between the active staff and the staff above it.
Active Staff
Changing staff distances (Red tab)
Changing system distances (“T” tab)
FIGURE 6 - 17: Using tabs to change staff distances and system widths
To increase/decrease the height of individual staves...
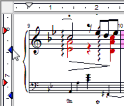
Drag the blue tab aligned with the bottom line of any staff up or down. The staff will resize vertically.
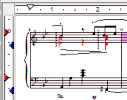
Resizing staff height (Before dragging blue tab)
Resizing staff height (After dragging blue tab)
FIGURE 6 - 18: Using tabs to change staff distances and system widths
To preview and change a document’s page layout,
Push Page Setup button in the Navigator (File > Page Setup)
![]()
If your score was created out of recognition, the Document Layout pull-down menu will show “From Recognition”. Each page frame represents the exact area cropped when each page was scanned. Choices include selecting a default page size and orientation as well as centering music on the page or else choosing one of several preset layouts as described below.
To apply selected page size / orientation and center music on pages,
Make sure your Page Type is correctly set to your paper size.
In the Document Page Setup pull-down menu, select
Center on Page.
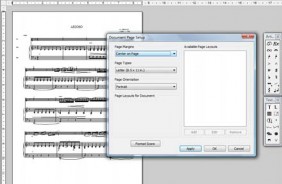
FIGURE 6 - 19: Document Page Setup (Center on Page)
Push Apply. Score pages in the background update with changes.
NOTE: Each page can be fine-tuned by dragging either of the frame tabs in the left mar- gin up or down. Use the bottom scroller to view and reposition each page up or
down if necessary. Once you are satisfied with the layout of your document, push
Page margins can be changed in the Page Setup window after selecting a layout choice and page type/orientation. Changes to margins must be made on a page-by-page basis.
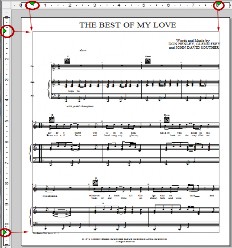
FIGURE 6 - 20: Document Page Setup (Center on Page)
In Page Setup, change margins of each page by moving tabs inside the vertical and/or horizontal rulers.
To change page orientation of an entire ENF score (e.g. from Portrait to Landscape).
In Page Setup, choose the layout (e.g. Centered) then choose a page type and orientation (Landscape or Portrait).
Move the left and right margin tabs to achieve the desired system width / margin spacing for each page.
In the page preview, you may see systems too close to the top or bottom of the page. Or you may see large gaps at the bottom or top of pages. You will need to change system dis- tances in these cases.
In the English version of SmartScore, the default page size and type is Letter / Portrait. In European versions, A4 / Portrait is the default page type. The default for Page Type can be reset in Edit > Program Preferences.
To permanently change your default Page Type and orientation,
Go to Edit > Program Preferences > Page Type
Select “Letter”, “Legal” or “A4” for your default page type / size.
Custom document layouts (other than Center to Page) are intended for publishing printed scores that will be spiral bound or stitched together. Page margins and system widths will be altered depending the page size and orientation of the layout scheme you select. Since pages will probably become reformatted, you may see systems move from page to page. We recommend that you correct (edit) the full score first while the TIF-ENF panes are still synchronized.
NOTE: In the English version, Page Type size is “Letter”. In European versions, “A4” is the default page type. The default for Page Type can be reset in Edit > Program Preferences.
To select an alternative (custom) document layout,
Select the layout you want to apply from the Document Layout pull-down menu as described below:
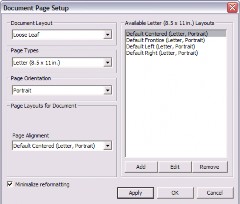
Page Layout: Loose Leaf
Single-sided pages with music centered in the middle of the page
Page Alignment: Centered
Page Margins: 0.5” Top, Bottom, Left, Right
Page Layout: Loose Leaf with Header Page
Single-sided, centered pages with first page having a 2” header:
Front Page: Centered
Page Alignment: Centered
Page Margins: 3” Top (1st page). 0.5” inch Top, Bottom, Left, Right (remaining pages).
Page Layout: Facing
Left / Right pages with increased inside margins for binding
Left Page: 1.5” right margin Right Page: 1.5” left margin
Page Margins: 0.5” Top, Bottom, Side (default)
Page Layout: Facing with Header Page
Left / Right pages with first page having a 2” header
Front Page: Centered
Left Page: 1.5” right margin Right Page: 1.5” left margin
Page Margins: 3” Top (1st page). 0.5” inch Top, Bottom, Left, Right (remaining pages).
You may wish to create your own personalized layout and add it to the existing layout schemes.
To create a new document layout:
In Document Layout pull-down menu, select a Custom Layout (other than Center to Page). Push the Add button.
Give a name to the new layout.
Reset the numerical scrollers on Left, Right, Top and Bottom or simply click and drag the margin guides inside the preview window. You may also change page orientation and page type from the pull-down menus on the right.
Push OK to create the new layout.
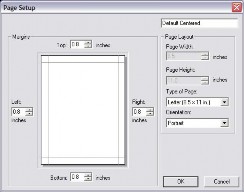
FIGURE 6 - 21: Default Page Margin Control
This window provides tools that can reformat the ENF score including line and staff spac- ing, measures per system and even a tool that re-scales (optimizes) the ENF frame should your scanner force re-scaling the image instead of resetting dpi.
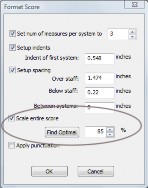
FIGURE 6 - 1: Format Score window
Select a fixed number of measures for every system in the score.
Apply auto-spacing to reformatted measures.
Set indent for 1st system.
To rescale the ENF score (optimize page size for printing)
Push Find Optimal button in Format Score window. The optimal ENF page resize amount is calculated and will appear in percentage window.
Push OK to apply change in page size.
Open Page Setup (File > Page Setup) and change Document Layout to “Center on Page”. Push Apply to view changes in Preview mode. Push OK to close Page Setup.
Score Structure (Edit > Score Structure) is a powerful tool that allows you to create entirely new scores by removing, creating and re-linking parts. By simply dragging links around, you have the ability to remove parts, extract parts and join individual part scores into multi-part “conductor” scores. See "Recognition Sequence", Section 3.5, on page 35 for more info.
With multi-staff score open in ENF vies, select Edit > Score Structure.
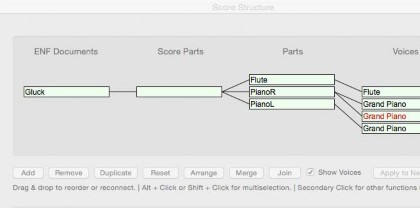
FIGURE 6 - 2: Score Structure (Typical Piano/Vocal Arrangement)
To isolate the part/s you want to extract, click on all the parts you don’t want and push the “Remove” button at the bottom of the screen.
Push Apply to New. The extracted part/s will open in a new ENF document. Your original document will remain open and unaffected.
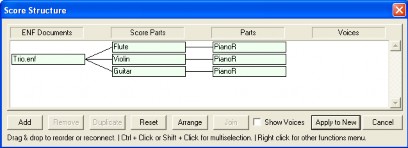
FIGURE 6 - 3: Score Structure (Typical 3 Score-Part structure)
To view score hierarchy & create a conductor’s score from score parts,
Click on any Score-Part to highlight it and push the Insert button at the bottom of the window. You will see a blank Score-Part appear.

FIGURE 6 - 4: Inserting new Score-Part
NOTE: Inserting a new ENF Document will work just as well. In either case, applying the change (Apply to New) will create a brand new ENF document, leaving the original file untouched.
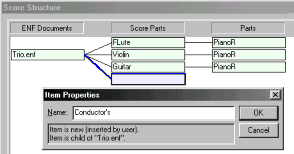

Naming new Score-Part in Properties
Re-linking Parts to new Score-Part

New Conductor’s Score (Apply to New)
To the left, a new, empty Score-Part was Inserted (you could also re-link parts to an existing Score-Part). Here, the new Score-Part is given a name (Win: Right-click / Mac: Option + click to open its Properties). To relink any structural object, click on the object and drag it to another object in an adjacent column. Here, the three existing parts are relinked to the newly cre- ated Score-Part (named Con- ductor’s).
FIGURE 6 - 5: Creating a Conductor’s Score
Highlight the unlinked Score- Parts and push Remove. Push Apply to New. The modified structure is transformed to a new ENF document.
NOTE:Newly-created docu- ments will have the same name of the source file plus “1”, “2” etc.
Extracting instrumental parts out of a conductor’s score in Score Structure is similar to creating a conductor’s score from score-parts, just reversed. NOTE: All SmartScore files (ENF documents) must contain at least one Score-Part linked to at least one Part.
Open an ENF file with 2 or more staves per system.
Select Edit > Score Structure.


Inserting New Score-Parts

Naming and re-inking Parts to New Score-Parts
Here is a typical “ensemble” score containing several parts linked to it. Since all parts are joined, there is only one Score- Part.
Click on the empty Score-Part and push Insert to create three new Score-Parts. Drag each Part (child) to new Score Parts (par- ent) to deconstruct the ENF doc- ument. Right-click (option + click for Mac) in Properties and give a name to each.
FIGURE 6 - 6: Creating Score Parts from Ensemble scores
Push Apply to New. This will create a new document with 4 Score-Parts arranged in order (all pages of Part 1 first, then all pages of Part 2, etc). Playback remains synchronized. Again, the original ENF document will remain open and unchanged.
![]()
![]()
![]()
TIP: Refer to the Quick Keys map (FIGURE 7 - 4:) for a graphic depiction of all SmartScore keyboard shortcut keys.
The fastest way to choose any object for inserting, deleting or changing is to Quick-select it first. Ctrl + Click on any object inside the active staff and the cursor inherits all of that object’s attributes.The cursor becomes any object that is Quick-Selected.
To insert a symbol anywhere in the active staffline,
Toggle the “C” key to activate the Insert mode.
Quick-select any symbol or select it from a tool palette.
To change the rhythmic value of an existing note or rest,
Quick-select (Ctrl+click) a nearby note or rest having the desired value. Or select a new value from the “Notes” or “Rests” palette.
Position the cursor over the symbol to be changed until it highlights yellow. Click to change it to the selected value.
NOTE: When you Quick-select on any object inside the active staff, the palette associ- ated with the object will open.
To delete an object in the active staff,
Quick-select (Ctrl + Click) a note or non-lyric symbol.
Press the “X” key and click on any note or non-lyric symbol to delete it.
To delete one or more object using the Select tool,
Press the Select tool icon in the Toolbar.
Click on an object or drag a region to select one or more objects.
Hit the Delete key to delete selected object(s).
![]()
Use the Select tool to highlight one or more objects for single or mass editing functions such as copying, deleting, splitting voices, flipping stem directions and joining notes of different voices to a vertical event. The “O” key activates this tool. Its button is found in the Toolbar.
TIP: Use the Select tool + Delete key to remove any object other than lyrics and bar- ![]() lines. It is especially useful for removing a large number of spurious or
lines. It is especially useful for removing a large number of spurious or
unwanted text or multiple objects that do not delete easily with the “X” key.
To delete one or more objects including notes, rests and symbols,
Push the Select tool icon in the Toolbar (“O” key) and click on an object or drag to select multiple objects to delete.
Hit the Delete key.
NOTE: Occasionally, you might find an area full of incorrectly recognized ties and/or slurs or hairpins. Use this tool to “mass-delete” these objects.
Refer to Section 11.3.3 through Section 11.3.5b for details on how to use the Select Tool to clone measures or entire score segments and place them elsewhere in the music.
A group of selected notes on the same staff can be transformed into one beamed group if they are flagged or they can be pitch-shifted at once.
To convert a sequence of flagged notes into one beamed group,
Use the Select tool (“O”) to select a group of adjacent flagged notes to be beamed together.
Hit the “B” key to form the flagged notes into a beamed group.
To move a selected group of notes upwards or downwards in pitch, To delete spurious articulations on a page,
Use the Select tool (“O”) to select an entire region for cleanup. Edit > Select All
(Ctrl + A) will select everything on the current page.
Hit the “G” key. Only articulations will be deleted. All other notation objects remain unaffected.
SmartScore offers several types of transposition options depending on your needs. You can transpose by key, the most common type of transposition. Transposing by clef is use- ful for transforming one instrument to another written in another clef sign. You can also choose to transpose by altering note pitches only, either considering the active key signa- ture or by ignoring the active key signature. Using the Limit option, you can choose a specified range, part or voice to transpose.
To Transpose your entire ENF document to a new key,
Position your cursor inside the first staffline of the score. Press Ctrl + T / Cmnd
![]()
+ T for Mac or select the Transpose button in the Toolbar or select Transpose from the Edit menu. The window in Transposition always displays the key signa- ture or clef sign of the active staff. This is your source key.
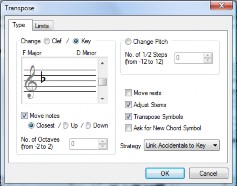
FIGURE 7 - 7: Transposition window
Select a new target key or target clef for the score by selecting either the Key or
NOTE: It is recommended that you fully edit your score before transposing. If your score contains incorrect change-of-key signatures and/or guitar fret and chord symbols, it may be hard to Undo properly. Also, the scanned score won’t transpose and visual checking of pitches will be difficult after transposition.
You can choose two “strategies” for transposing your scores: Link Accidentals to Key
and Keep Line-space.
Link Accidentals to Key
This choice will consider the target key signature during transposition. If the target key belongs to the opposite class than that of the source key (e.g. transposing from a key with sharps to a target key with flats), then accidentals may be swapped to their harmonic equivalents.
Keep Line-Space
This choice will retain exact relationships between intervals after transposition is com- pleted. Accidentals will generally remain fixed. No attempt will be made to swap har- monic equivalents of accidentals. For example, c and d# may transpose up to c# and d double-#.
Transpose Symbols
To transpose guitar fret and chord symbols to match the new target key, check this box. This selection will also move articulations, such as slurs, up or down along with notes and rests. If necessary, guitar fret and chord symbols may move up to avoid collisions with upwardly-transposed notes.
Ask For New Chord Symbol
This option allows you to accept or change each transposed guitar fret and chord symbol during transposition. Use this option when you know you won’t accept default fretboard patterns or when you know you will need to add new fret and chord symbols to the library.
Adjust Stems
Move Notes
Uncheck this box to leave the notes in their original positions. This will transpose only key signatures, leaving notes unchanged... good for mental games, but not much more.
Change Pitch
This transposes notes without changing the key signature. Select the number of half-steps to move selected notes (harmonic pitch shift). Pitches are moved by a uniform interval while considering the key signature. Change Pitch can be used in conjunction with Limits tab.
TIP: To shift the pitch of a small range of notes, it is easier to use the Select tool (O).
![]() Hold the Shift key down, drag the selected notes up or down.
Hold the Shift key down, drag the selected notes up or down.
Limit Transposition
You may limit transposition to a part or voice or to a selected range within the ENF score.
To limit transposition by part, voice or range,
Click on the Limit tab at the top of the Transposition window.
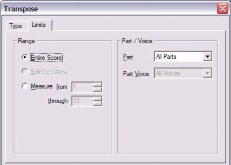
FIGURE 7 - 8: Limit Transposition
Choose All Parts, or select individual parts by name to transpose. If you select a single part, you may also limit the scope of transposition to a single voiceline. In the Part Voice box, select the voice to transpose.
To limit transposition by range, choose Selected Area (range must already be highlighted by the Select tool) or by Measure number.
Click OK to transpose with selected limits applied.
The “Score Properties” window contains powerful options for controlling staff and system spacing, bracketing and part linking (for re-linking parts in optimized systems). Other major editing functions include adding or removing a part (staff) to the score (Section 7.3.8), adding or deleting a system(Section 7.3.7) and appending a score-part to the ENF file (Section 7.3.9).
Select “Score Properties” from the FILE menu, Or, with Properties Tool selected, right-click (alt / option + click for Mac) inside any staff line of any system.
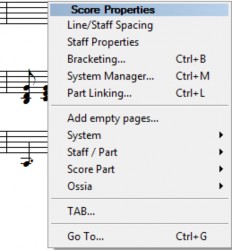
![]()
FIGURE 7 - 9: Score Properties (Right-click inside staff line)
With the Score Properties window open, select “Staff / Line Spacing”.
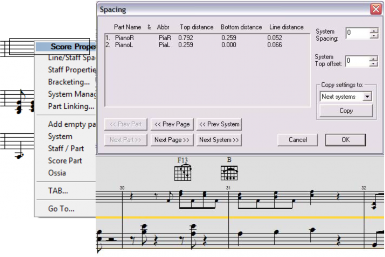
FIGURE 7 - 10: Line/staff spacing window
Here are some practical examples:
Improve page layout by optimizing number systems in pages.
Create piano accompaniments with smaller (reduced) solo parts.
Create large-notehead (“E-Z Read” format) scores.
Resize staves converted from TAB to melody and vice-versa.
To numerically change staffline and system spacing,
Select FILE > “Score Properties”.Or, Right-click (alt + click for Mac) inside a staff line. In Score Properties, choose “Line/staff spacing” among the options.
Make changes to staff line distances and to top / bottom staff spacing in the active system. Push OK to view changes.
To apply distance changes to other systems in the score,
Once changes in distances are confirmed in the ENF display, right-click on the source system and select Staff Line Spacing again to continue.
In the Copy Settings To area, select either “Next Systems” or “All Systems”. Next Systems will change subsequent systems and All Systems will change all systems in the score.
Push Copy to apply the changes. Push OK to close the window.
Use the Next System or Previous System buttons to compare settings. To visually
check changes in the ENF display, push OK and examine changes made.
With Properties Tool arrow, click into any yellow marker to the left of a staff line.
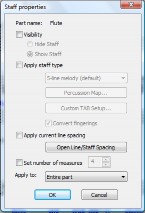
 Staff properties for that part are shown in the window.
FIGURE 7 - 11: Staff Properties window
NOTE: Turning off visibility permanently removes all notation symbols.
The following sections of the Score Properties window (File > Score Properties) addresses adding/removing parts (staff lines), systems, pages and score parts to the score.
This command will append an empty page to the end of the score.
Select one of these commands to insert a new, empty system above or below the active system or to delete the active system.
NOTE: Added systems will include every part contained in the Super System. See Sec- tion 7.4.6, "Super System" for details. If it’s necessary, individual parts (staff lines) within any system can be optimized or made “invisible”. Refer to “Visibil- ity” in "Staff Properties", Section 7.3.2 for details
Use to insert a new part into the score or to remove the active staff line from the system. The “Insert” command is identical to the “Add Part” button found in the System Manager (see "Adding a new part to the score", Section 7.4.5, on page 127). The “Remove” com- mand removes only the active staff line from the current system. To remove an entire part from the score, refer to "Deleting parts", Section 7.4.8, on page 129
Use this tool to delete or insert an ossia above or below the active staff. Inserted ossias are editable just as any normal staffline except that ossias are not played back.

FIGURE 7 - 12: Ossia
To resize an ossia,
Hold the Shift key down (Nudge mode) and drag either of the control points at either end of the ossia. Barline, key and time signature information is inherited from its associated staffline.
Re-space ossias using tabs in the left margin just as any staffline.
This command opens the “Staff Properties” window and applies “6-string guitar” TAB
Use this tool to jump to a new measure, page or score part.
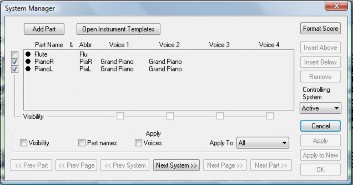
Use the System Manager to add, assign or change instrumental parts, change part names and to extract parts and voices by controlling visibility.
![]()
FIGURE 7 - 13: System Manager window
The System Manager displays information about what is found in the active system (the highlighted system). Changes made can be applied to the current system, current plus sub- sequent systems, to the entire score or limited to the current Score-Part.
To open the System Manager,
Position the cursor over a given system in the ENF view.
![]()
Press (Ctrl+M / Cmnd+M) or select Edit > System Manager from menu. All parameters of the active system will be displayed including part name, visibility and assigned MIDI instruments.
Parts of the system run vertically along the far left column. Checkmarks identify whether parts are “visible” in the active system. Voices run horizontally with checkmarks below which identify the status of their visibility.
When a Part Name is selected in the System Manager, playback parameters are inherited from Instrument Templates, including pitch shifting of transposed instrument.
To select a Part Name,
Click into a desired instrument name in the Part Name column. Select one of preset instruments Notice that MIDI instruments for each voice become updated.
If you wish to add a new part name with a unique MIDI instrument assignment, select “Add New Part” from the top of the pull-down list. This will open Instru- ment Templates and allow you to create a new template, name it and assign any MIDI instrument and alter transposition pitch shifting.
Voices inherit MIDI instrument assignments from Instrument Templates initially. You can change MIDI instrument assignment for voices (in Voice mode) or parts (Part mode) in the System Manager or Playback Console.
![]()
TIP: Assigning each voice a different instrument adds richer sound texture and helps in hearing “inner voicings” of the music. Highly recommended for classes in composition.
NOTE: Playback Console and System Manager are linked. Changes made to MIDI instruments in one environment will update the other. MIDI instrument assign-
ments in Instrument Templates are not changed automatically. They can only be changed manually.
To change MIDI instruments for voices in System Manager,
In System Manager, click on any voice of any part and select a new MIDI instrument in the pull-down menu.
NOTE: Changes made to instruments in System Manager or the Playback Console will not be applied to playback when the Aria player (VST or AU) is active.
![]()
NOTE: Part and voice extraction can be accomplished using either System Manager or the Score Structure environment, a graphically-based score display. Many find Score Structure to be easier to use for part extraction. See "Using Score Structure to Extract & Join Parts", Section 6.5, on page 111 for details.
In the System Manager, look for “Visibility” checkboxes along the far left side and along the bottom of the list of parts. Checkmarks identify which parts are active (visible) in the current system. Individual parts and/or voices can also be made “visible” or “invisible” by selective use of these Visibility checkboxes.
Let’s say we want to extract a contrapuntal voice from the right hand part of a vocal / piano arrangement.
To extract a voice from an existing part,
Remove check marks of all parts and voices except for the part and voice you wish to target.
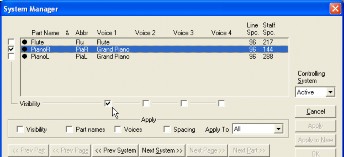
FIGURE 7 - 14: Selecting Voices to be extracted
Make sure “Visibility” in lower left-hand corner is checked.
Press Apply to New to create a new score, leaving the current file unaffected. Or press OK to isolate the part in the open document.
The extracted vocal part from the vocal/piano score will appear like this:

FIGURE 7 - 15: Extracted Voice
To extract a voice from the score,
Highlight a visible part by clicking on the dot next to Part Name.
Check or uncheck the Visibility box below the desired voice number depending on which voice(s) you wish to extract.
Select Visibility in the Apply field and choose Apply to New from the Apply To pull-down menu. This will extract all checked parts to a new ENF document while keeping the original document unchanged. The Apply option alters the current document. Apply to New will create a new, separate ENF document.
To insert a new part into the score, push the “Add Part” button in the System Manager. This is the same as choosing Staff/Part > “Insert” option in Score Properties window (see "Score Properties", Section 7.3, on page 120). To restore “invisible” parts to systems, see "Restoring a missed or “invisible” staff line", Section 4.13.2, on page 78.
To add a new part to the entire score,
![]()
Open System Manager (Ctrl+M or select File > System Manager from the menu).
Push the “Add Part” button at the upper left corner of the window.
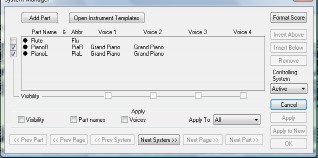
A similar, but more detailed window will open. This is the Super System. It rep- resents all existing parts in the score, whether they’re visible or not in any partic- ular system. The Super System can also be opened from the Controlling System pull-down menu in the System Manager.
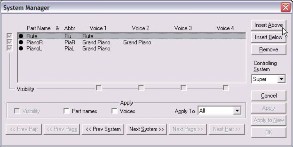
FIGURE 7 - 16: Creating a new part using Super System in System Manager
Highlight an existing part where you want the newly-added part to be placed by clicking on the black dot to the left.
Choose Insert Above or Insert Below and press “Apply”.
The System Manager window will appear displaying the active system and all visible parts including the newly-added part.
In the “Apply to” pull-down menu, choose how this current part configuration will be applied throughout the score: All systems, current system, current system plus all subsequent systems, current Score/Part or, in some cases, to the Super System.
The Super System is a “receptacle” that holds all existing parts in the score. All parts (staff lines), whether visible or not, are stored and displayed in this special area. The Super System display is found in the System Manager window under the “Controlling System” pull-down menu.
Sometimes “optimized” music is scored for more instruments than may appear in any sin- gle system of the score. If the total number of possible instruments exceeds even the larg- est system in the score, parts need to be added to the Super System as described above. SmartScore assumes that all possible instruments are equal to the system with the largest number of parts. For playback will sound correct, parts in optimized systems need to be reassigned to their appropriate instruments. See "Maintaining playback continuity", Section 4.13, on page 77 and "Re-linking parts", Section 4.14, on page 80 for more details. Parts (staff lines) can be added either from the System Manager or the Staff Prop- erties window.
Any part of any system can be made “visible” or “invisible”. This is called “optimizing” a system. This is useful in those sections where a part is tacit or silent for several systems and/or pages. Optimizing systems can be accomplished using System Manager or the “Visibility” check box in the Staff Properties window (See "Staff Properties", Section 7.3.2, on page 122).
To make parts visible or invisible using System Manager,
Make sure Controlling System is Active.
Check (or uncheck) the Visibility box next to each Part Name you wish to affect.
Check Visibility in the Apply region below the parts matrix.
Select the option, Apply To = All if you wish the part to be visible or invisible in all systems.
Select System if you only want to affect in active system.
Select System + if you want to affect the current and all subsequent systems.
Push OK.
To permanently delete a part from a score.
Open System Manager (Cntl + M) and select Super System from the Control- ling System menu.
Click the dot corresponding to the part you wish to remove. Push Remove.
Push “Apply to New” to create a new document without changing the original. Otherwise, push “Apply” and “OK”.
Besides the “Add Part” button, there are two other useful buttons visible in the System Manager: Instrument Templates and Format Score...
Many characteristics of parts in the System Manager are inherited from Instrument Tem- plates including part name, abbreviation, MIDI instrument assignment and playback pitch transposition. To open, push “Open Instrument Templates” button in System Manager. See "Instrument Templates", Section 4.10.2, on page 72 for more details.
Changes you make to System Manager will apply to the area of interest you select in the “Apply To” pull-down menu:
Applies to the currently active system and all subsequent systems.
Applies to the Score or Score-Part.
Changes will be applied only to the Super System.
Applies the change to all systems of the score. Select this when you want your changes to be globally applied.
Once your changes have been set, select where you want the changes to be applied:
The selected changes will be applied to the currently open ENF document.
This action will create a new document with your applied changes. The original document will remain unchanged.Both ENF documents will remain open. The newly-created docu- ment will have “(1)” appended to its name.
By holding the Shift button down, the display switches to a special edit mode. Active con- trol points are shown as orange boxes.
![]()
Click and drag the control point (center of notehead) up or down.
To move multiple symbols horizontally, use the “O” key to select the objects. Drag the “pull point” of any object left or right.
![]()
Dragging the endpoint of a beam or note stem will increase or decrease its length.
![]()
All text fields are linked to an active staff line. To reveal the control point for each text field, position your cursor over its associated staffline and then locate the control point of the text field.
Slurs (legatos) can be reshaped in two ways:
By moving end points of the arc or
By controlling the shape of the curve with either Bezier control handles.

End points con- trol the place- ment of the slur.

Bezier handles control the shape of the slur.
FIGURE 7 - 17: Reshaping slurs
![]()
To horizontally reposition all symbols in adjacent measures:
In Nudge mode, moving barlines to the left or right will reposition symbols in measures adjacent to the barline. Symbols will become more spaced out or more contracted depending on the direction. This is helpful when a particular measure becomes crowded. Try it! Notice that relative note spacing (punctuation) is retained when measures are expanded or contracted.
To horizontally reposition all symbols in a staff line:

Moving the barline at the end of a system will compress symbols in the entire system and all relative note spacing will still be kept intact. If a barline at the end of a system is moved far enough to the left, the first measure of the following system will reposition itself to become the last measure of the active system.
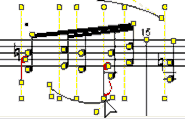
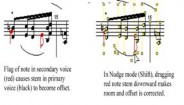
Flagged note in secondary voice After dragging note stem control causes offset in primary voice. point downward, offset is corrected.
FIGURE 7 - 18: Improving flagged note positioning by lengthening its note stem

Notes and/or rests belonging to different voices (within the same vertical event) will auto- matically offset when positioned next each other. This is meant to avoid collisions between the two. Depending on the situation, readjusting position offset objects is possi- ble:

Offset rests due to close vertical proximity.
Offset corrected after dragging.
FIGURE 7 - 19: Offset due to rests too closely positioned
Beam angles are a function of the length of note stems within the beam. By dragging note stems up or down, the angle of the beam will change. Control points at the end of beams can also be dragged up or down to adjust overall beam angle.
If a beam collides with note stems or appears at odd angles after moving or deleting notes, click & drag the control point on either beam end. Drag beam end until it is properly posi- tioned. Stems of notes alternate as the beam angle is changed.

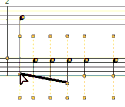
Use the stem-lengthening method to control cross-staff beaming:
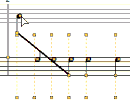
Beam colliding with note stem
Drag beam control point to flip stem direc- tion
Drag beam control point to change beam angle
FIGURE 7 - 20: Controlling cross-staff beams
All notation symbols used in SmartScore can be selected from the Tool palettes. By default, up to 3 palettes remain open at one time. Palettes “recycle” by default, but you may have all open at once.
NOTE: Tool palette buttons are expandable. Any button with a small arrow in the lower right corner will expand to reveal all possible symbols when held down with the left mouse button for several seconds.
![]()
FIGURE 7 - 21: Expandable tool palettes
To replace an open Tool Palette with another palette type,
Right-click on any open Tool Palette. (Mac: Ctrl + click).

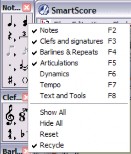
FIGURE 7 - 22: Tool Palette Selection
![]()
Click to select an alternative palette.
NOTE: The F1 key (Reset Workspace icon in Toolbar) always resets win- dows and palettes to their default positions.
To change palette display behavior,
Right-click (Ctrl + click for Mac) onto any open tool palette.
At the bottom of the Palette window, choose one of 4 alternative modalities for palette behavior including:
This changes the secondary open palette when a Quick Key is activated. The
Notes palette remains open and does not cycle.Show All opens all 9 SmartScore
Tool Palettes.
This removes all Tool Palettes from view.

Select a note or rest from either of the Notes or Rests buttons located in the “Notes” palette. Left-click and hold for two seconds to expand the palette revealing all possible notes or rests.
Press the “C” key to activate Insert mode.
The cursor will display the selected symbol along with a grey dot which indicates the line or space on the staff. Click to insert.
NOTE: Use “Quick-select” (Ctrl+click) to select any symbol on the page, including notes and rests, Press any numeric key from 1 through 0 to select a particular note value. “Shift + 1-0” will select rests.
See "Editing note clusters", Section 5.2.9, on page 91.
Select the “n-measures” object from the “Rests” palette.
Select the number of empty measures.
Click in an empty measure of the active staffline.
To delete a tuplet or articulation
Once selected, push the Delete key.
NOTE: To resize or move a tuplet bracket, use Nudge mode and drag the control point located on either end of the tuplet.

The D:B tool button allows for custom tuplets.
Nested tuplets (tuplet within a tuplet)
Choose the value required from the “Rhythmic Groups” palette. Click and drag the cursor to select a tuplet group within another tuplet. A bracket will drop identifying the nested tuplet.
See "Inserting, changing and deleting beamed notes", Section 5.2.10, on page 92.
![]()
While in Insert mode, select a rhythmic value and press the grace note button in the “Notes” palette. Click before any note in the active staff to insert a grace note. ENF playback will insert the grace note and truncate the duration of either the following or the previous note.
To control how grace notes play back
Select Edit > Document Preferences > Playback
Change default playback characteristics for grace notes:
Before the beat
![]()
Select the “D” key, dot or double dot from the “Notes” or “Rests” palette. Click on any notehead to attach a dot of prolongation.
To delete a dot of prolongation,
Press the “D” key again and click on the notehead.
![]()
Ties connect contiguous notes of the same pitch causing the first note to sound for the duration of both notes. Ties are not the same as slurs.
While in the Insert mode, hit the “V” key or press a Tie button in the “Notes” palette.
Click on the notehead of the first note of a tied pair to insert the tie with a down- ward arc.
Right-click (option + click for Mac) to insert a tie with upward arc.
To delete a tie, hit the “X” key with a tie showing on the cursor and click the first note of the pair to delete.
![]()
FIGURE 5 - 8: Accidentals (in Notes palette)
To insert an accidental,
Select any accidental from the expanding accidental button located in the “Notes” palette.
Toggle the “C” key to activate Insert mode.
Click on the notehead that is to receive the marking.
To change an accidental,
Select an accidental from the “Notes” palette. Click on a note with an accidental. It will change to the selected accidental.
To delete an accidental,
Quick-select (Ctrl + click) any accidental, press the “X” key and click on a notehead to remove its associated accidental.
A courtesy accidental is bounded by parentheses and acts as a reminder that a note has an accidental.
To insert a courtesy accidental,
Press the parentheses button when any accidental is selected before clicking a notehead.

Articulations affect the playback of selected notes. These include slurs, turns, fer- matas, mordents, trills, accents and tremolos.
Note durations associated with slurs are increased about 10% giving an overlap- ping or “connected” effect when played back.
To insert a legato (slur),
Push the Legato button in the “Articulations” palette.
Inserting Slurs and Tuplets (Detail)
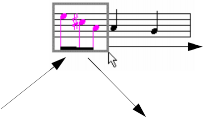
![]()

![]()

Inserting and deleting slurs and ties are very similar. While in the Insert mode, select a triplet (“T” key) from the “Notes” palette or select Legato from the “Articulations” pal- ette.
Creating a triplet
Creating a slur
FIGURE 7 - 1: Creating a Tuplet or Slur (legato)
Click and drag down to insert the tuplet or legato above the notes to be selected.
Click and drag up to insert the tuplet or legato below the notes to be selected.
Many common expression marks can be inserted as text with the use of Expres- sion tool. Available phrases can be found in English, Italian, French, German with English translation.
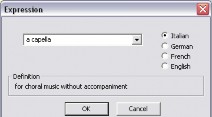
FIGURE 7 - 2: Expression Tool
Select the EXP (Expression) button.
Choose a language and an expression from the pull down menu or type your own expression in the text field. Press OK.
Position the cursor anywhere in the active staff.
NOTE: Expressions are simple text and have no affect on playback.
To insert turns, fermatas, accents, trills and mordents,
Ornaments can be inserted above or below notes by clicking the top of a notehead or near the tip of note stem.
Select the articulation.
Click on a note head to insert the articulation above the note head.
Click on a note stem to insert the articulation at the tip of the stem.
To delete a turn, fermata, accent or mordent,
Quick-select the articulation. Or use “O” key to select. Press the “X” key and click on the notehead or stem of the associated note.
Trill
With tr (trill) selected, click on a note to insert a single trill marking. To create an “extended” trill, hold the Shift button down (Nudge mode) and drag the yellow control handle on the trill marking to the right.

With tr (trill) selected, click on a note to insert a single trill.
![]()
Trill Extended Trill
FIGURE 11 - 8: Trill and Extended Trill
To create an “extended” trill,
Trills have a control handle to the right of the “r”. In Nudge mode, dragging the con- trol handle to the right will extend the trill’s effect to all notes in the same staff below the extension.

FIGURE 7 - 1: Extended Trill
Click on note head or note stem apply a turn. Turns play as follows:

FIGURE 8 - 1: Turn
Staccatos
Click on note head to apply a staccato. Duration of the associated note is shortened by 25%.
Click on note head to apply a tenuto. Duration of the associated note is extended by 125%.
Click on note head to apply an accent. Accent increases the velocity of its associated note by 150%.
Soft Accent
Click on note head to apply a soft accent. Soft accent increases the velocity of its associ- ated note by 125%.
Sharp, Flat and Natural
Mordent
Click on notehead to apply a mordent. Mordents play back as follows:
![]()
FIGURE 11 - 2: Mordent
Inverted Mordent
Inverted mordent play back as follows:
![]()
FIGURE 11 - 3: Inverted Mordent
To insert a tremolo,
Select a tremolo from the Tremolo button of the “Articulations” palette. Avail- able tremolos are single, double, triple or quadruple (Both single or beamed tremolos.
![]()
FIGURE 7 - 1: Tremolos (Articulations palette)
Click on the head of the note to apply the tremolo value.
NOTE: Beam tremolos will playback only if the applied “half-beam” notes are posi- tioned in measures as if they were quarter notes.
To change existing half notes to beamed tremolos,
With a beam tremolo value selected, click on the first of two adjacent half notes. The notes will beam with tremolo mark inside.


Arpeggiated chords will offset the start time of all members of a cluster and will keep them sustained throughout the duration of the chord.
Written Played
FIGURE 11 - 8: Arpeggio
Select the Arpeggio button (squiggly line) from the palette.
Click and drag the mouse to select a chord cluster (can include more than one voice).
Dragging the mouse in an upward direction will cause the notes to arpeggiate in an upward scale.
To insert a glissando,
Select the Glissando button (two notes connected with a line) from the palette.
Clicking on any single (non-chord cluster) note will insert a glissando to the fol- lowing note belonging to the same voice. During play back, the glissando will be heard.
Quick-select the articulation. Press the “X” key, and click on the note associated with the articulation.
NOTE: To delete any articulation that is not note-specific, use the Select tool (“O” key) to highlight it and hit the Delete key.
Use the Select tool (“O” key) then drag to select a range of notes.
Select the articulation to be applied to all highlighted notes and insert it to any note.
To delete all articulation marks and slurs in a selected area,
Use the Select tool (“O” key) to drag a box around the area from which you wish to remove articulations.
Once the area is selected, hit the “G” key to delete all articulations in the selected region.
![]()
Glissandos connect two adjacent notes into equal steps totaling the combined value of the connecting notes.
![]()
Written Played
FIGURE 11 - 9: Glissando)
NOTE: Although it is part of the glissando, the last note always sounds its full value.

Inserting dynamic markings, crescendo & decrescendo markings or hairpins will alter the velocity of selected notes in the active staffline.
To apply dynamics and/or dynamic markings to more than one staff, enter the dynamic in each active staff that you wish to apply the effect. If you do not wish to have so many dynamics visible in every staffline, you may enter symbols in the Hidden Symbols mode. For more details, see "Hidden Symbols", Section 7.10, on page 163.
To insert a hairpin,
Select a dynamic hairpin from the “Dynamics” palette or hit Shift + “,” for cre- scendo hairpin and Shift + “.” for decrescendo.
NOTE: If a similar hairpin is nearby, Quick-select it by holding down the “Ctrl” key and clicking on it.The cursor will become that mark.
Click and drag to select notes for which a hairpin is to be applied.
Dragging downward will insert the hairpin above the active staff. Dragging upwards will insert the hairpin below the active staff.
FIGURE 7 - 1: Hairpin crescendo (drag upwards)
To use keyboard shortcuts for entering hairpins (P, < and >)
Press the “P” key to select p (piano) dynamic marking and open the “Dynamics” palette.
Hold down “Shift” + “,” to select the crescendo hairpin.
Hold down “Shift” + “.” to select the decrescendo hairpin.
To insert a crescendo or decrescendo mark,
Select Cresc. or Decresc. from the “Dynamics” tool palette. Or, if the mark you want is nearby, Quick-select it by holding down the “Ctrl” key and clicking on the marking you want. The cursor will become that mark.
In Insert mode, click and drag the mouse to highlight the range of notes over which you wish to apply the dynamic change.

FIGURE 7 - 2: Inserting a crescendo marking
Dragging downward while selecting the range of notes will insert the marking above the staffline. Dragging upward will insert the marking below the staffline.
To change the range of cresc. / decres. markings, hold the Shift button down (Nudge mode) and drag the yellow control handle horizontally. Notes to be affected by the mark will highlight in a light grey color.
To Insert a Dynamic marking,
While in the Insert mode, select a dynamic marking from the “Dynamics” pal- ette.
Click anywhere above the active staff. A change in playback volume (MIDI Vol- ume) for that particular active staff (MIDI track) then will apply.
Changes in note volumes range as follows:
pppp = 30 / ppp = 40 / pp = 50 / p = 60 / mp = 70 / mf = 80 / f = 90 / ff = 100/ fff
= 110 / ffff = 120.
To delete a dynamic or tempo marking,
An alternative is to use the Select tool (“O” key), highlight the mark and hit Delete.
Default tempo for all time signatures is 120 beats per minute (120 bpm) except for “cut- time” and 2/2 time, which play at 60 beats per minute. Tempos can be modified by insert- ing one or more metronome marks, by inserting a tempo marking or with the ENF Tempo Controller.
NOTE: The default tempo of all ENF scores is 120 beats per minute (BPM). Any tempo marking (whether recognized or inserted) will over-ride the default tempo. Default tempo can be reset by clicking the Default Tempo button in the Play- back Console or from Default Tempo under the Edit menu.
To insert a metronome mark or change-of-tempo marking,
Select the metronome mark button in the “Tempo” palette or select a custom tempo by pushing the Metronome Mark button at the bottom of the palette.
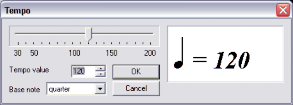
If using a metronome mark, select a new tempo and baseline note value. Preset tempo markings ranges from 30 bpm (Lento) to 240 bpm (Prestissimo).
![]()
FIGURE 7 - 3: Tempo Change (Metronome Mark) window
In Insert mode, click anywhere above the topmost staff of a system to insert mark. Tempo will adjust accordingly at that point.
Tempo Markings are found in the “Tempo” palette. Clicking anywhere inside a staffline will insert the selected Tempo Marking above the staff. Tempo will be altered at that point.

FIGURE 7 - 4: Selecting Tempo Markings from Tempo palette
NOTE: Expression markings, found in the “Articulations” palette, are merely descrip- tors and will not alter playback.
To edit a metronome or change-of-tempo mark in the score,
![]()
Select the Properties tool from the Toolbar.
Click on a mark in the score to edit its properties.
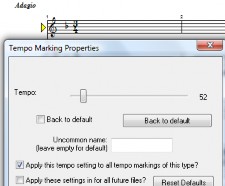
FIGURE 7 - 5: Tempo Marking Properties window
7.6.6 Using the horizontal slider, select a new tempo for the mark. Choose whether to apply the change to just the single mark, all similar marks or permanently apply the change for that mark.
Creating a change-of-tempo is accomplished by inserting a metronome mark above the staff line where you want the tempo to change.
.The Metronome tool in the “Tempo” palette (also activated in Edit > Default Tempo) sets the tempo at the point the mark is inserted.

FIGURE 7 - 6: Setting Default Tempo
Select the appropriate symbol and enter it by dragging the mouse over the range of notes you wish to apply the effect to. Use the Properties tool to modify the tempo change over the range of notes to which it applies.
NOTE: To view the selected range of accelerando/descelerando, push the Hidden Objects button. Range is shown with dotted line.
![]()
Another method to change tempos is to use the Tempo Controller.
To activate the interactive Tempo Controller,

To insert a key or clef signature,
Hold either the “Treble clef” button or “4/4” button down for a few seconds and select the appropriate key or time signature from the palette.
Click at the beginning of the staff (or part) to which it applies.
NOTE: Key signatures for that part will automatically update in all subsequent systems up to, but not including, any change-of-key signature should any occur. Clefs signs are not automatically updated but can be cloned using the “Unify” com- mand.
7.6.11a For time signatures, see "Unify Time Signatures", Section 7.8.4b, on
7.6.11b For key signatures, see "Unify Key Signatures", Section 7.8.4a, on page 156
To change an existing key or time signature to another signature,
Entering or changing any time signature automatically updates time signatures in all parts of all systems; up to the first change-of-time signature if one exists. Entering or changing key signatures must be done one staff at a time.
Quick-select (Ctrl+click) a desired key or time signature nearby or select a new signature from the tool palette.
Click on a highlighted signature to be changed.
NOTE: The key of C major (A minor) does not have a visible sign to indicate its pres- ence. If no key signature is visible in the first measure of the ENF display, the key signature will be C major (A minor) by default.
To create a custom time signature to Insert or Change,
![]()
Select the Custom Time button from the “Signatures” palette
Using numeric scrollers, select a new numerator (beats per measure) and a new
denominator (note value receiving the beat).
Click to insert signature immediately following any barline.
To insert a new key or time signature in the body of a score,
With a time or key signature selected from the “Signatures” palette, Insert mode, click to the right of any barline.
To insert a new key or time signature at the end of a system:
According to the conventions of music notation, a change-of-key or a change-of-time sig- nature that begins on a new line should also be indicated to the right of a barline at the end of the previous system.

FIGURE 7 - 7: Time Signature at the end of a system
To delete a signature
Quick-Select a key or time signature. Hit the “X” key and click on the signature to delete it.
To prevent the last measure from rolling to the next line, avoid deleting the final barline of any system.
Select a clef from the Clefs palette.
NOTE: Left-click and hold on any palette button with a small arrow for 2 seconds to expand it and reveal all symbols of that class.
Click anywhere in the active staff to insert the selected clef.
The midpoint of the “C” clef indicates where C below middle C (MIDI C3) is to be located.
Playback in these clefs will be an octave higher than with a standard clef.
Playback in these clefs will be an octave lower than with a standard clef.
![]()
When the Percussion clef is inserted into a staff line, MIDI channel assignment of the staff switches to 10; the default drum channel. Notes are entered normally, but playback as MIDI drums. Note pitch-to-MIDI drum assignments are mapped in Drumset option under the Playback menu.
These are not clefs per se. Rather than insert with a mouse click, they are applied to selected notes by dragging to select the notes to be modified. Playback of selected notes will be an octave higher when selecting with Octava tool and an octave lower when selecting with Octavo tool.
To assign Octava or Octavo to a range of selected notes
Select either Octava or Octavo tool.
Drag the cursor to select notes in the active staff.

FIGURE 11 - 8: Octava
Notice that the Octava or Octavo mark will appear at the beginning of the range of selected notes an the applied range will be indicated by a dashed line above the selected notes.
![]()
To change or delete a barline,
Select a desired barline from the “Barlines” palette or Ctrl+click on a barline nearby.
Click on a yellow-highlighted barline to change it to the selected barline.
To delete a barline, Quick-select it, press the “X” key and click on the barline.
Deleting a barline at the end or beginning of a system will cause that measure to roll to the next system. Follow this step to delete or change a barline type that ends or begins a sys- tem...
To change a barline at the end of a system to another barline type,
a. Insert the desired barline type to the left of the barline that you wish to remove.
Delete the barline (“X” key then click). The measure will shift slightly to the left but not roll to an adjacent system. For details on repeats and jumps, see "Repeats", Section 4.6, on page 60 or "Jumps", Section 4.8, on page 63.

Selecting the Text button sets the cursor to the Text Edit mode. See "Text
mode", Section 8.2, on page 175.
Selecting the Lyric button sets the cursor to the Lyric Edit mode. See "Lyrics", Section 8.1, on page 173.
Rehearsal
Ten Rehearsal Markings can be placed anywhere in the ENF view.
Pedals
Four Pedal Markings can be placed anywhere in the ENF view.
Bowings
Two Bowing Markings can be placed anywhere in the ENF view.
Breaths
A Breath Marking can be placed anywhere in the ENF view.
See "Unify (U)", Section 7.7.1, on page 152 or "Unify Score (“U”)", Section 7.8.4, on page 155
Hit the “D” key. This toggles between Insert a dot and Delete a dot modes. Notice how the cursor alternates between a solid insert dot and grayed-out delete dot.
Any note or rest may be selected with dots of prolongation assigned to it. Select a note or rest from the appropriate palette, then click on the single or double-dot button inside the palette. In Insert mode, the new note/rest will have a dot.
Hit the “V” key. This toggles you between the solid Insert tie and grayed-out Delete tie modes. To tie two contiguous notes of the same pitch, click on the first note. The “V” tie tool will also insert multiple ties from one chord cluster to the next as long as note pitches match.
NOTE: To over-ride default arc direction, insert ties with a right-click (option + click for
Mac). Inserted ties will have reversed arc directions.
To insert only one tie at a time, select the single tie button from the “Notes” palette.
With any single flagged note chosen, hit the “A” key. This toggles between Left beam, Middle beam and Right beam directions.
The “S” key changes the default note stem direction. When inserting a note, toggling the “S” key reverses the stem direction of an inserted note.
Default stem direction of an inserted note is determined by its vertical position on the staff. Stem direction of inserted notes automatically changes when the cursor crosses the middle line of any staff.
To place a note with a stem in the opposite direction of the cursor,
Hit the “S” key to flip the stem on the cursor. Or right-click while inserting a note
(option + click for Mac).
To change the stem direction of an existing note,
In Insert mode, right-click on any given notehead (option + click for Mac). The stem direction of the note will become flipped.
NOTE: In general, Voice #1 should have stems up and Voice #2 should have stems down. To change the stem direction of several notes at once,
Hit the “O” key to activate the Select tool.
Click and drag a box around any series of notes.
Press the “S” key to reverse the stem direction of the highlighted notes.
To change the stem direction of ALL notes in the document,
Select Ctrl+A (Select all in document).
Press the “S” key to reverse the stem direction of every note with a stem.
To split two-note clusters into two independent voices,
![]()
Hit the “O” key or Select button to activate the Select tool.
Select Ctrl+A (Select all) to highlight all symbols in the document.

Press the “H” key. This will separate two-note clusters into 2 voices.

FIGURE 7 - 1: Splitting two-note chords into 2 voices
![]()
TIP: Only two note clusters will split. If you wish to split clusters containing three or more notes, delete the least desirable note(s) from the cluster (“Z” key and “X” key) until you are left with two notes in each cluster.
NOTE: You can select multiple clusters on the page using the Selector Tool or using “Select All” (Ctrl + A or Edit > Select All).
![]()
a. Mis-matched parts can be properly reassigned with Part Linking. In addition, “orphan” staff lines can be reconnected to their proper system using this tool. With your cursor positioned over the system of interest, press Ctrl+L (Win) / Cmnd+L (Mac). An alternative method is to select the Properties Tool and right- click (alt / option for Mac) over any staffline in a system that requires re-linking and select “Part Linking”. This will open the Re-link Parts window.
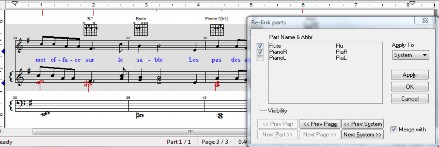
FIGURE 7 - 2: Re-link Parts window
![]()
Push to open / import a file compatible with SmartScore. Select SmartScore (ENF), Image (TIFF, BMP, PCX), XML or MIDI file from “Files of Type” pull- down menu. Same as File > Open.
![]() Push to initiate scanning. Same as File > Scan Music > Acquire.
Push to initiate scanning. Same as File > Scan Music > Acquire.
![]()
Push to initiate recognition on any pre-scanned image. Same as File > Recog- nize.
![]()
Unify updates key and time signatures, clef signs and staff spacing throughout the score based on choices made in the dialog window.
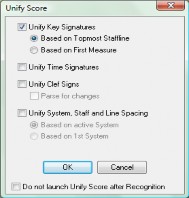
FIGURE 7 - 3: Unify Key, Time and Clefs
![]() TIP: Check part linking (Ctrl + L) before applying Unify when editing optimized scores.
TIP: Check part linking (Ctrl + L) before applying Unify when editing optimized scores.
Based on topmost staffline. (Default)
All key signatures for every part are updated based on signatures found in the first staf- fline of each system. Any change-of-key signs found in the topmost staffline will update subsequent stafflines within each system. Use when systems have the same key signature in each part.
Based on 1st system.
All key signatures in every system are updated based on signatures found in the first sys- tem on the first page. Any subsequent changes in key signatures will be removed. Use to unify scores that have transposed instruments with a fixed number of parts per system.
NOTE: Manually edit key signatures when scores contain:
Transposed instruments AND change-of-key signatures
Transposed instruments AND have optimized systems.
All time signatures are updated based on signatures found in the first system on the first page. Change-of-time signatures are removed in any subsequent systems. Use when no change-of-time signatures occur.
All clef signs are updated based on clefs found in the first measure of the each system. Any change-of-clef found inside systems are removed. Use if many false change-of-clefs were recognized or if very few change-of-clef signs are found in the original.
Parse every measure (Default)
Clefs are updated on a line-by-line basis. Change-of-clefs encountered updates each staf- fline until another change-of-clef is encountered. Use when many change of clefs are writ- ten into the original score.
Distances between systems, staves and line will be universally applied throughout the score based on:
the active system (default)
the first system of the score
Select the option if you choose not to have Unify open automatically after recognition is completed.
![]()
![]() Use to check for proper page layouts. Also seen in Page Setup view.
Use to check for proper page layouts. Also seen in Page Setup view.
![]()
Push to create ENF score from scratch. Choose ENF score template from “System Type in Score” pull-down menu. Same as File > New > New ENF. To copy regions or pages of an existing ENF document to a new one, see "Copying an ENF region to paste into non- music programs", Section 5.6.2, on page 98.

Push Record button to initiate MIDI Recording. All open ENF documents are closed when MIDI recording is launched. A MIDI Piano Roll view opens with Track 1 staged for MIDI recording through an external MIDI device. Identical to Real-time > Record in MIDI View.
![]() Push to enter Karaoke playback environment.
Push to enter Karaoke playback environment.

Push MIDI button to view score in MIDI environment. Use also to change from one MIDI view to another; e.g. to change from Overview to Piano Roll view. Choose Overview or Piano Roll or Event List for a selected Part. Same as View > New MIDI View. ENF view remains open until or unless recording is initiated. To revert back to ENF view, close the open MIDI view.
![]()
Viewing several displays of your score can be extremely useful. It is possible to view sev- eral MIDI and ENF views simultaneously.
Push Tile button to display all open TIF/ENF views along with any open MIDI Over- view, Piano Roll or Event List views. This is identical to selecting the Window > Tile menu.
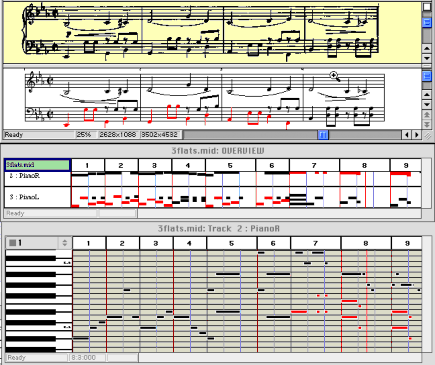
![]()
FIGURE 7 - 4: Tiled view (typical)
Push this button to create a .WAV file of the ENF playback and/or burn to CD.
NOTE: DVD-Audio write devices must be located on the system. Some external devices may not be discoverable. In these cases, create the .WAV file and then use CD / DVD-R or CD / DVD audio burn software.
![]()
With Auto-Beam selected, beamed notes will automatically form into common groups based on the active time signature and standard notation beaming rules. Auto-Beam defaults to “off” after recognition.
![]() • To automatically insert and edit beams into preformed groups.
• To automatically insert and edit beams into preformed groups.
Push Auto-Beam button in the Toolbar
Select a note value from the Notes palette.
With any beam tool selected, clicking from left-to-right, will create beamed groups into pre-determined sets.
![]()
With the Auto-Space button selected, notes and rests will insert proportional to their relative value within a measure. After recognition, Auto-Space defaults to “off.”
Each staff line has the potential of containing up to four contrapuntal voices. Contrapuntal voices are organized into “threads” (voicelines). See "Voices and Playback", Section 4.5, on page 56 for more about how voices affect playback.
To view contrapuntal voices as separate colors,
![]() • Push the Voice Visibility button in the Toolbar.
• Push the Voice Visibility button in the Toolbar.
Contrapuntal voices display as one of four possible colors (Voice 1= black, Voice 2 = red, Voice 3 = green and Voice 4 = blue). Normally, you will see black (Voice 1) and red (Voice 2).
Voice color/number assignments can be changed manually.

To override default voice color of a note or rest (change voice number),
Select desired voice number (and color) from Voice Tool combo button in the Toolbar.
Locate the note or rest for which you want to change voice color.
Click on a note or rest to change it to the selected color and voice.
Voice color is automatically determined based on several factors (number of voices, stem direction, number of beats, vertical alignment, etc.) You can override voice colors manu- ally. Changing voice color may change voice colors of other notes in a given measure.
To vertically align offset voices,
![]()
Use the Select tool (“O”) to highlight offset notes and/or rests.
Press the “Y” key to group the selected, offset notes into a single vertical event. Selected voices will move slightly.
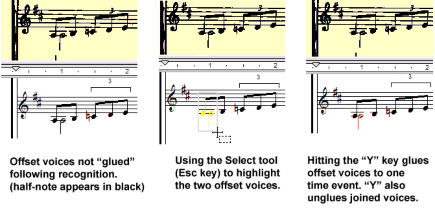
FIGURE 7 - 5: Correcting offset voices not “glued” after recognition.
Similarly, if you see notes bunched together each displaying different colors (usually black and red and sometimes green), but which actually belong to only one voice, they are probably “glued” to the same vertical event. Joined notes can be “unglued” as follows:
To “Unglue” offset notes not intended to play simultaneously,
With the Select tool (“O” key), carefully select the incorrectly glued notes (NOTE: they will each have different colors). Be sure to select only the notes which are incorrectly joined.
Hit the “Y” key. Joined notes will separate and change color.
Hold the Shift button. Click and drag note control point to verify.
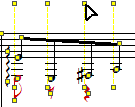
FIGURE 7 - 6: Using Nudge mode (SHIFT) to check vertical alignments

Occasionally, you will want to swap the horizontal positions of a pair of joined offset notes. This can easily be done by selecting a vertically aligned pair with the Select Tool (“O”) and hitting the “L” key. The relative positions of these joined notes will be swapped without altering voice color or playback.

Note heads before swap
Note heads after swap
FIGURE 7 - 7: Note head swapping
Occasionally, notes of one voice may “visit” an adjacent staff. Technically, visiting notes belong to their “home” staff, but they obtain their pitch information from the visiting staff line.
To create cross-staff voicing,
Make sure the note to be moved across staff lines has its stem in the correct orientation (Select + “S” to change stem direction). Hold the Shift key down and drag the note- head to the desired pitch of an adjacent staff. If cross-staff notes belong to a beamed
group and the beam does not interfere with the movement of the notehead, simply hold the Shift button down and drag the notehead into the adjacent staff to its desired pitch.

FIGURE 7 - 8: Cross-staff voicing
NOTE: Cross-staff indicator lines can be either solid or dotted. These attributes can be changed in Edit > Program Preferences > Systems > Cross-staff voicing line style.
To control cross-staff beams (beam collisions and flipped stems)
If a beam collides with note stems or appears at odd angles after moving notes, hold Shift down (Nudge) then click & drag the control point on either beam end. Drag beam end until it is properly positioned. Stems of notes alternate as the beam angle is changed.

Beam colliding with note stems.
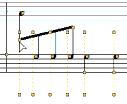
Drag beam control point to alter stem orientation
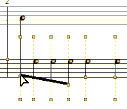
Drag beam control point to change beam angle
FIGURE 7 - 9: Controlling cross-staff beams
![]()
To create a cross-measure beam,
Insert a flagged note on either side of a barline.
Use the Select tool to highlight both notes and hit the “B” key.
Two notes in different voices can share the same pitch at the same time. You can choose whether note heads of different voices should overlap one another or become horizontally offset.
To allow offset note heads,
Check off “Overlap Notes” in Edit > Document Preferences > Score Symbols > Overlap mode. Playback will not be affected whether note heads are offset or overlap.
![]()
You can insert any symbol and have it hidden from normal view as well as keep- ing it from being printed. You may need to add a extra rests for correct playback, but you don’t not want them all to be visible. Another example would be “implied” triplets... you may want to show only the first few and “hide” the rest. Hidden Symbols will also display the range of certain symbols such as 8va, 8vb, ritard, accelerando or descelerando. Holding the SHIFT button down will also display effective ranges for these symbols (see "Pitch shift (Nudge mode)", Section 5.2.1, on page 88
To insert a hidden notation object,
Push the Hide/Show Symbol button in the Toolbar. Insert any notation object nor- mally. Symbols entered in Hidden Symbols will appear as a lighter color than when entered normally.
In the following example, the measure in question has only 1 beat written into the upper part and 2 beats written in the lower part. Inserting 2 hidden rests in the upper and one hid- den rest in the lower corrects error.

Recognized measure (w/ cross-staff voice)

Corrected measure
(w/ rests placed in Hidden mode)
To view ranges of dynamics and tempos,
a. Push the Hide/Show Symbol button. Dynamics or tempos which were applied to a range of notes will appear as follows:

FIGURE 7 - 10: Hidden range of an accelerando
Push again to exit Hidden Symbols mode. “Hidden” symbols do not appear in normal mode and will not print.
Both the ENF view (white) and the image reference view (yellow) appear in “split screen” format immediately following recognition. Alternative reference views include a floating “Scan view window” and “Overlay with fader” feature (Mac only).
NOTE: After reformatting a system, page or score, the floating scan view window will automatically open.
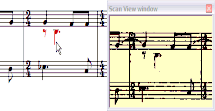
Default Split Screen Floating Scan View window
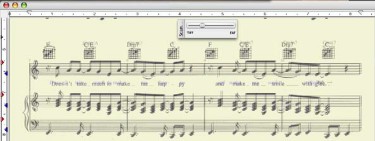
TIFF / ENF Transparency Overlay (Mac only)
FIGURE 7 - 1: Scan Reference Views
To choose an alternative reference view,
a. Go to View > Split Screen and select an alternative reference view option. Mac Only: Try the TIFF / ENF transparency overlay with fader.
To view a variable ENF transparency over the TIFF pane,
Go to View menu and select “Split Screen > Overlay”.
Use the variable transparency fader to the right of the Toolbar to adjust the opaqueness of the top ENF pane.
To activate the floating Scan View window,
Go to View menu, select “Scan View Window”.
To increase or decrease zoom view of the window, choose either Zoom 25% or Zoom 50% from the View > Scan View window.
Use the scroll bar and up/down arrows to the right of the ENF window. You may also use the arrow keys located on your computer keyboard to scroll up, down, left, and right in an ENF document.
To page forward or backward in an ENF document,
•
![]()
Use the “Next page” / “Previous page” buttons located in the Toolbar or push the double paging arrows at the lower right-hand corner of the SmartScore window.
While editing, you can go to any page or measure in ENF file.
To open the GoTo… window
Choose the View menu and select Go To... (Ctrl+G or Cmnd+G for Mac).
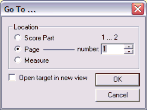
FIGURE 7 - 2: Go To window
Select whether it is a Part, Page or Measure you wish to jump to.
Enter the Part, Page or Measure number.
Checking the Open Target in New View box will open a new ENF at the targeted Part, Page or Measure. Push OK to jump.
![]()
SmartScore accepts any Standard MIDI file and converts it to an ENF file. Since printing is disabled, SmartScore MIDI Edition does not include MIDI to ENF.
To create an ENF document from a MIDI file,
Select File > Open and change the file type pull-down menu from SmartScore Files to MIDI Files. All MIDI files in the given directory will appear in the selection window. Double-click on a selected MIDI file to open.
The Playback Console window will appear with a MIDI Overview representation in the background. To hear the file playback, push the Play button in the console.
To convert the MIDI file into SmartScore notation, push the Close button in the Playback Console. Closing the console will begin the conversion process.
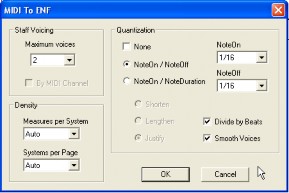
FIGURE 7 - 3: MIDI to ENF window
Choose the number of contrapuntal voices you wish to see in the converted ENF file.
NOTE: It is unusual to have more than 2 voices in most music. For neatness sake, 1 or 2 voices is a goo
SmartScore can quantize the MIDI file that will be converted. Each note event will “snap to” the nearest beat boundary eliminating fluctuations in the timing of a MIDI perfor- mance.
MIDI files created with “free tempo” (rubato) will probably have many irregular note divisions and odd-looking timing as SmartScore attempts to “compartmentalize” notes “off-the-beat”.
Check None to prevent the application of quantization.
Use Note On/ Note Off to determine the smallest rhythmic values used to when spell- ing note start times (Note On) and end times (Note Off) in the ENF document.
Use Note On/ Note Duration to determine the smallest rhythmic values used to when spelling note start times (Note On) and the minimum length of each note (Note Dura- tion) in the ENF document.
Shorten each note to the last Note Duration value.
Justify each note to the nearest Note Duration value.
![]()
TIP: If the resulting ENF file has many stand-alone flagged notes, try reducing the Quantization value (e.g. to 1/8th notes).
Problem | Probable Cause | Fix |
Notes and symbols appear as large letters. | Font association lost. | Reinstall Chopin10 font. Font is located in the SmartScore directory. |
Measures outlined in a red color. | Incorrect rhythm in one or more voices. | Edit voicelines to agree with time signature. |
Pickup or closeout mea- sure highlights red & doesn’t play smoothly. | Voiceline durations do not agree with the current time signature | With Properties tool selected, click on barline that begins the measure. Select “As written”. |
Only one system high- lights black at a time. | View active staffline is ON (default selection). | Check off View Active Staffline in View menu. |
Measure remains high- lighted but measure plays back smoothly. | Secondary voice may be truncated (not fully com- pleted in the measure). | This is a common con- vention in music notation. May be left as is. |
Can’t delete an object when “X” key is pushed. | Actual object must be selected first. | “Ctrl + click” the object before deleting. Or, sim- ply use the Select tool (“O” key) & drag around an object then hit Delete. |
New note is inserted when trying to change an existing note. | Existing note was not highlighted yellow when clicked. | Yellow-highlighted notes will be changed to new value. Blue inserts new note at same time slice. |
Measures unexpectedly roll from one system to another. | Barlines at the end or beginning of measures may have been deleted. | Restore the number of measures per system by opening Staff Properties with Properties tool. |
Systems unexpectedly roll from one page to another. | Line, staff or system spacing may have been changed. | Readjust spacing tabs in left margin until systems are restored to page. |
Problem | Probable Cause | Fix |
Staffline missing from system | Staffline cut off or during scanning or was not localized during Recog- nition. | Restore missing staff. See "Restoring a missed or “invisible” staff line", |
Wrong part suddenly plays. | Expanding / collapsing score; Part / instrument linking lost. | |
Display shows notes as brightly colored or with green vertical lines or with a solid orange hori- zontal line along the staff line. | ENF display is in Hidden Objects, Tempo or Veloc- ity controller mode. | Exit Hidden mode. See “Hidden Symbols” on page 163, “Velocity Con- troller” on page 75 or “Tempo Controller” on page 75. |
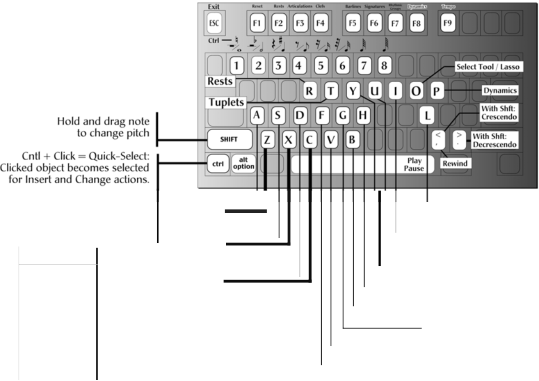
9x I 2x I NT I ME I XP
J0J0.
.....
:=1
8
"."
EN F Editor Quick Keys Map
'§'.
0
1:12
1:12
(")
(1)
::>::I
-@!
Cntl + Active System = Hold Cntl maintains current system as Active System while cursor
-moves outside system.
SINGLE I
CLUSTER
DELETE I
Re-link Parts
Barline (Insert/ Delete)
N g
=e-
---.l
With CNTL
E • Error Che<k
ft - Paste / Replace
T - Tran51>0Se
I- New MIDIView
S - ln.slrurnenl Templates
C .Go 10 Page l - Part Linking 8 - Bracketing
M - Master System
9 - Playb;Kt< Console
I I
DELETE ANY INSERT I CHANGE
Beam Direction Toggle Stem Direction Toggle
Dot (Insert I Delete)
Unify Key,Time, Clef
. --Join Selected Voices
.... Split Voices
.... Select Region to Beam Notes
Select Region to Delete Ties
------Tie (Insert I Delete)
..... Flag I Beam Toggle
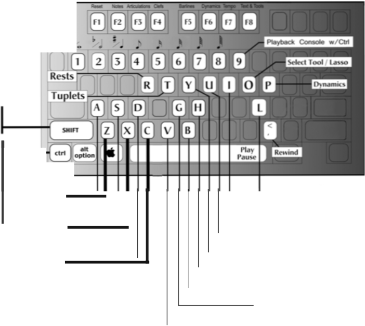
8
SMARJSCO
(5(
c... -:
c g
>..'.%..j.
00
Jj" '-l
.....
For Macintosh
ENF Editor Quick Keys Map
Nudge Mode
Cnll + Click -Quick-Select:
0 "'
Clicked object becomes selected I I
("/} ,0
3 =·
("/}
(")
(1> rn
x
for Insert and Change actions.
Cnll + Active System = Ilold Cnll maintains current system as Active System vhi e cursor moves outside system.
SINGLE / CLUSTER
DELETE /
Swap Noteheads Barline (Insert I Delete)
Unify Key,Time,Clef
N -@

Wi hlll Ojlhc>o key
With9 key
DELETE ANY
- n.pnote*""
°"
v - lta<enr hrOr«-. f'i.tfdtol\,l.\_"W
Ml()tJQC..
C - Eml<Ch«
CHANGE
R - .,I< Rq>l.K• INSERT I
T-,, """',.
l·f\.a, MIOl\.'lif"
S IMl-T
I I
--Glue I Unglue Selected Voices
---Split Selected Clusters
---Beam Selected Notes
cl-,e..o.l".'....,.
Beam Direction Toggle
Delete Slurs from Region
-
-.i
N
""' Stem Direction Toggle
M-A'-'-S,-
••"-lt..H...- Doi (Insert Delete)
---- Tie (Insert I Delete)
![]()

![]()
This section covers editing text, lyrics and chord symbols. SmartScore attempts to distinguish between “dumb” and “smart” text when music is recognized. Dynamic and tempo markings written as text are “smart” as are chord symbols. Annotations, rehearsal markings and fingerings are “dumb”.
A lyric “block” is a string of characters equivalent to a spoken syllable. Out of recogni- tion, a lyric block becomes associated with a single note or rest in the staffline immedi- ately above it. Locating the note or rest associated with a lyric block is as simple as searching directly above the center-justified lyric block. All lyric blocks within stafflines are horizontally linked and are separated from each other by dashes, underlines and/or periods.
NOTE: Text and lyrics have different colors. Text is black, lyrics are blue. Text and lyric colors are changeable.
NOTE: Lyrics sometimes appear below a system (e.g. some choral scores) and a special option should be selected before Recognition. See Lyrics Under Last Staff of Systems in "Recognition Options", Section 3.5.1, on page 36.
![]() TIP:Move notes in Nudge mode (Shift) to verify lyric-to-note associations.
TIP:Move notes in Nudge mode (Shift) to verify lyric-to-note associations.
To edit lyrics,
![]()
Push the “L” button in the Toolbar to enter Lyric mode.
Click into a lyric block or on an associated note or rest. Once highlighted, text within the block can be edited like normal text.
Click and drag inside a lyric block to highlight characters for editing. Use the left arrow, right arrow or spacebar on your keyboard to navigate within a lyric block. Once positioned, type normally.
Characters can also be cut, copied or pasted to other lyric blocks using standard Ctrl + “X”, “C” and “V” keyboard shortcuts (Cmnd + “X”, “C” and “V” for Mac).
To edit a lyric block below the current line of lyrics, click into the topmost line of lyrics and use the down arrow key. Cursor will enter the next block in lyric line immediately below.
To create a new lyric line, hit Return anywhere in a lyric line. A new lyric line will be created at the first note of the system.
Push “L” again (Toolbar) to exit Lyric Edit.
To move lyrics up or down between staves,
Hold the Shift key down (Nudge mode), locate the yellow control handle along the left-most barline of the system.
Drag the control handle up or down to move entire lyric block.
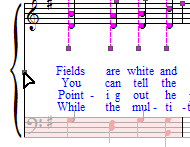
FIGURE 8 - i: Nudge mode - repositioning Lyrics
![]()
Dashes, spaces and underscores are special characters used to separate lyric blocks. Typ- ing any of these characters will move the cursor to the next block. The Backspace key deletes dashes, spaces and underscores.
In the following example, the block “der-” was missed in recognition. The cursor was positioned at the end of the previous block. A dash was entered to create a new “syllabic” block and the correct text was then entered.

FIGURE 8 - 2: Editing Lyrics
Nudging note heads horizontally is a good way to verify that a particular lyric block is indeed associated with a note stem. In a similar way, Nudge mode is useful in verifying that vertical events are properly aligned. Refer to "Checking vertical alignment of voices", Section 7.9.3 for more information.
To verify vertical alignment of two or more voices in Nudge mode,
Horizontally nudge the upper note (Voice #1) of a vertically aligned set of notes and/or rests. All vertically aligned (joined) notes or rests will move together.
To enter Text mode for editing or creating “dumb” text,
![]()
Push the “T” button in the Text and Controller Toolbar.
Text fields are associated with the nearest staffline. To ensure text is associated with a particular staff, move the cursor over the staff first.
Click anywhere and begin typing.
NOTE: It will not be possible to do other sorts of editing other than text or lyrics in either of these modes. It will be necessary to push “T” or “L” again to exit the mode first.
While in Text mode, click anywhere inside a text field.
Drag left or right to highlight one or more characters within the field. Typing will replace the characters. Hit the Delete key to remove highlighted characters. Text
can also be cut, copied or pasted elsewhere using standard Ctrl +“X”, “C” and “V” shortcuts (Cmnd + “X”, “C” and “V” for Mac).
To delete text fields,
To delete more than one text field, use the Select tool (“O” key) to select and highlight text in yellow. Hit the Delete (Del) key removes all highlighted text fields.
Quick-select (Ctrl+click) any text field, hit the “X” key (cursor goes grey) and click again on any text field to remove it.
Out of recognition, text and lyrics are matched to the closest font type and size available. You can modify the font type, size and color of all text or lyric styles. Changing the style of the lyric block will change ALL lyrics because lyric have only one style and text fields can be assigned many different styles.
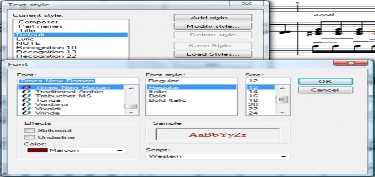
FIGURE 8 - 3: Changing Text and Lyric styles
o modify font styles of text fields and lyric blocks,
Push the “T” button to enter Text mode. Click into any text field. While the cur- sor is blinking, right-click (alt/option + click for Mac) to open the Style window.
For lyrics, push the “L” button and click on either the associated note or rest or directly into a lyric field. Right-click to open the Style window (alt / option + click for Mac).
The current text style will be highlighted in the Text Style window.
Click on the style you wish to change. Select “Modify Style” and enter new font characteristics and push “OK”.
You may also add a new style to the list for continued use later.
To add a new style,
Select “Add style” and enter new font characteristics. Push “OK” and then give it a name (e.g. “Fingering”).
NOTE: The styles window is also accessible by pushing the “Text Styles” button in File
To nudge text,
Hold the Shift button down to enter Nudge mode.
Each text field has a small yellow box to its left.
Click and drag the box to reposition the text field to where you want it.
To move multiple text fields,
Use the Select Tool and drag the cursor to highlight a multiple text fields. Release the mouse button. Selected text fields will turn from yellow to green-grey.
Hold the Shift button down to activate Nudge mode.
NOTE: Dragging one control box of a highlighted text field will move all selected text fields together
![]()
Guitar fret diagrams are recognized automatically. Chord symbols written as text can be recognized and automatically converted to fret symbols when Recognize Text Symbols as Chords option is selected prior to scanning. See "Recognition Options", Section 3.5.1, on page 36. When transposing key signatures, fret sym- bols transpose and root names will automatically be updated.
If no chord or fret symbol was recognized, one can be selected and inserted using the Gui- tar Chord Library (GCL).
![]()
Push the fretboard button in the Toolbar or Ctrl + click on any chord symbol nearby.
Click above the topmost staff where you want the symbol to be inserted.
The Guitar Chord Library and editor will open.
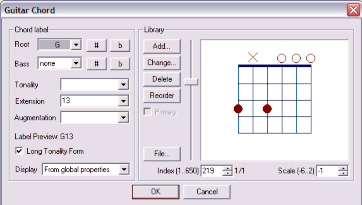
FIGURE 8 - 4: Guitar frets and chord symbols library
Select a Root chord. Add a Sharp, Flat, Tonality, Extension and Augmenta- tion as necessary.
If the selected chord name matches one stored in the library, a corresponding fret configuration will appear in the right window.
NOTE: If there are multiple fret configurations for the same chord name, the box next to
Primary will be checked. Use the Index scroller to search for alternatives.
Push OK. The fret / chord symbol will appear where you previously clicked.
If a fret / chord is incorrectly recognized, you can quickly fix it; often by acquiring the value of a nearby chord which is correct.
To copy the value of one fret / chord symbol and apply it to another,
Right-click (Option + click for Mac) on the chord symbol that you wish to change. The stored (correct) chord will then appear in the Guitar Chord Library. If you are satisfied with the naming and fingering of the displayed chord, push OK. The correct configuration will be applied to the old chord.
To change an existing chord by selecting one from the library,
Select “Guitar Chord Library” from the FILE menu. Or, Ctrl + click on a chord symbol to be changed. Click on the chord again to open the Guitar Chord Library.
Change the root chord, tonality or other extension. Fingerings associated with the selected configuration will appear in the diagram to the right.
Click OK once you have found an acceptable chord name / fingering configura- tion. The chord will become updated.
If you are unhappy with the fingering diagram or fret positioning of any particular chord, you can permanently change it.
To change the fingering configuration of an existing fret symbol,
Push the Change button in the main GCL window to open the Change Guitar Chord editor.
Select the Frets tab to open the fingering and frets editor. Edit options are as fol- lows:.
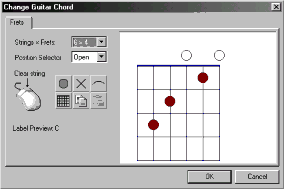
FIGURE 8 - 5: Guitar Chord Library - Fingering Editor
Right-click (Option + click for Mac) on any finger marker inside the fretboard to remove it.
Clear All (grid) removes all current finger markers in fretboard.
String Marker (dot) places a finger marker on any string between frets on the fret- board. Clicking above the fretboard nut (thick line) places an open string symbol (open dot) at any string position.
Barre Marker (arc) places a barre marker above the fretboard by dragging above the nut. When dragged across strings inside the fretboard, the barre marker is positioned between frets.
Mute-string marker (x) places an X above any string position to indicate a muted string. When clicked above the nut, any finger marker of that string is deleted.
For banjo, ukulele, bass or other non-six string fretted instrument or for chords that require more range than 4 frets, choose the configuration you wish from Strings x Frets combo box.
To show fingerings in other than 1st position, choose from Position Selector. The solid line represents the fret position.
Once changes have been made, push Done. The original configuration will be permanently replaced when you press OK. If you made a mistake, push Cancel and try again.
If the particular chord symbol or fingering configuration you want does not exist, you can add it to the chord library.
![]()
Push the Guitar Chord button in the Toolbar. The cursor will become a grid. Click where you want to insert a new chord above a staff line. (Be sure the cor- rect staff is “active”)
In the main GCL window, select a Root chord name. Add Sharp, Flat, Tonality, Extension and Augmentation. If the selected configuration does not exist, no diagram will show.
Push the Add button to open the Add Guitar Chord editor.
Make chord configuration selections in the Label tab and desired fret and finger- ing settings in the Frets tab.
Once changes have been made, push Done. In the main GCL window, push OK
is drop the new chord in place.
You may wish to add alternative fingering configurations to other chord symbols which share the same chord name. Also, following recognition, you may see some fret symbols without chord names. These can also be configured and added to the library.
To add alternative fret configurations to the Guitar Chord Library,
Click on top of any fret symbol or click anywhere above a staffline to open the chord library.
Push the Add button in the main GCL window to open the Add New Chord edi- tor.
Make chord configuration selections in the Label tab and desired fret and finger- ing settings in the Frets tab.
Push Done. A notice may appear telling you that another fret configuration with the same chord name exists. When asked if you want to add the new chord to the library, select “Yes”.
To export, import, reset or clear a GCL library file,
Press File in the Chord Library window. The Library Management window will open.
Clear All Chords deletes all current guitar chord library data.
To modify how all chord symbols appear in the ENF view,
Open the Chord Symbols tab in Edit > Document Preferences window. Change the default appearance of chords as follows:
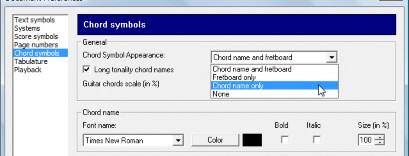
FIGURE 8 - 6: Guitar Chord Preferences
Press Apply or OK to apply and close.
To Copy and Paste any fret or chord symbol,
Ctrl + click on the chord symbol you wish to copy. With your mouse, click anywhere to paste the symbol you just clicked on. The Guitar Chord Library will open to confirm your choice. Press OK to insert.
To delete existing chord symbol(s),
Hit the “X” key and click on the symbol you wish to delete. To remove several fret symbols at once, use the Select tool (“O” key) to highlight as many fret symbols as you wish and hit the Delete key.
To move one or more chord symbols,
Use the Select tool (“O” key) and highlight one or more fret symbols. Hold the Shift key down (Nudge mode) (Shift) then drag the control point of any fret symbol. This will move to all selected chord symbols.
To annotate fingerings and string numbers,
Use Rehearsal marks to enter string numbers with in circles.
Use Nudge mode (Shift) to position inserted symbols exactly.
Non-lyric and non-text symbols (e.g. dynamic and tempo markings) which appear as text are also editable. Default font, size and behavior of symbols can be changed in Document Preferences.
To edit Text Symbols,
Open Edit > Document Preferences. The Text Symbols tab appears as follows:
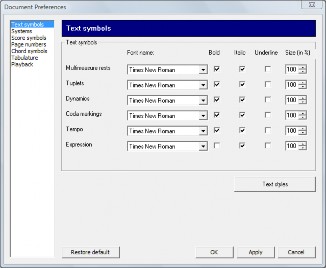
FIGURE 8 - 7: Document Preferences > Text Symbols tab
To edit Score Symbols font characteristics,
Open Edit > Document Preferences > Score Symbols tab.
![]()
Instrument families are grouped with the use of brackets. Grand staff and braces are recognized whenever possible. Use Bracketing to assign braces, grand staff brackets and to join selected parts into barline groups in an ENF document. This feature can be also be used to change the behavior of brackets and barlines. For example, barlines can be separated by stafflines and/or by instrument grouping.
To break barlines between stafflines
Select Bracketing from Edit menu (Ctrl + B (Cmnd + B Mac).
Select “Break barlines by staff”. Click “OK”.
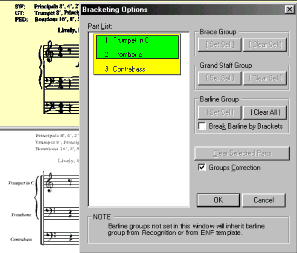
FIGURE 8 - 8: Bracketing window
To create braces, grand staff brackets and create barline groups,
Highlight two or more parts in list to select for grouping.
Choose Brace, Grand Staff or Barline Group set and press Set Sel.
Click “Break Barline by Brackets” checkbox to have barlines break according to instrument families which are already designated by braces, groups and grand staffs.
Choose Clear Sel or Clear Selected Parts in selected group or Clear All to remove groupings.
Score headers are not considered “text”. They are unique tags.
To enter a Score Header at the top of the first page of the ENF file,
a. Select Edit > Score Header.

FIGURE 8 - 1: Score Header
Enter a name for the ENF document in the Title field.
Enter a Composer name if desired.
To move a Score Header vertically,
With Selector tool active, drag the positioning tab associated with the score header found in the left-hand ruler up or down.
![]()
![]()
![]()
SmartScore supports recognition, editing and playback of percussion and tabla- ture parts. Any existing part (or staff) can be transformed to and from a variety of staff types including TAB, percussion and standard notation. Individual MIDI sounds are linked to all staff lines & spaces. Drums and percussion instruments can be re-linked using the Drum Map editor. Playback can also be enhanced by adding automatic drum styles. New rhythmic styles can easily be imported, cre- ated and added to the drum styles library.
In the Options section on the left side of the“Begin Recognition” window, check the box: Recognize tablature, percussion and/or split syustems.
NOTE: If your score contains a 4-line part, SmartScore will, by default, consider it to be a TAB staff. If in fact it is a percussion part, be sure to check the box “Convert 4- line staffs to percussion”. Staff types can be changed after the recognition, but all notation will be lost when converted.

FIGURE 9 - 1: Recognition - Selected Files / Options / Preview
You may convert staff properties simply by choosing an alternative staff type. For exam- ple, you may want to convert a line of standard notation (melody) to guitar TAB (6-string guitar). Or reverse it: change TAB to notation. This is all done in Staff Properties.
To change staff property types),

Select the Properties Tool then click on the yellow arrow to the left of the staff you wish to change.
![]()

FIGURE 9 - 1: Staff Properties: Changing staff type
Check the “Apply staff type” box and choose a new staff line configuration from the list of available staff types in the pull-down menu.
Choose how to apply the change in the “Apply to” pull-down menu:
Entire part, Current staffline or system, All parts in all systems, System + (active system forward). Push OK to apply the change.
NOTE: It is recommended to correct mis-recognized symbols before changing the staff height since this could cause the TIFF / ENF screens. to go out of sync. In that case, the floating scan window opens so you will still maintain some reference.
Parts written in TAB format are automatically recognized if the option “Recognize TABs and Percussion Staff Lines” is selected prior to recognition (see "Recognition Options", Section 3.5.1, on page 36). TAB scores are edited in a similar fashion as standard ENF notation. Parts written in standard notation (melody staff) can be converted to the TAB format. Recognized TAB music can also be converted to standard notation. Converting one to the other is done in the Staff Properties window. See "Converting staff line types", Section 9.2, on page 186.
Tablature notes (fret numerals) are displayed as numbers on top of a string line (6 lines for guitar). The number represents the fret that string is to be played (with “0” representing an open or unfretted string). SmartScore uses an unique notation convention that not only displays the rhythmic value of each TAB numeral, but also its voicing. Note duration val- ues (rhythmic cues) belonging to Voice 1 appear above the staff. Rhythmic cues belonging to Voice 2 appear below the staff (in red).
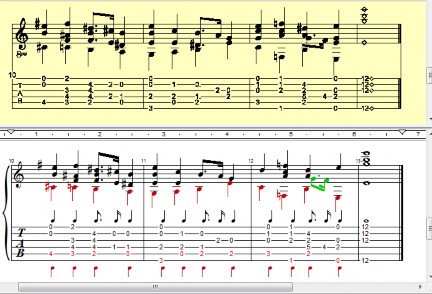
FIGURE 9 - 2: SmartScore TAB notation (typical)
Changing fingerings is easily done in Nudge mode. Moving a fret numeral to a new string automatically updates its fret number.
To reassign a fret numeral to another string
Hold down the SHIFT button (Nudge mode).
Drag the handle of any fret numeral to an adjacent string.
The number will automatically become updated to reflect its new finger position. Its playback pitch remains the same.
To enter a fret numeral inside a TAB staff,
First select a note value: Ctrl + click on any nearby note with the desired value or select that note value from the Notes palette. Position the cursor on the line you wish to enter a numeral and left click to enter the numeral as Voice 1. Right-click to enter the numeral so it is assigned to Voice 2 (red / below staff).
NOTE: To add a TAB numeral to an existing chord cluster, position the cursor inside the vertical line of numerals until they highlight blue, then click to insert.
To change the fingering of any TAB numeral,
Enter Insert mode by hitting the “C” key or selecting the “Insert” button from the lower Toolbar. Click on any numeral until a red box (numeral editor) appears. Enter a new num- ber.
NOTE: You will have 4 seconds to enter a new number before the numeral editor becomes inactive. You may change the default time period by going to Edit > Program Preferences > Tablature > Timer.
To change the rhythmic value of a TAB numeral,
To change to voicing of a TAB numeral,
You must first delete the numeral by hitting the “X” key and clicking on the numeral. Hit the “C” key to enter Insert mode and select the correct note value, if necessary. Position the cursor where you want to insert the numeral and right-click to insert it as Voice 2 (red) or left-click to insert the numeral as Voice 1 (black).
To delete a TAB numeral,
Simply hit the “X” key and click on any numeral. This action will delete both single TAB numerals and numerals in chord clusters.
![]()
To duplicate a notation staff and transform it to a TAB staff,
Open any ENF score. Go to Edit > Score Structure.
Click on the box that represents the part you wish to copy. Push the “Duplicate” button. The new part will appear below the original box. Click on the newly-cre- ated part and drag left to create an “association” line to the ENF Score Part box next to it. Select “Apply to New”. A new ENF document will be created, leaving the original unchanged.
In the ENF view, you will see the duplicated part beneath the original part. With the Properties Tool selected, click on the yellow triangle to the left of the new part. Select “5-line guitar TAB” from the Staff Type pull-down menu and unify staff and line spacing as described in 9.2 on page 186 and “Tablature notation display in SmartScore” on page 188.
To reverse the process (duplicate a TAB staff and transform it to standard notation), follow the same steps above but instead, choose “6-line melody” from the Staff Type pull-down menu.
After converting a “melody” to a “TAB” staff, you may want to change the fingering. Refer to "Change fingering configurations", Section 9.3.2, on page 188 for details.
After converting “melody” to “TAB” or vice-versa, you may want to change line distances and unify those changes for a clean look.
To resize the TAB spacing and apply it to the entire part,
Position your cursor over a TAB staff line and manipulate the red (distance) and blue (line space) tabs per Section 6.2. The next step will unify all TAB staffs.
Select “Staff Spacing” from the FILE menu. Or, select the Properties Tool and right-click into the staff that has been altered. Choose Line/Staff Spacing.
![]() c. In the “Copy settings to” menu, select “All Systems” and push “Copy”.
c. In the “Copy settings to” menu, select “All Systems” and push “Copy”.
d. Push “OK”. All staves belonging to that part will adjust.
An alternative method for “unifying” layout is as follows:
With your cursor over the modified staff line, hit the “Caps Lock” key to lock in focus on that staff.
![]()
Push the “Unify” button in the Navigator (“U” key). Select “Unify System, Staff and Line Spacing” (Based on active system). Push OK.
Hit the “Caps Lock” key again to release the active system.
SmartScore recognition acquires and reconstructs variable-line staves when “Recognize TAB and percussion staff lines” option is checked in the Begin Recognition window (See "Recognition Options", Section 3.5.1, on page 36).
To edit recognized notes on a percussion staff,
Then ensure that the percussion part has correct number of lines in all systems: Select “Staff Spacing” from the FILE menu. Or, select the Properties Tool and right-click into the percussion staff. Choose Line/Staff Spacing. In the “Copy settings to” menu, select “All Systems” and push “Copy”. When done, push “OK”. All percussion staves belonging to that part will become updated.
Edit drum notes exactly as any normal “melody” staff including note duration value and pitch. A MIDI drum instrument is associated with every line and space and will sound as you Shift + drag notes up or down. If necessary, you may need to reassign MIDI drum sounds using the
To reassign drum instruments to percussion staff lines...
With Property Tool active, click in the yellow arrow associated with any percus- sion staff.
Push “Percussion Map” button in the Staff Properties window to access the drum instrument map.
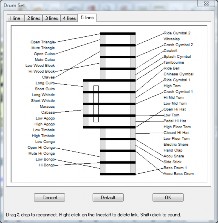
FIGURE 8 - 1: Drum-to-pitch links (Drum Set)
Click on a drum instrument name and drag to a new line or space. If another instrument is linked to the line or space, it will unlink.
Clicking and dragging a line or space to an instrument name will also create a new link and delete any existing link.
Press OK to finalize changes. Press Cancel to undo changes. NOTE: Accidentals are ignored regardless of the key of the score.
Position your cursor inside the staff line where you wish to insert a new percus- sion line and right-click (Ctrl + click for Mac).
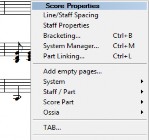
FIGURE 9 - 1: Staff Line Options (Right-click)
Select Staff > Insert (above or below).
See "To change staff property types),", Section , on page 187 to change the part from notation to percussion.
Select eighth note from “Notes” palette and using beam direction tools, create the following pattern. Hit Spacebar to play back.
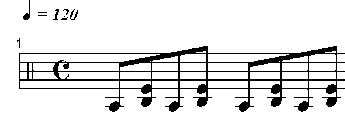
FIGURE 9 - 2: Creating a drum pattern
![]()
NOTE: Simultaneous drum sounds must be contained in the same voice. Therefore, you will need to use the Cluster tool to add additional drum “note heads” to an exist- ing note stem. Holding down Shift and dragging a notehead up or down will allow you to hear each drum sound associated with each space and line.
It’s more fun if it’s got a beat! Simply select a drum accompaniment or you can add cus- tomized patterns to the drum library yourself.
To select an instant drum pattern for ENF playback,
With any ENF file open, click on the Drum Pattern button in the Toolbar.
Sort each column by clicking on its name in the column header.
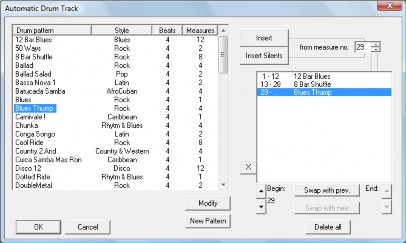
![]()
FIGURE 9 - 3: Automatic Drum Track Window
Click on a pattern that matches the time signature and style of your ENF file.
Choose a starting measure in the “from measure no.” field and push the Insert
button.
To enter another drum groove at another location, repeat steps c. and d. above.
If you wish to mute drum playback for one or more measures, select the starting measure and push the “Insert Silents” button.
NOTE: Insert Silents are automatically inserted if the Begin and End points of 2 or more patterns are not sequential.
Press OK to accept the selection.
Press the spacebar to hear your file playback with drum accompaniment.
To Remove a drum pattern from the library,
Locate the Styles folder inside the SmartScore application folder and delete the .ssd
file you wish to remove.
The drum pattern library is expandable. You can add new patterns that you have either cre- ated yourself or imported from a MIDI file which contains a drum track on MIDI Channel 10.
To add an ENF drum pattern to the automatic drum pattern library,
Open an ENF file which contains a percussion part (written with a percussion clef) or,
Open an ENF file in which you have created your own drum pattern. Refer to "Creating a percussion staff from scratch", Section 9.4.3 for more information on how to create drum patterns.
![]()
Click the MIDI button in the Navigator to open the MIDI Overview. See Section "Selecting MIDI views", Section 10.1.1, on page 198 for more details on changing MIDI views.
Select Edit > Create Automatic Drum Pattern.
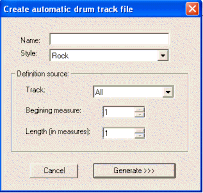
FIGURE 9 - 4: Creating a drum pattern from a MIDI file
Locate the track in which the drum is played and select it in the Track field. Note that MIDI drums will sound only if they are assigned to MIDI Channel 10.
NOTE: To check the channel number of a track, right-click (alt + click for Mac) next to the track number in MIDI Overview then select Piano Roll. The channel number (and its color) will appear in the upper left corner of the Piano Roll View. Close
the Piano Roll window to return to Overview window. Another option is to sim- ply open the Playback Console (Ctrl + 9). Next to each track number listing is a colored box containing the MIDI channel number assigned.
Enter the name you wish to give the pattern in the Name field.
Select a musical style to classify the new pattern and enter it in the Style pull- down menu.
Locate the first measure where you wish the pattern to begin and enter it into the
Beginning Measure field.
Decide how many measures you wish the pattern to contain and enter it in the Length (in Measures) field. This is a very important decision if you want to have proper-sounding patterns.
Click Generate to add the pattern to the library. It’s name will then appear in the
![]()
TIP:Add “fills” to longer patterns (8 or 12 measures). Repeated fills in patterns hav- ing 1 or 2 measures usually sound dumb.
Importing MIDI drum patterns
![]()
Push the Open button in the Navigator (File > Open) and click to select MIDI from the “Files of Type” pull-down menu. Browse to a MIDI file containing a drum track and double- click.
Push the Play button to hear the MIDI file play back. Push Close.
The imported MIDI file will appear in the MIDI Overview window.
Repeat the process from Step d) above.
To create a virtual MIDI drum track,
Open MIDI View.
Right click inside any number the Track Number column. Select “New Track”.
A MIDI Record view will open. Test drum sounds by hitting the center keys on the two front rows of your computer keyboard.
When ready, hit the Record button. You will hear a metronome sound for one measure. Playback and drum recording begins.
Hit Stop when finished. Close the MIDI window to return to ENF.
To change a MIDI drum and link to your computer keyboard,
Select Options > Virtual Drum Kit Definition
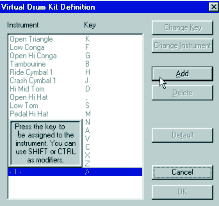
FIGURE 9 - 5: Virtual Drum Kit Definition
Click on an instrument / key in Instrument list.
To reassign a MIDI drum instrument, push Change Instrument and make another MIDI drum selection in the pull-down menu.
To reassign a keyboard key for that instrument, push Change Key and press any keyboard key to be linked to that instrument.
When finished, press OK.
To add a MIDI drum and link it to your computer keyboard,
Push Add.
Press a key to become associated with the sound.
Select a new drum sound from the pull-down menu.
When finished, press OK.
![]()
![]()

Underlying MIDI data of an ENF score can be viewed and manipulated in one of three MIDI views: Overview, Piano Roll and Event List.
To open MIDI environment from ENF and select a MIDI view,
![]()
Press the MIDI button in the Navigator or choose View > New MIDI View
(Ctrl +I / Cmnd+I (Mac)).
The New MIDI View Window will open.
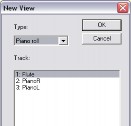
FIGURE 10 - 1: New MIDI View
In the Type window, select the type of MIDI view desired, Overview, Piano Roll or Event List).
![]() • Overview
• Overview
![]()
This view displays all MIDI tracks (parts) found in the open Score-Part.
Piano Roll
This view displays all MIDI note events found in the selected track.
Event List
![]() This view lists all MIDI events and every detail associated with them.
This view lists all MIDI events and every detail associated with them.
The above MIDI view buttons are accessible from the MIDI Toolbar.
The MIDI Toolbar (View > Toolbars > MIDI Toolbar) includes buttons for opening Overview, Piano Roll, Event List views. Also visible are the Shuttle tool, Record, Record to New Track, Record Virtual Drum, Delete Track and Insert Instrument Change buttons.
![]()
![]()
Each MIDI view (Overview, Piano Roll and Event List) has its own “close” icon in the upper left-hand corner of the window. Click to close an active MIDI view window. Or select File > Close. Closing the last MIDI view will return dis- play to its associated ENF view.

Overview provides a “bird’s eye view” of all existing MIDI tracks. Some editing ![]() functions are limited
functions are limited
FIGURE 10 - 3: Track Overview window
Right-clicking (option + click Mac) into a track’s Name field in Overview will display the track properties. Double-clicking into a track’s Name field will open its Piano Roll view.
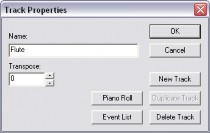
FIGURE 10 - 4: MIDI Track Properties
The Track Properties window allows for editing of the Track Name and its Transposition. It is also used to create new MIDI tracks. Push Piano Roll or Event List buttons to view selected track in one of these views.
NOTE: The Transpose selection window will actually move all the note events of the selected track by half steps.
New Track will create an empty new track.
Selecting Duplicate Track will create an exact copy of the active track and insert it at the bottom of the track listing.
Delete Track will erase the highlighted MIDI track completely.
Press the spacebar to Play. Press again to Pause. Press again to resume Play. Press the comma key (“,”) to Rewind to the start.
The Mini-Console is a dock-able (tear-off) Toolbar that plays, records, rewinds and stops playback.
![]()
No MIDI
Recording

FIGURE 10 - 5: Mini-Console Transport
The “spring-loaded” tempo slider will increase or decrease tempo speed depend- ing on the distance it is pulled from the center. Releasing the mouse will return playback tempo to the default speed.
Play button initiates/resumes playback of the active MIDI file. Once playback has begun, the Play button becomes Pause. Use this button to retain MIDI data after returning to ENF display.
![]() • Stop button stops playback/recording of the MIDI. Play/Record is re-initialized at 0 (rewinds to the beginning).
• Stop button stops playback/recording of the MIDI. Play/Record is re-initialized at 0 (rewinds to the beginning).
![]() • Rewind button resets playback to the beginning of the range.
• Rewind button resets playback to the beginning of the range.
The Record button will be active only when a MIDI Out device is selected. Push-
![]() ing the Record button will create a new MIDI track and will launch a new record- ing session. When Record is lit, press Play button to begin recording a new MIDI
ing the Record button will create a new MIDI track and will launch a new record- ing session. When Record is lit, press Play button to begin recording a new MIDI
performance to a new track. When recording to a new MIDI track, existing MIDI
data, instruments, channels and transpositions of the original ENF or imported MIDI file will be maintained.
NOTE: All playback functions are also available in the Realtime menu (in MIDI) or
![]()
TIP:To select an entire track for cutting and pasting, go to Overview and click (option + click for Mac) in the track’s Name field.
To set the MIDI input and output devices,
Select MIDI Devices from the Options menu. The MIDI Devices window will open.
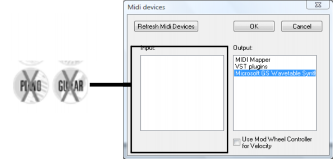
FIGURE 10 - 6: Options > MIDI Devices
Click on the MIDI Input device / interface you will use for recording new MIDI data.
Click on the MIDI Output device you wish to use for MIDI playback. The MIDI device window will display all installed MIDI device drivers. MIDI Mapper is the default in Windows and is most commonly used for sound cards although a specific soundcard driver may be selected from the Output list.
Press OK to set the selected MIDI devices as the current SmartScore MIDI sources. The selected device then moves to the top of the list.
NOTE: If the desired device is not listed in the MIDI Devices window make sure the device driver has been properly installed. Check any software that was installed with your MIDI device and/or download MIDI driver from manufacturer’s web- site. When installing a new MIDI driver, reboot to initialize the new driver.
To specify part of the score for playback,
Select Set Play Range from the Realtime menu.
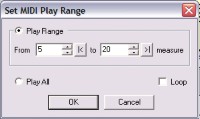
FIGURE 10 - 7: Set MIDI Play Range
Set the first measure and last measure of the Play Range.
Mark Play All to play the entire score.
Check Loop to continually repeat the assigned playback range.
In the familiar MIDI piano roll view, it is possible to alter MIDI note events and fine tune other playback parameters. MIDI events are only editable when “Show Actual Playback” option in the View menu is checked off. When “Show Actual Playback” is checked, artic- ulations (trills, tremolos, etc.) display but cannot be edited since articulations are con- trolled by Properties. The Piano Roll view is track-based.
To move from track to track, click the Track Paging buttons located in the Toolbar.
To select and display a track in Piano Roll view:
Select the MIDI button in the Navigator. In the New MIDI View window, select a track or Part Name. Pushing OK will open the selected track in piano roll format.
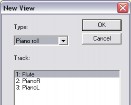
FIGURE 10 - 8: Overview - Selecting a track
Select the MIDI track you wish to display and press OK.
![]()
Select the magnifying glass from the Toolbar. Left click to zoom in and right click (option + click for Mac) to zoom out of the Piano Roll view.
.
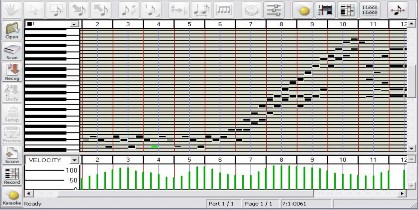
FIGURE 10 - 9: MIDI Piano Roll View
Another method of zooming in or out is to drag measure markers horizontally. Dragging to the right zooms in and dragging to the left zooms in.
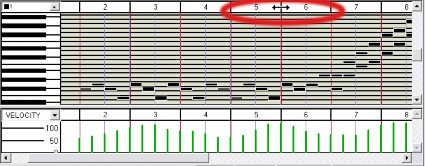
FIGURE 10 - 10: Horizontal zoom by dragging measure markers
![]()
Using the Tile Windows feature, you can view both ENF and MIDI windows simultaneously. This is useful if timing problems are encountered while editing ENF notation. By switching to MIDI Piano Roll view and pushing the Tile Win- dows button, it is possible to examine underlying MIDI events while referring to the same region as notation in the associated ENF window.
To tile all open document windows,
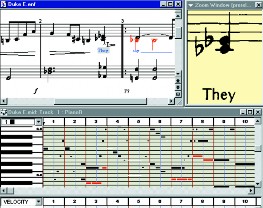
Push the Tile Windows button located both in the Toolbar and in the Navigator palette.

Tile Windows Menu Button
FIGURE 10 - 11: ENF / MIDI Tile View (with floating Zoom window)
You can insert any number of instrument changes into a MIDI track.
NOTE: This same function (inserting a change of instrument for playback) can be done in the ENF notation view. See "Changing instrument sounds on the fly", Section 4.5.4, on page 58 for details.
To insert a Program Change (MIDI instrument change) in a MIDI track:
In Piano Roll view, position cursor and click to drop the red marker where you wish to make a MIDI instrument change.
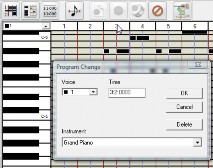
Push the Program Change button in the MIDI Toolbar or select Edit > Program Change.
![]()
FIGURE 10 - 12: MIDI Program Change (Piano Roll)
Select a new MIDI Instrument from the pull-down menu.
Press OK.
NOTE: List of instruments is determined by the selected Instrument set selected in Options > Instrument Settings. Instrument set is also able to be selected in the Playback Console (see "MIDI Setup", Section 4.15.1, on page 83).
An inverted red triangle will indicate the point where the program change was inserted. Clicking on any Program Change triangle will open the Program Change window for additional changes.
NOTE: SmartScore supports multiple MIDI channels within each MIDI track. This allows for contrapuntal voices within ENF staff lines to be assigned to different instruments within each MIDI track. In other words, multiple voices in ENF are equivalent to multiple channels within a MIDI track. This is a sort of hybrid MIDI type (MIDI Type 1/Type 0 hybrid).
In Piano Roll view, the bottom pane of the window displays a graphical, continuous- change MIDI controller. Click into Controller Selector pull-down menu and select a new MIDI controller you wish to view.


FIGURE 10 - 13: Velocity and Tempo controllers in Piano Roll view
With the pencil mouse pointer, click and drag a curve over the range you wish to apply the effect.
The Shuttle Tool allows you to sound MIDI events forward or backward by dragging the mouse over a range of events.
To operate the Shuttle Tool,
![]()
In Piano Roll view, the “S” key toggles the Shuttle Tool off and on. To manually select, press the Toggle Shuttle button in the MIDI Toolbar or go to the Options menu and select Shuttle On. Click and hold anywhere in an Overview or Piano Roll and drag the Shuttle Tool to the right to play the MIDI file at your own tempo. Drag the Shuttle Tool to the left to rewind and hear the MIDI file simulta- neously.
To insert or change the voice assignment of selected note event(s):
Use the Voice Selection pull-down menu located above the piano keyboard to select a voice number.
Right-click and drag to create a note event.
To change MIDI instrument parameters,
Select Instrument Settings under the Options menu. In Playback Console, push the Set Instrument button. This will open the Instrument Settings window.
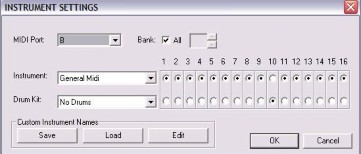
FIGURE 10 - 14: Instrument Settings
Select the MIDI Port of the MIDI instrument you will be adjusting with the MIDI Port pull-down menu.
Choose a specific Instrument Bank or all Banks from the selected MIDI Port if numerical banks are supported by your MIDI device.
Select the type of MIDI Instrument (GM, MT32, GS, Yamaha XG, Numeric or Custom) from the Instrument pull-down menu.
Use the radio buttons to activate or deactivate specific MIDI channels for selected Instrument set and Drum set. The default MIDI channel for drums is 10.
Use the Drum pull-down menu to select the type of MIDI Drum set your device supports (GM, No Drums, Roland GS Drums, Yamaha XG Drums, Numeric or Custom).
Push Custom to create a formatted text document for displaying custom instru- ment names for your MIDI device. Edit to change.
Under the Edit menu choosing Select opens the Select Window.
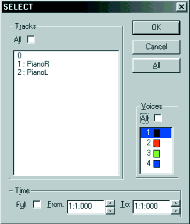
FIGURE 10 - 15: Select Event window
Select All tracks or an individual track or voice to highlight for cut, paste, pitch shifting or assigning parameters. Choose Full time to display the full length of the MIDI file or des- ignate a portion of the file to display by entering the measure, beat, and tick into the From and To fields.
NOTE: Edit > Select All is only available from a Piano Roll or Event List view.
Selecting MIDI events using mouse click-and-drag can be done from any view. Mouse functions work the same in all views.
To select a note or group of notes:
Click on the individual note or click and drag to Group Select many notes.
To add note(s) to the Group:
Hold down the Control key and click on the un-selected note(s).
To select note events within a given time frame:
Click in Piano Roll to mark the beginning of the time frame.
Hold down the Shift key and click again to set the end of the time frame. The selected range will highlight in grey.
To change the start time of selected note event(s):
Click and drag the left edge of the note(s) to the position you want.


FIGURE 10 - 16: Editing MIDI note on/off events
To change the duration of selected note event(s):
Click and drag the right edge of a note to change a note’s duration.
To change the velocity (loudness/note attack) of selected note event(s):
Drag the top and bottom edges of a note adjust the note’s velocity.

FIGURE 10 - 17: Editing MIDI note velocities and pitches
To change the pitch or position of selected note event(s):
Click and drag the center of the note to change pitch (vertical drag) or note placement (horizontal drag).
NOTE: The arrow keys on your computer keyboard can also be used to adjust the pitch and start time of the selected note.
NOTE: To realign MIDI events to the nearest starting point (quantization), go to Options
To delete selected note event(s):
Hit the Delete key to remove any highlighted notes.
To change the velocity and/or the duration of selected note(s):
Select the Velocity/Duration option from the Edit menu. The Velocity and Dura- tion window will open.
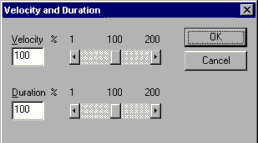
FIGURE 10 - 18: Velocity and Duration window
Use the sliders or type in numbers to increase or decrease the velocity or duration of the selected note(s) by a percentage. Example: You wish to double the dura- tion of a group of selected notes. In the Velocity/Duration window move the Duration slider to 200%.
Press OK.
Double-clicking on any note event will open the Note Event window.
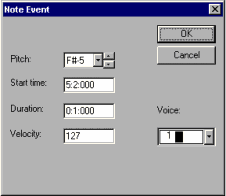
FIGURE 10 - 19: Note Event window
The Note Event window allows access to and adjustment of an individual note’s parame- ters.
Raise or lower the Pitch of the Note Event
The Duration of the Note Event can be shortened or lengthened
Increase or decrease the Velocity of the Note Event
Select a different Voice for the Note Event
Click and drag the mouse or use Edit > Select to select a region that you would like to cut, copy or paste.
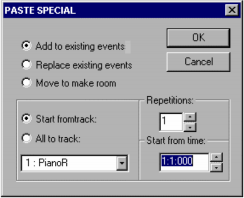
FIGURE 10 - 20: Paste Special
The Paste Special window offers several options for pasting the contents of the clipboard back into the music.
Use Repetitions to determine the number of times the contents of the clipboard will be inserted.
Select Start from track to paste to a selected track number.
To view and edit detailed MIDI events, meta events, note events, controllers, program changes, key and time signatures, etc. in a selected track,
Press the MIDI button of the Navigator or in the menu, select
Choose Event List from the Type pull-down menu
Select a track to view and press OK.
The Event List displays every MIDI event and note attribute of the selected track:
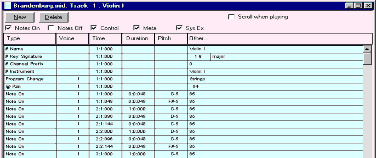
FIGURE 10 - 21: Event List
Select what event types are displayed in the Event List by checking or un-checking the Event Type boxes along the top of the Event List.
To scroll the Event List display during playback, check the “Scroll when playing” box in the Event List window.
To page from track to track, click on Track Paging buttons in the Toolbar.
![]()
To change parameters of a group of selected notes:
Click in any of the columns to change the parameters of an existing MIDI event or double click in the Type column of a Note Event to open the Note On window.
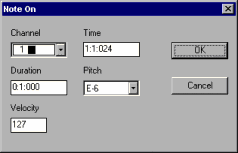
FIGURE 10 - 22: Note On window
To insert new events in the Event List view,
Click the Event you want the Note to follow. Select New from the upper left- hand corner of the Event List. The Create New Event window will open.
Scroll to Note On in the Event Type menu.
Press OK.
A Note On event will be inserted into the Event List.
Enter the Voice, Time, Duration, and Pitch of the new event by clicking in the corresponding columns or double-click in the Type column to open the Note On window.
Click in any column to make changes to any existing MIDI events. To insert a new tempo, key, or time signature click the event you want the new event to follow. Press the New but- ton. The Create New Event window will open.
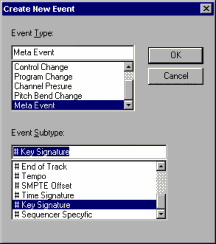
FIGURE 10 - 23: Create New Event window
Use the scroll bar to select Meta Event. A Meta Event is a MIDI file instruction. Scroll through the Event Subtype window to choose Tempo, Time Signature, or Key Signature. Press OK. Use the Other column to select the new tempo, time signature, or key signature OR double-click in the Type column to open an event-specific window. You may type in a new value.
Any MIDI event that is not a note-on or note-off event is a non-note event. This includes MIDI Control Changes, Program Changes, Channel Pressure, Pitch Bend information, and Meta Events.
To insert a non-note event in the Event List view:
Select the event you want the non-note event to follow.
Press the New button. The New Event window will open.
Use the Event Type menu to select the event to be added.
NOTE: Some events, such as Control Change and Meta Event, have Subtype event list- ings. Choose one if applicable.
Press OK.
Program Changes
Program Change inserts a MIDI event that changes the instrument playback for a given channel / voice.
To insert a Program Change of the voice/channel in Create New Event:
Program Change is the default New Event, so simply press OK. The selected Program Change will be inserted into the Event List.
Use the Voice pull-down menu to designate the voice to which the Program
Change applies.
Use the Other pull-down menu to select a new instrument.
Control Changes
Control Changes send adjustable parameters to your selected MIDI device i.e., vibrato, hold, volume, pan, effects, etc. You can add specific changes to these controls from within SmartScore’s Event List. To find out more about what each control change will do, refer to the user’s manual of your MIDI device.
Meta Events
Meta Events are MIDI file instructions written to the MIDI file. They provide information such as file and track headers, SMPTE code, tempo, key and time signatures, etc. and can be added to any MIDI file using SmartScore’s Event List
![]()
The Playback Console is available in Overview and Piano Roll views and allows for detailed viewing and control of playback and provides real-time editing of the active MIDI file. Push MIDI in the Navigator and select Piano Roll or Overview.
Push the Playback Console button in the Toolbar or choose Real-time > Playback Con- sole (Ctrl +9 Win / Cmnd+9 Mac) to open the Playback Console.
NOTE: The console can act as a “window shade”. To shrink vertically, drag the bottom edge of the console up or down.
Adjust global playback volume using the General Volume slider.
Adjust channel volumes using individual Volume sliders.
Use Pan to adjust stereo balance for each channel.
The Close button will close the Playback Console.
Change the MIDI Instrument or Channel of any voice.
To play back at a given point in the file;
Use the Measure / Beat slider and scroll to the desired measure and beat in the score.
To select the MIDI output device;
Use the Port pull-down selector.
To transpose playback globally;
Use the General Transposition pull-down selector.
To transpose an individual track / voice;
Use the Transposition pull-down selector in any track / voice.
To choose whether the timing of MIDI note events is displayed by Measure: Beat: Tick or by Tick Number;
Go to the Options menu and select Time Format.
Choose by Measure: Beat: Tick or by Tick Number.
To choose whether the velocity of MIDI note events is displayed with absolute numbers (0-
or as percentages;
Go to Velocity Format under the Options menu.
Choose by Value (0-127) or Percent.

No MIDI
Recording
To activate the Record mode and adjust the recording options choose Record from the Realtime menu.
Synchro Start
Recording is synchronized to start with the first MIDI note played. To “un-synchronize” the start of recording with the first played MIDI event uncheck Synchro Start from the Realtime menu OR choose the Metronome Settings listed under the Options menu and uncheck Synchro On.
Sends new MIDI events to the selected MIDI output device. The active Piano Roll deter- mines the parameters of the MIDI Thru sound. If no Piano Roll is open, MIDI Channel 1 is used.
The Metronome is on by default. The metronome is useful in keeping time while record- ing and as a “count-in” tool to mark the beginning of the recording session.
Sometimes, you may want to record “freely”... that is, you simply want to capture a per- formance in MIDI without worrying about timing or about trying to convert the perfor- mance into notation. For this purpose, you will want to turn the metronome off. To make the metronome inactive during recording, uncheck Metronome from the Realtime menu OR choose the Metronome Settings listed under the Options menu and uncheck Metro- nome On.
To make changes to SmartScore’s metronome;
Choose Metronome Settings from the Options menu. The Metronome Settings win- dow will open.
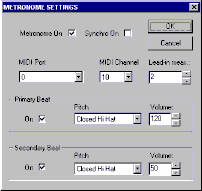
FIGURE 10 - 24: Metronome Settings
NOTE: The Metronome On check box must be selected for the metronome to sound during recording. To record without a metronome uncheck the Metronome On box.
With Synchro On, SmartScore will synchronize the start of recording with the first played MIDI event.
Select which MIDI Port the metronome will play through. Choose the metronome’s MIDI Channel.
NOTE: The de facto drum channel, MIDI Channel 10, is the default channel. But you can change it if you wish.
Determine the number of Lead-in Measures that will play prior to the start of recording. The metronome will click at each baseline beat (derived from the time signature) for as many measures as you choose.
The Primary Beat (down beat) will sound when its On check box is selected. The Pitch pull-down menu displays all General MIDI drum sounds. Use the Volume scroll box to increase or decrease the volume of the Primary Beat. The default accents the Primary Beat.
The Secondary Beat will sound when it On check box is selected. The Pitch pull-down menu displays all General MIDI drum sounds. Use the Volume scroll box to increase or decrease the volume of the Secondary Beat.
MIDI recording is very strict. Any fluctuation in timing or speed may result in strange or even useless notation. To prevent this, you can apply quantization to your performance. Select Snap to from the Options menu prior to recording. Choose the smallest rhythmic value that you think you can accurately play while recording. The resulting MIDI events will be justified, each event beginning at the nearest selected rhythmic timing mark.
You can reset start times of selected events to the nearest value set in Options > Snap to will also reset start times of all selected MIDI events and will fix the increment at which selected MIDI events can be moved, when using the mouse or arrow keys to move events horizontally.
To Record a new track to a MIDI file,
Select Record from the Realtime menu OR press the Record button in the Play- back Console. The New View window will open if any MIDI data already exists in an active file.
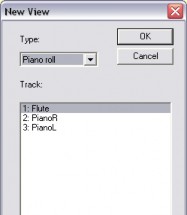
FIGURE 10 - 25: Selecting Track to Record
Select an existing track to record a new voice within the same track.
NOTE: The new MIDI data will be added to the existing track without overwriting any material.
Select New Track to record a brand new MIDI track.
NOTE: A Piano Roll will open for the selected track. A Piano Roll must be open to record in SmartScore. A new voice and MIDI channel will automatically be cre- ated when recording into any track.
Use the Playback Console to assign the MIDI parameters for the new track / voice.
Press the spacebar or select Play from the Realtime menu, or press the Play but- ton in the Playback Console to start recording at measure 1, unless a Punch In point has been set (see "Setting Punch In and Punch Out points" below).
While recording:
To run SmartScore’s MIDI recording from an external timer, select External Timer
from the Realtime menu.
To set Punch In and Punch Out points for recording, double click any measure number in an Overview or Piano Roll. The Measure Settings window will open.
Check Punch In to start recording at the beginning of this measure.
Check Punch Out to set this measure as the last measure for recording.
The Punch In and Out points are marked with red triangles in the Overview and Piano Roll displays.
Recording a “live” MIDI performance to a metronome may be very useful to an accom- plished keyboardist, but many of us do not have the timing skills required to record a per- formance meaningful enough for conversion to notation. Even if using “Snap to” quantization will result in note positions that are offset with a mix of strange note values and, usually, many rests. A logical alternative to live recording is Step Time Recording. Using this method, you will be able to quickly select exact note durations as well as “skips” (rests) from the number pad of your computer keyboard. With your other hand, enter notes and chords from your MIDI keyboard or MIDI instrument.
To activate Step Time Recording,
Make sure your MIDI keyboard or MIDI instrument is properly connected to your computer and that it or its interface is selected under Input in the MIDI Devices window (See "MIDI Devices", Section 10.3.3, on page 201 for more.)
From the Realtime menu, select Step Time Record.
Select a track. The default is set to “New Track”. If you wish to record onto an existing MIDI track, select that track in the New View window.
Press OK.
A floating window representing the computer keyboard number pad and associ- ated note durations appears. Record is now staged.
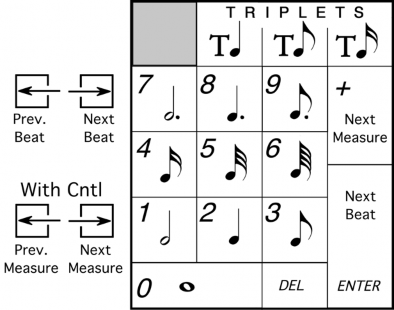
FIGURE 10 - 26: Step Time recording (Number Keypad)
Click on a note value or control button in the floating key pad window. Or, you may select the corresponding value / control function using the numerical keypad on your computer keyboard.
Press the Play button of the Mini Console. Recording will begin at Measure 1.
Press a note or chord on your MIDI instrument. Notes of the selected value will insert. The next note you enter will begin at the same point the last note ended.
e.g. In 4/4 time with quarter note selected, hitting a note four times will fill up one measure.
To insert a rest, choose a note value and hit Enter or right arrow.
In any MIDI view, you can record your own drum tracks onto existing tracks using noth- ing more than your computer keyboard. To activate Virtual Drums, go to the Realtime menu and select Virtual Drum Kit. See "Virtual Drum Kit", Section 9.6, on page 196 for more details.
If you return to the ENF view after editing in the MIDI environment, playback will retain changes made in MIDI views until the ENF display is updated with “MIDI Refresh”. If notation is subsequently edited in ENF or if MIDI Refresh is selected, you will be given a choice of A) Keeping current MIDI playback B) Refreshing ENF and clearing previous changes made in MIDI or C) Saving the current playback as a MIDI file.
SmartScore accepts any Standard MIDI file and converts it to an ENF file.Turn to "MIDI to ENF", Section 7.12 for details.
When saving a MIDI file, remember that you are not saving a music notation file. The more “humanized” the MIDI file sounds, the less likely it will appear correctly when imported into a music notation application, such as SmartScore. Saving SmartScore files derived from scanning will normally give reasonably good results because the music is already “quantized” into discreet start and stop times.
To save a SmartScore MIDI file,
Select FILE > Save As, click the “Save as Type” pull down menu and select either MIDI Type 0 (Single Track/Multiple Channels) or MIDI Type 1 (Multiple Tracks / Multiple Channels).
Push the Save button. A window appears saying the following:
Articulations such as slurs, staccatos and legatos will result in a MIDI file that will not import properly into a notation program. Choose whether you want your MIDI file for importing into a notation program or for playback only.
Choose Remove or Keep Articulations according to your need.
Using the CD Writer feature, you will be able to record one or more ENF (MIDI playback) performances as a audio file or burn to a playable in your car, home stereo, etc. In order to burn to CD, it will be necessary to have a CD-R (CD Writ- able) device installed and connected to your system.
NOTE: Some external CD/DVD-R devices may no respond to the Writing “burn” com- mand. In this case, you should record to .WAV file and use dedicated CD burning software to record CD audio.
NOTE: For best results and sound quality, it is recommended that you use the Aria player for playback whenever saving to an audio file or burning audio to CD.
To record ENF or MIDI files and burn them to audio CD,
![]()
Push the CD Burn icon at the bottom of the Navigator or choose .
Push “Add Files” and select one or more ENF or go to FILE > CD Writer. MIDI files to be recorded to CD.
FIGURE 10 - 27: Audio CD Writer window
Each selected file must undergo a conversion to an audio format. (.WAV is the default). After converting, the selected file(s) will appear in the “Files to Burn” list as an audio.
Files may be reordered using the “Move Up” or “Move Down” buttons. They may be removed from the list separately or all together with “Remove” or “Remove All” buttons.
Insert an unused writable CD (CD-R) into your CD/DVD tray. Burn Method =
Auto. Change to another method if you have trouble.
Push “Burn Last Track and Finalize CD” to record and finalize your ENF files to DVD. All selected files will record on a single CD track. To record individual tracks, use “Burn New Track” as described below.
NOTE: “Finalizing” a DVD is necessary before a can be played back. Once Finalize is applied, you will not be able to record anything more to the CD.
If you wish to continue burning new selections without finalizing the CD, push “Burn new track”. Each set of converted files in the “Files to Burn” list will record to one track. Select “Burn Last Track and Finalize CD” to record last track and finalize the CD.
![]()
![]()
Default ENF display characteristics can be changed. From the EDIT menu.
Select Document Preferences or Program Preferences depending on whether it is doc- ument or program-dependant.
Reset default font size and type for text symbols such as triplets, dynamics and expression marks. For text and lyric defaults including part names, push the “Text Styles” button. Push Apply to change. See "Adding and changing styles of Text and Lyrics", Section 8.2.2.
Reset display characteristics for systems including part names, measure numbers, lyric display, clef visibility and printing, cross-staff pointer lines and constraining system scrolling when the score is reformatted.
FIGURE 11 - 1: Document Preferences > Systems
Select how to display part names: Choose how to abbreviate part names and whether to show or don’t show part names.
Change options for showing measure numbers.
Change whether or not to display clefs in every system.
Select whether to show and/or print lyrics.
Change the line style for cross-staff voicing.
Editing Defaults (may be turned off):
Minimize symbol repositioning when reformatting music.
Display rhythmic errors (highlight measures in red).
Suggest Auto-tuplets after the same rhythmic grouping is inserted more than twice.
Show both chord name and guitar fretboard symbols.
Show only guitar fretboards.
Show only chord names.
Show neither chord nor fretboard symbols.
Long Minor will display “min” instead of “m” for the word “minor”.
Change GLOBAL playback characteristics:
Randomizer: Place check in checkbox to apply. Adjust sliders to increase/ decrease random changes to start time and note velocities.
Control tool palette behavior, turn display of active staff and margins off and on and show Task Window at startup. Reset default windows settings including post-recognition pop- up notifications.
Reset default ruler display units and reset zoom - screen size ratios.
Select whether or not to print note value symbols.
Reset default Autosave rules.
Every n minutes - even if no editing takes place.
Every n actions - based on number of editing actions, e.g. Inserting, Changing, Deleting, etc.
What is first - based on which is first; the number of minutes selected or the num- ber of actions performed.
Control whether or not to display certain warning and caution notices.
Select alternative PDF creation application. These 3rd-party applications may redirect your browser to the publisher’s website for upgrading or other offers when launched.
See "Page number" under "Document Preferences".
Select between a new ENF or a new MIDI. Choosing New ENF will open the New Smart- Score Document window. Select a Template or use Custom to create a unique score. Choosing New MIDI will open a blank MIDI Overview and Piano Roll for MIDI input.
![]() Opens File Selection dialog box and lists saved files. A selected file will be loaded into memory and will display on the screen.
Opens File Selection dialog box and lists saved files. A selected file will be loaded into memory and will display on the screen.
Closes active ENF document. If changes have been made, a Save As dialog box will open.
![]()
This will save an open SmartScore document to the same drive the file was opened from. The original name remains unchanged. If ENF and Image are dis- played, only the ENF file is saved.
You can save files in several file formats other than SmartScore’s native ENF format. These include MIDI (.MID), NIFF and MusicXML (.XML) file.
Go to Save As.
In the File type/Format window, choose a format to save the file.
Browse to another directory and change the name if necessary.
Press OK. The file will be saved in the last directory used to “save”. NOTE: Use Save (Ctrl +S /Cmnd+S) to update the current ENF file.
Use this function, also found in the lower Toolbar, to launch Finale and import the current ENF file (saved as an XML file).
This opens file browser and saves current active ENF file as an Adobe® Acrobat® PDF format file. (Windows requires PDF 995 from installer)
Acquire: Initiates scanning. Same as Scan in Navigator.
![]() • Select Scanner: Opens list of available TWAIN drivers to select.
• Select Scanner: Opens list of available TWAIN drivers to select.
Choose Interface:
> SmartScore’s = selects the SmartScore scanning interface. Refer to "Selecting your scanner driver in SmartScore (Windows only)", Section 3.1.2 for details.
> Your Scanner’s = selects scanning software from your scanner.
![]()
![]()
This initiates the recognition sequence for recognition of pre-scanned images. See "Scanning in Macintosh®", Section 3.2 for details.
This opens the document layout control panel. See "Custom document layouts", Section 6.3.5 for details.
![]() • Print (Ctrl+P / Cmnd+P)
• Print (Ctrl+P / Cmnd+P)
![]()
Use to check for proper page layouts. Also seen in Page Setup view.
The last four ENF files are listed and may be opened by clicking their names.
Saves and closes all open ENF files and closes SmartScore.
![]()
Reverses the last action you performed. SmartScore has ninety-nine layers of Undo.
![]() Reapplies the last action that has most recently been Undone.
Reapplies the last action that has most recently been Undone.
To view selected objects from the score and place them on the clip- board,
![]() a. Hit “O” key or choose the Select tool from the Toolbar.
a. Hit “O” key or choose the Select tool from the Toolbar.
Click and drag a box with the cursor until objects you wish to cut (and store to
![]()
the clipboard) are highlighted orange.
Press the Cut button in the Toolbar, hit Ctrl + X / Cmnd + X or select Cut from the menu.
![]()
To copy selected objects for pasting elsewhere in the score,
Activate the Select tool then click and drag a box to select a region of interest.
Press Ctrl +C / Cmnd+C or go to Copy.
a. To copy selected region of the page to the clipboard for pasting as a bitmap image into another program, activate the Select tool and drag a region with the
![]() right mouse button (Alt + click for Mac).
right mouse button (Alt + click for Mac).
To copy a full page:
Open 3rd-party application, position cursor and Ctrl + V/Cmnd+ V (Paste).
To paste the contents of the clipboard into an ENF file,
![]()
Select Paste (Ctrl +V / Cmnd+V) from the Edit menu and click anywhere in the score. The contents of the clipboard will be added to the score and will not replace any existing notes.
Paste Replace (Ctrl+R or Cmnd+R)
To paste the copied material into an ENF file and replace existing notation,
Select Paste Replace from the Edit menu (Ctrl+R or Cmnd+R) and click anywhere in the score. Use Paste Replace to quickly replace a complex passage that was poorly recog- nized with an identical passage that is correct.
A special paste mode becomes available after selecting and copying symbols or entire sys- tem segments. Clicking on the beginning barline of the section to be altered will open the following dialog box:.
FIGURE 11 - 2: Paste Option Dialog (Barline click)
Merge with existing bars: Copied symbols will be added to current measures.
Insert new bars: Copied measures will be inserted and follow-on measures will be rolled forward.
Replace existing barlines: This choice will replace existing measures (identical to Paste Replace).
![]() In this mode, clicking on objects that are moused over (and highlight yellow) are deleted.
In this mode, clicking on objects that are moused over (and highlight yellow) are deleted.
To select all symbols on the current page for global editing functions such as split voices (Section 4.5.2), flip stems (Section 7.7.5) and ungluing joined voices (Section 7.5.7a):
Choose Select All from the Edit menu (Ctrl+A or Cmnd+A).
Refer to "Adjusting measures", Section 6.1.2 for details.
Refer to ".To modify font styles of text fields and lyric blocks,", Section for more details.
Many printed scores “collapse” or “optimize” systems to show only actively playing parts. Similarly, instruments that appear in one part may split into two or more parts anywhere in the score causing systems to “expand” in size. SmartScore automatically senses expand- ing systems when, for example, a piano solo introduction precedes a vocal/piano arrange- ment. Expanding and collapsing parts are easily linked or re-linked in a simple-to-use
environment called Part Linking. Part Linking is also used when merging staves with brackets that were cut off. Turn to "Re-linking parts", Section 4.14 for details on this fea- ture.
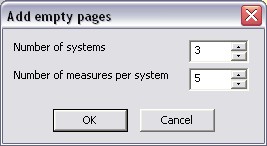
Use to add new pages. Also found in Status Bar (lower right corner).
![]()
FIGURE 11 - 3: Add Empty Page window
Use this feature to revert a selected set of notes within a measure to their default voice / color assignment. Useful if voice / color assignments become confused after repeated over-riding of voices.
To set the default tempo,
Select desired Beats per Minute from the horizontal slider.
Choose a base note Tempo Value (4/4 default = quarter note).
Check the Metronome Mark Visibility box to display the Metronome Mark in the ENF document in the first measure.
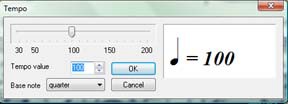
FIGURE 11 - 4: Default Tempo window
Refer to "Tempo Markings", Section 7.6.5 for entering change-of-tempo (metronome) markings.
![]() Opens the “assign drum pattern” window. See "Add drum tracks", Section 4.10.5
Opens the “assign drum pattern” window. See "Add drum tracks", Section 4.10.5
for details on creating automatic drum tracks.
![]() The Guitar Chord library contains preset guitar chords and associated chord sym- bols. Add, change, delete and store any custom chords. Guitar frets and chord
The Guitar Chord library contains preset guitar chords and associated chord sym- bols. Add, change, delete and store any custom chords. Guitar frets and chord
symbols automatically transpose with key transposition. Refer to "Guitar Fret and Chord Symbols", Section 8.3.1 for details.
Transpose your score by key or by clef. Limit to a part, a voice or select a range. Refer to "Transposition", Section 7.2 for details.
Zoom
Select tool (Ctrl+O / Cmnd+O)
Delete - See "Deleting notes and symbols (“X”)", Section 7.1.3.
Vertical Alignment (Y) - See "Working with Contrapuntal Voices", Section 7.9.
Beam Notes (B) - See Convert a sequence of flagged notes into one beamed group under Section 7.1.5.
Split Voices (H) - See "Voice Splitting (Select + “H”)", Section 4.5.2.
Delete Selected Ties/ Articulations (G) - See "Select tool (“O”)", Section 7.1.4.
Navigator
Opens and closes the SmartScore Navigator.
Main
Opens and closes Toolbar
SmartScore
Opens and closes Toolbar
Image
Opens and closes Image Editing Toolbar
Text and Controllers
Opens and closes the Toolbar containing control buttons for text and graphical controllers.
Mini Console
Opens and closes the Mini playback console in ENF view.
MIDI Toolbar
Opens the MIDI Toolbar in the active ENF view.
Print Preview Toolbar
Open and closes the Print Preview Toolbar when Print Preview is active.
Status Bar
Opens and closes Status Bar at the bottom of display. Displays current page, cursor posi- tion, image size, zoom, page view type and add page.
Refer to Section 7.6, "Tool Palettes" for details.
When selected, the ENF display to highlight the active staff in black while other staves
become grey. The active staff line is the staff that the cursor was last positioned over.
TIP:If you find that a certain staff line is stuck “on” regardless of the position of your ![]() cursor, it is probably is a result of having “Caps Lock” on. Turning on “Caps
cursor, it is probably is a result of having “Caps Lock” on. Turning on “Caps
Lock” will lock in the active staff line to allow you to move about freely.
TIP:If an object does not delete even if it shows itself to be in an active staff, use the ![]() Select tool (“O” key) to highlight it and then hit Delete. All selected objects will
Select tool (“O” key) to highlight it and then hit Delete. All selected objects will
be removed with the Delete key, whether they are in the active staff or not.
This selection will highlight measures with suspected rhythmic errors in a pink color. If the total of beats in one or more voices in a measure do not equal the default time signa- ture the measure will highlight pink. It does not necessarily mean the measure is “illegal” or that it will play back incorrectly. There are many accepted conventions that cause this.
Select one of several choice to display Part Names along the left-hand side of systems. “Do Not Show” is also an option.
This option will display or not display measure numbers in the ENF display.
Choose to display chord symbols as guitar fret symbols, text or not at all.
Refer to Section 7.10, "Hidden Symbols" for details.
Checking this option off will remove the display and printing of lyrics.
Synchronization between the ENF and TIFF panes assumes exact ENF correspondence to the original score structure. Synchronization may become lost after systems are inserted, removed or if page margins are changed. Once a system rolls from one page to another, ENF-TIFF synchronization will become lost for all subsequent pages.
To synchronize ENF and TIFF views,
Go to Associate Image Files...
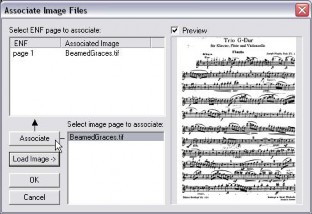
FIGURE 11 - 5: Associate Image File Window
Push Load Image to browse and locate the TIF file associated with the open doc- ument. Double click to select the image. If the file contains several pages of images, they will appear as xxxP1, xxxP2, xxxP3, etc.
Click to highlight a page in the image-page list. A preview of the page will appear in the view window if Preview is checked. Then click on the appropriate ENF page in the list of ENF pages.
Push the Associate button to associate the image page with the appropriate ENF page. Continue as necessary.
Provides information on the structure and type of the currently displayed image file.
Next Page
Displays next page of ENF document
Previous Page
Displays previous page of ENF document
Go to Page (Ctrl +G / Cmnd+G)
Presents a dialog box to select a page number to jump to. Refer to "Paging", Section 5.1.5 for details.
Lists available view percentages. Changing zoom will affect both the image and the ENF file simultaneously. Range is from 8% to 400% view scale.
Used to control playback functions from menu.
Sets MIDI device to play “live” without MIDI Record on.
Opens Playback Console (Ctrl+9 / Cmnd+9).
Opens and closes Mini Console Toolbar.
Opens MIDI device dialog box. Select MIDI input and output sources. Refer to "Quick Playback Tricks", Section 4.2 for details.
Turns swing playback on or off. Refer to "Swing", Section 4.10.6.
Refer to "Barline Properties (Pickup measures and Codas)", Section 4.9.11.
Refer to "ENF Graphical controllers", Section 4.11.
a. Opens the SmartScore task window:
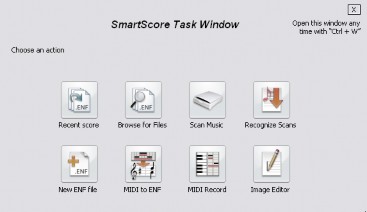
FIGURE 11 - 6: Task Window
Provides options for the floating zoom window including whether to display ENF or TIFF close-ups in the zoom window and selecting additional zoom views. Refer to "Split-screen and scan view reference views", Section 7.11.1 for details on the floating zoom window.
Duplicates and opens currently open ENF file.
Choose to the screen view that makes sense to you: ENF/TIFF, ENF only or just the .TIF.
Activates the ENF / Scan view split control tool.
Display, overlap and offset all open ENF files.
Display all open windows of all open ENF files with no overlap.
This option acitvates the “window pane” puller. Use to control the split screen.
Opens MIDI view window and displays the selected MIDI environment, Overview, Piano Roll or Event List. See "MIDI Views", Section 10.1 for more details.
Opens the Karaoke view window. See "Karaoke View", Section 4.10.1 for more details.
Resets tool palettes and toolbars to their default (program launch) positions and maxi- mizes the ENF display.
Opens New MIDI View dialog box. Select type of MIDI view.
Overview - Displays all staves as MIDI tracks.
Piano Roll - Displays selected stave as MIDI track. Event List - Displays MIDI events of selected staff line.
In DVD versions, this selection will open the file, SSManual.pdf. This file is the full Using SmartScore 5 manual in Adobe Acrobat format. It is located in the SmartScore directory and is opened by Adobe Acrobat.
In download versions, this selection will attempt to open an Internet connection and begin downloading of the file, SSManual.pdf from the Musitek website. If the file is moved to the SmartScore directory, the local file will open when the SmartScore Manual (PDF) is selection is made again.
This selection will attempt to launch your Internet browser and connect to a special inter- active help system online at musitek.com. The Online Help system is fully interactive and contains index links, table of contents links and text hyperlinks to related subjects.
Displays version / update number. Pushing the graphic icon reveals author / programming information.
Select between a new ENF or a new MIDI. Choosing New ENF will open the New Smart- Score Document window. Select a Template or use Custom to create a unique score. Choosing New MIDI will open a blank MIDI Overview and Piano Roll for MIDI input.
Opens File Selection dialog box and lists saved files. A selected file will be loaded into memory and will display on the screen.
Closes all MIDI views. If any changes were made to the MIDI file, option to Save MIDI file. Return to main SmartScore window.
Writes currently displayed file to the hard disk.
Opens Windows File Selection dialog box
Save processed or modified MIDI files to hard disk following MIDI Recording or Editing procedures.
Use to save selected files to directory other than the working directory
Opens SmartScore Task Window.
Automatically loads one of the last four files accessed by SmartScore.
Exit SmartScore. Save current file. Go to Windows main desktop.
Reverses the last action you performed. SmartScore has ninety-nine layers of Undo.
Reapplies the last action that has been Undone.
Opens the Select window for defined note selection.
Selects all MIDI events in every track.
Removes the highlighted notes from the score and places them in the clipboard.
Places selected notes on the clipboard without removing them from the score.
Insert the contents of the clipboard back into the score without deleting the existing notes.
Opens the Paste Special window. The Paste Special window offers several options for pasting the contents of the clipboard back into the music.
Deletes the selected section from the MIDI file.
Deletes the currently displayed MIDI track.
Opens the Change Instrument window. Insert a change to a new MIDI patch.
Opens the Velocity and Duration window. Adjust the Velocity and/ or Duration of the selected MIDI events.
Converts MIDI data in the currently open file to ENF notation.
Opens and closes the SmartScore Navigator.
Opens and closes Toolbar.
Opens and closes Toolbar.
Opens and closes Image Editing Toolbar.
Opens the Toolbar.
Opens Mini Console transport control.
Opens the MIDI Toolbar.
Synchronizes measure sizes in all MIDI views to that of current MIDI view. All horizontal resizing is synchronized between all MIDI views.
When selected, all MIDI events (including articulations such as trills and tremolos) are visible in the Piano Roll view. When selected, MIDI events cannot be edited (behavior of articulations is controlled with Properties tool in the ENF view. Turn off to edit MIDI events.
Quantities selected MIDI “Note On” events to the nearest “tick” specified. Also deter- mines default quantization value for MIDI recording and for horizontal nudging of selected MIDI events by mouse dragging or by use of the arrow keys. Quantization values range from 32nd triplet to whole note.
Opens Sequence Settings window. Shows the MIDI header information including: tempo, time base, time signature, key, and MIDI instrument.
Opens Track Properties dialog box. Select a different track view, delete, duplicate, rename, or transpose the selected track.
Opens MIDI device dialog box. Select MIDI input and output sources.
Opens Instrument Settings dialog box. Allows for selection of Port, Bank, and MIDI chan- nel assignment for Instrument and Drum sources.
Opens Metronome Settings dialog box. Allows for selection of Port, MIDI Channel, num- ber of lead in measures, MIDI sound and volume for Primary and Secondary beats.
Activate/ deactivate SmartScore’s shuttle tool.
Opens Set MIDI Play Range dialog window.
Begins/ pauses/ resumes playback of current MIDI file. In Record Mode will start and pause MIDI recording.
Stops playback or recording of current MIDI file.
Rewinds to beginning of Set Playback Range.
Check to activate MIDI Record mode
Set recording to begin from an external signal.
Active only in Record Mode, check to synchronize start of MIDI recording with first note played on MIDI keyboard.
Allows MIDI input to sound without having to be in Record mode.
Activates/ deactivates Metronome in recording
Opens the Playback Console.
Allows MIDI input to sound while recording.
Opens MIDI Device window.
Select between a new ENF or a new MIDI. Choosing New ENF will open the New Smart- Score Document window. Select a Template or use Custom to create a unique score. Choosing New MIDI will open a blank MIDI Overview and Piano Roll for MIDI input.
Opens File Selection dialog box and lists saved files. A selected file will be loaded into memory and will display on the screen.
Writes currently displayed file to the hard disk.
Opens Windows File Selection dialog box
Save processed or modified Image files to hard disk following Scanning and Editing. Use to save selected files to directory other than the working directory.
Saves currently open TIFF image as a PDF file (Windows requires PDF 995 from installer).
Selects scanner or initiates scanner to acquire image.
Initiates Recognition to begin processing saved image file(s).
Initiates Windows Print Monitor. Current Image file is output to default printer from selected printer port.
Automatically loads one of the last four files accessed by SmartScore (Win). Select any recent files by type (Mac)
Exit SmartScore. Save current file. Go to Windows main desktop.
Reverses the last action you performed. SmartScore has ninety-nine layers of Undo.
Reapplies the last action that has been Undone.
Removes the selected section from the image file and places it on the clipboard
Places selected section on the clipboard without removing it from the image file.
Insert the contents of the clipboard back into the image file
Deletes the selected section from the image file.
Selects the entire image for moving / centering.
Trims the image file down to the selected region
Switches the colors of the image file.
Left: Rotates the image file counter-clockwise
Right: Rotates the image file clockwise
Any: Opens the Rotate window for rotation by defines degrees.
Deletes currently displayed page. Does not delete the entire file.
Activates the Area Selection tool.
Activates the Line drawing tool.
Activates the Brush tool.
Activates the Deskew tool for straightening “crooked” scans
Opaque
When a selected area is moved to the clipboard the background will be included
Transparent
When a selected area is moved to the clipboard only the black portion of the selected area with be moved.
Select the color used by the Brush and Line drawing tools.
Opens and closes the SmartScore Navigator.
Opens and closes Toolbar
Opens and closes Toolbar
Opens and closes Image Editing Toolbar
Opens and closes Status Bar at the bottom of main SmartScore Window. Displays current page, cursor position, image size, and zoom percentage.
Opens and closes tool palettes for ENF document editing.
Provides information on the structure and type of the currently displayed image file.
Displays next page of ENF document
Displays previous page of ENF document
Presents a dialog box to select a page number to jump to. Use scroller to select desired page and click OK.
Lists available view percentages. Changing zoom will affect both the image and the ENF file simultaneously.
Resets windows, toolbars and palettes to their default position.
![]()
![]()
Voice - Derived from choral music but applied to instrumental music as well, contrapun- tal voicing (sometimes referred to as polyphonic voicing) refers to a unique melodic thread distinct from other voices in a measure by its harmonic direction and possibly its timbre. Contrapuntal voices reside in the same measure of the same staff. Voices are often distinguished by stem direction and sometimes by offsetting the horizontal position of notes. For the purposes of SmartScore, a “voice” written in its own staff line is referred to as a “Part”.
System - A grouping of multiple staves linked together by a solid line or bracket along the left margin is called a “system”. All staves belonging to a system are played simultane- ously. In ensemble scores, each system appends to the one before it. A single page of a symphony conductor's score, containing 10 or 20 staff lines per system, may represent only a few seconds of music!
Voiceline - An individual melodic line formed by a voice within one measure. When a staff contains more than one voiceline in any given measure, note stems of each voiceline usually point in the opposite directions. The sum of all note and rest values of each voice- line in any given measure should be accounted for, but sometimes are not. Refer to "Work- ing with Contrapuntal Voices", Section 7.9 for more on dealing with this rule in SmartScore.
Clef - The clef sign at the beginning of each stave identifies which pitch “class” that stave belongs to. The lowest instruments are written in the bass clef, intermediate instruments and voices often use one of three “C” clef classes while higher-pitched instruments, in addition to the right-hand part of a piano score, are scored in the treble clef. The clef sign always appears at the beginning of every staff line and in the first measure if a change of clef occurs. Change of clef signs are smaller than normal clefs.
Key Signature - The key signature, along with the clef sign, appears at the beginning of every line; it is also found in the measure where a change of key occurs. The key signature defines the “tonal center” of the piece. The number of sharps or flats in the key signature determines the key tone (or tonic).
Time Signature - Time signatures usually appear only once: at the beginning of the stave in the first measure of the piece. They will also appear when a change of time signature occurs. Time signatures indicate both the number of beats per measure (numerator) as well as which note value is given the fundamental beat (denominator). The sum of note dura- tion values in a given measure must equal the value of the current time signature.
Tuplet - Some notes belong to a special readmit class called “tuplets”. These include trip- lets, quintuplets and sextuplets. A tuplet is a group of notes marked with a bracket that is subdivided into equal beats (divisions) with a total duration equal to the number of unmodified notes (value). For example, a (3:2) triplet applied to three eighth notes is equal in total duration to two eighth notes.
NOTE:Ties and slurs (legatos) often look alike, but they are different. Ties connect two notes of the same pitch and combine their durations into one note event and slurs connect two or more notes over a range of pitches forming a legato that when performed, creates a slight overlapping of the notes.
Standard MIDI File (SMF) - The file protocol or format for music files saved as MIDI (.MID extension). Includes Type 1 (multiple track / multiple channel) and Type 0 (single track / multiple channel) formats.